Using Visual Crafts in the Classroom
During the holidays it’s tough to find the motivation to come up with and prep crafts. Look no further! This bundle on TPT for December Visual Crafts is AMAZING! Find it here. This set has everything from a material list to visual step-by-step directions to a review page. This not only saves so much time, but is such a fun activity for students to complete. You will be working on reading, following directions, sequencing, and reflecting! Parents also absolutely adore these crafts and usually can’t wait to display them during the holidays.

Tin Foil Ornament Materials
The first step when using the items in the December visual crafts bundle is the materials list. This is awesome, as you can have your students find the items and check them off. I grabbed a bingo dauber for ease! If you have students that are not allowed to get into cabinets or you do not want them to know where materials are stored, I would suggest having items out on a desk where students can practice identifying them and checking off if they are available or still needed. This is perfect for working on language, identifying and fine motor.

Step-by-Step Directions
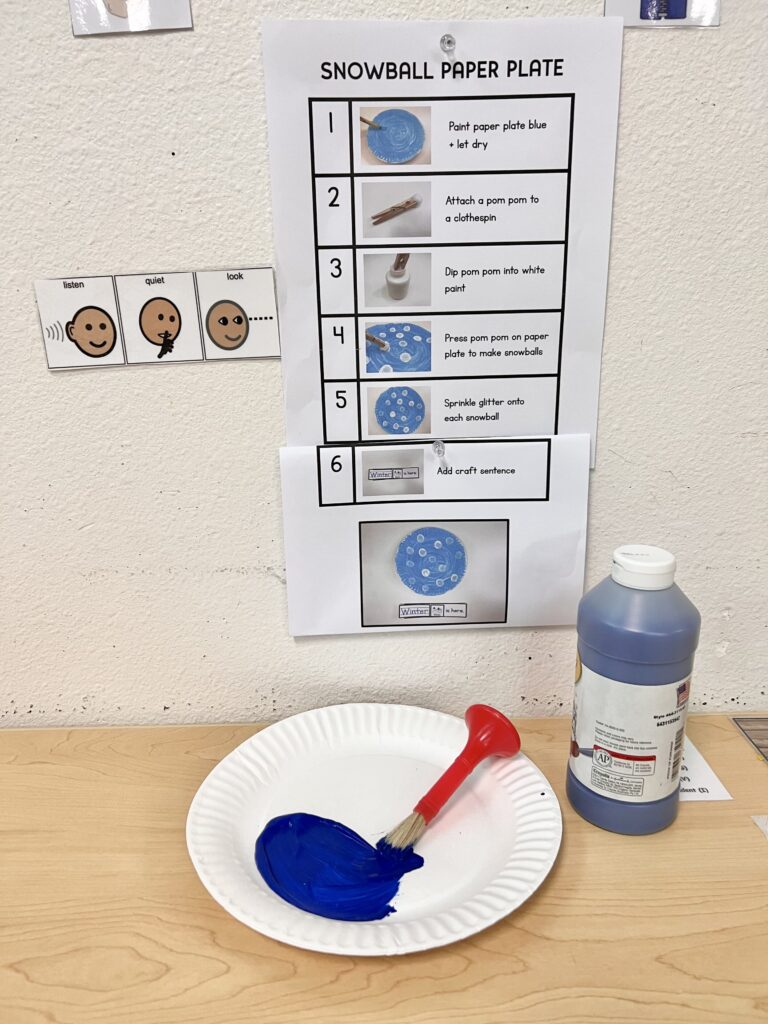
For the next activity, I go over the directions before we actually do the craft. After reviewing the craft, I have the student cut out the steps. As some students may need help with this step, you can cut around the outside so that your students only have to do short lines, or you could highlight the lines you want your students to cut. Some may need hand over hand assistance as well. Once the steps are cut, we go over the sequence and the students find the correct step and glue it in. When this activity is complete, you can leave it out or post it up on a wall for your students to reference when completing the activity!

Prepping The Craft
The next item would be to prep the craft, which you might need to do ahead of time. If you have advanced students, they could possibly trace a circular item for this step. You will then need to cut out the ornament. For this step, I had my students use adapted scissors, which spring open, making it easier for them to cut! Once the ornament is all cut out, the fun part of having the students handle foil begins. The students loved the way the foil sounded and felt, though as I discovered, they might need help covering the cardboard. I used tape on the other side to hold it down.

Decorating the Ornament
Another fun part of this project is having the students color the foil! This was a new sensation for them and fun to talk about shapes, colors, and all things surrounding the holidays! I also like how we can work on functional grasp and opening and closing the markers. In my class, markers are a special treat as we don’t often use them!

Visual Craft Sentence
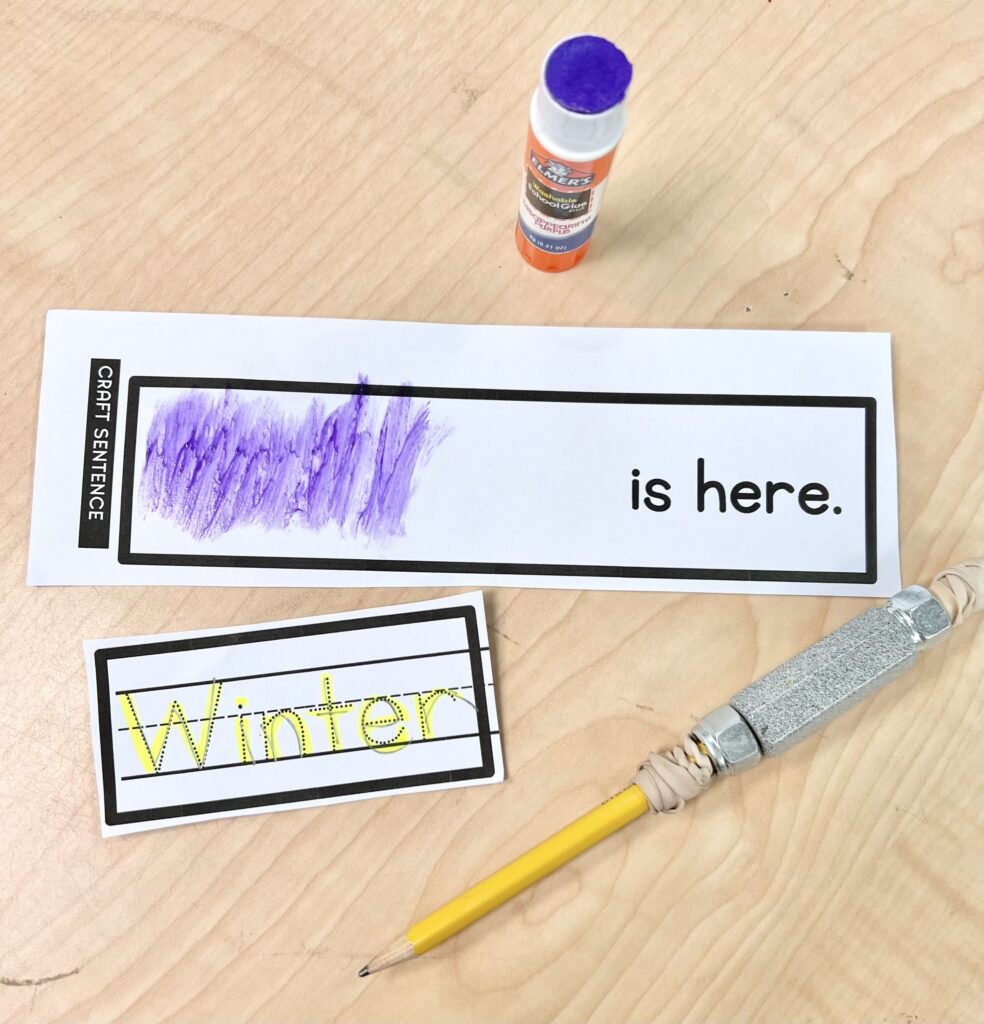
I love this step in the December visual crafts activity! Again, we practice cutting, tracing, and gluing. All of these skills are essential for our special education students to practice. I go over the sentence with my students and have them practice reading it. Depending on your level of students you, can use just the word or just the picture icon. In this step you can focus on spelling and letter formation.

Review of December Visual Craft
The last step in using the craft bundle is the review page. This survey page helps the students reflect on what they made. It will help to let you know if they enjoyed it as well, as the no right or wrong nature of questions gives them some autonomy when answering. You may need to write the word with a highlighter so that your students can trace or write the name of the craft on the board, which they can copy from a model.
Tips and Tricks To Use

When completing the activity, it might be helpful to have the directions posted at eye-level so your students can easily reference when sequencing the craft.

When completing the craft sentence, using purple disappearing glue is perfect for students to know where to place the word. Make sure to differentiate the work to each level of your student, as most students will need something different. In the picture above, even though there is a dot to dot word for tracing, it might not be enough for your students to see. Highlighting them in a bright color will help your students see the entire word. Another item that some students might need is a weighted pencil.

One last tip would be to have your students paste a word on the review page instead of write it. There may be some students that do not have the ability to write. Highlighting the area and using a purple glue stick will help visually on where the picture icon needs to go. Again, the bingo dauber is always a big hit for the students to use!
Let me know how you like using these crafts in your classroom!


