I am so excited to share everything I’ve learned about setting up a multiple disabilities classroom with you! I’ve spent a lot of time mapping out my classroom layout this year. I hope this blog post about setting up a multiple disabilities classroom will be helpful for you!
My Caseload
I currently have seven students that are wheelchair users and 3 that are not. I have 2 students that are fully virtual that I service through seesaw and google meets sessions on Wednesdays. Most of my students are also considered medically fragile, so that is an additional angle that I needed to plan for.
My Schedule
We have new considerations due to the COVID-19 pandemic that we need to incorporate this school year. My students are currently coming to school on an AA/BB schedule. I have some students Monday and Tuesday (AA) and some Thursday and Friday (BB), with Wednesday a virtual day for all to allow for deep cleaning. Some of my students may come to both the AA/BB session depending on the IEP team decision.
A Multiple Disabilities Classroom Layout
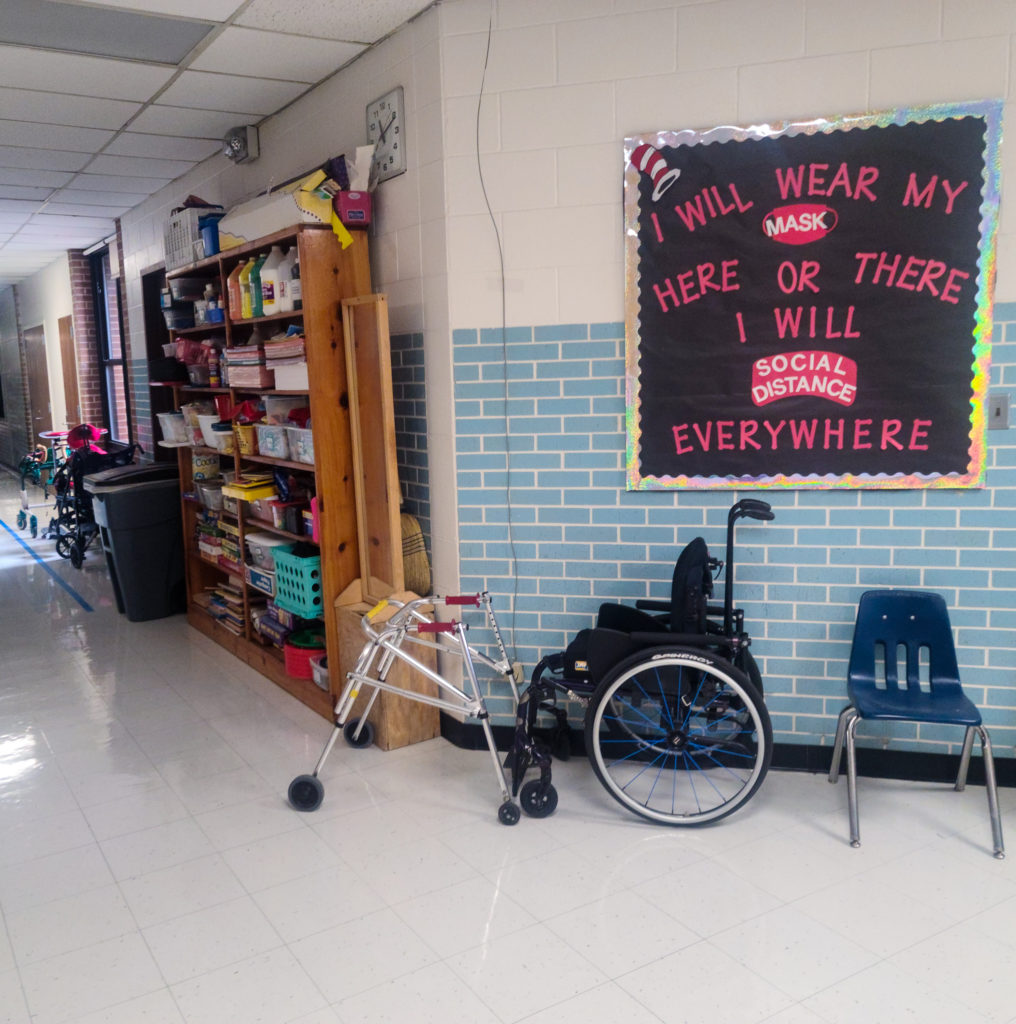
Going in I knew that every activity area had to be separate. I also knew I had to be able to keep everything sanitized and clean. My district provided me with PPE, including alcohol wipes, and I purchased a sanitizing spray safe to be around children and pets. Everything is wiped with an alcohol wipe between uses and sprayed throughout the day. Our cleaning staff also comes when we are at recess to sanitize our room.
One of the biggest decisions I had to make was that we are not leaving our classroom this year. We leave for recess and the specials teachers come to us. I have my own door and wheelchair ramp that most of my students utilize. I can keep our environment clean, but I can’t control the rest of the students in our school. We use google meets to keep up with our general education peers while staying safe in our classroom. In my state, unfortunately, COVID-19 procedures are a hot topic. For the safety of my students we quarantine in our room. I open the windows to increase air circulation and we go about our day.
You’ll also notice that I don’t have a teacher desk! I got rid of it. I keep my paperwork in a cabinet and work from behind the u-table. My classroom is small and I need all of the space I can get.
Now, lets talk about the actual process of setting up a multiple disabilities classroom!
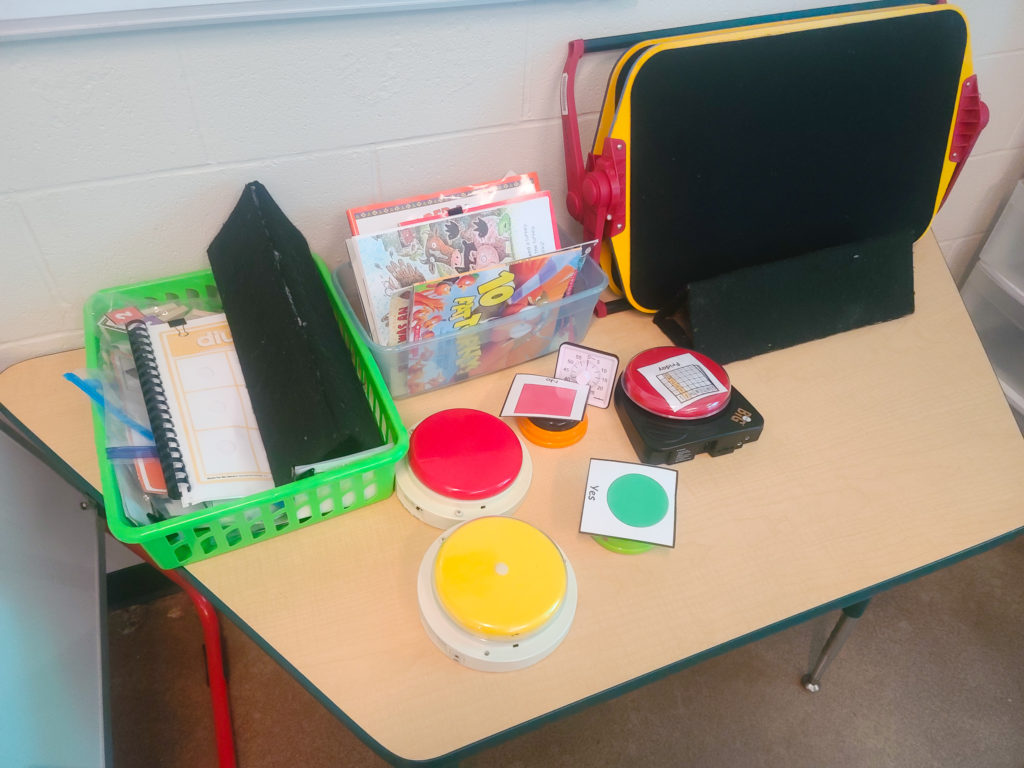
Switch Activities Station
What is a switch activity? These are cause and effect activities (for my students at this stage) that help my students understand that when they push the button something happens. Why is this important? Most of my students are diagnosed with significant mobility impairments. They access most technology for learning, communication, and leisure through the use of a button like those in the videos below.
In the past, I had paired the light box and switch activities together. Now, they need to be totally separate spaces. I ended up moving the switch activities area to another part of the classroom and I absolutely love it. I don’t know why I didn’t think about that before! It seemed easier, for some reason, to share the outlet. With some ingenuity I was able to incorporate the switch activities station into its own space in my general layout.
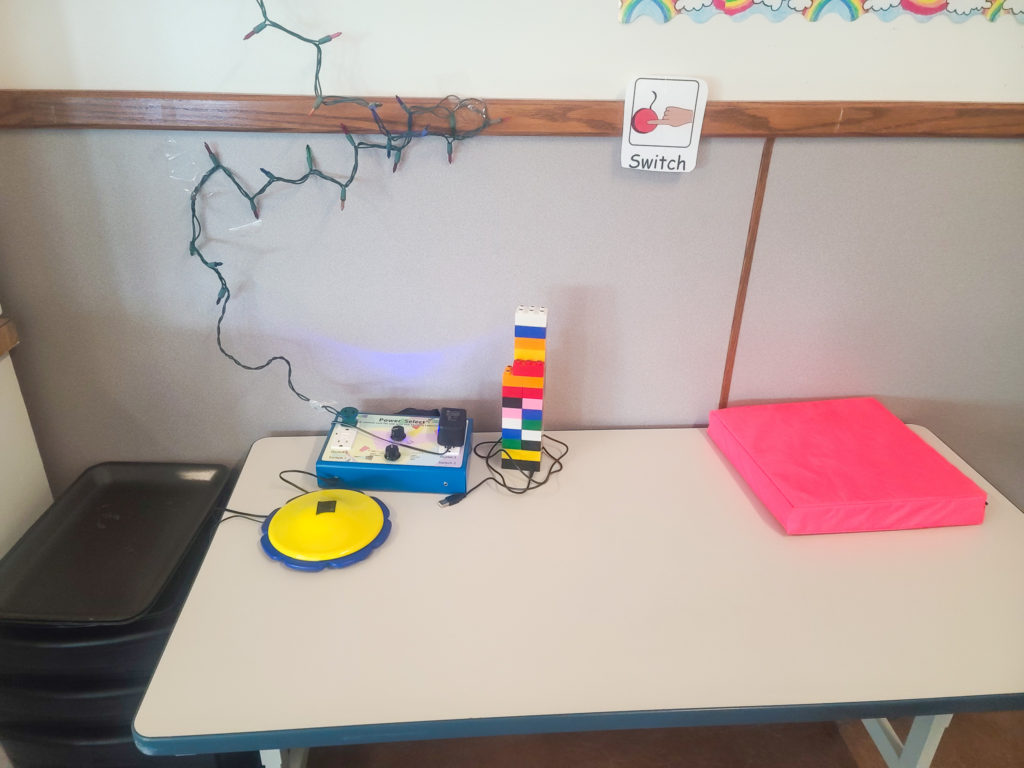
I like to use the yellow scallop edge switch at this station because it is easy to press. There is a power link to connect various activities to (The power link box, switch, and vibrating pad are part of a kit a received from the American Printing House). I have bright lights on the wall, Light Stax cubes (Taylor talks about these in her post about inclusive toys), a fan, and a vibrating cushion that are all favorites in our class. The black container next to the table holds switch adapted toys; including a bubble machine and an adapted Beat Bo toy (affiliate link to the non adapted version here).
Lightbox Table
Our large lightbox gets its own area this year! I keep the activities in a labeled plastic drawer system behind my desk.
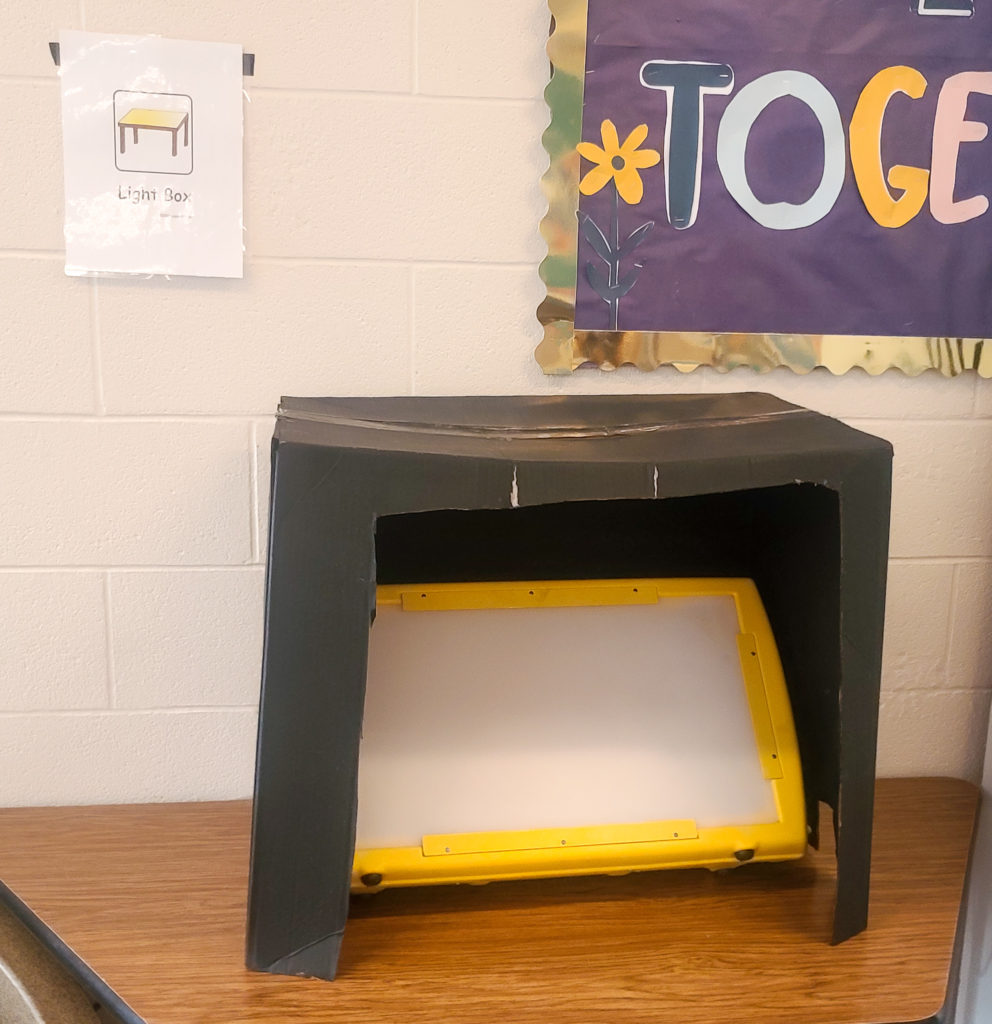
By far my students favorite activity is when I attach the ‘bead bar’.
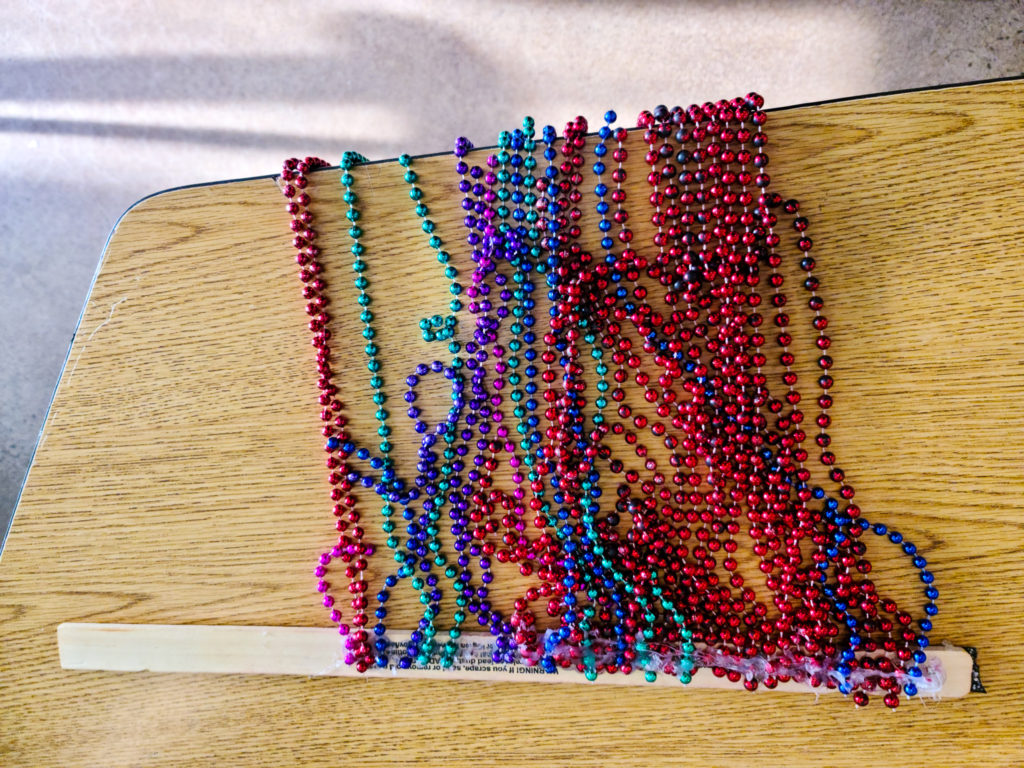
The bead bar is made of party beads from dollar tree hot glued to a paint stick and attached to the lightbox with velcro. I went to this amazing training with Diane Sheline to learn new techniques for working with students with a diagnosis of Cortical Visual impairment and Visual Impairments.
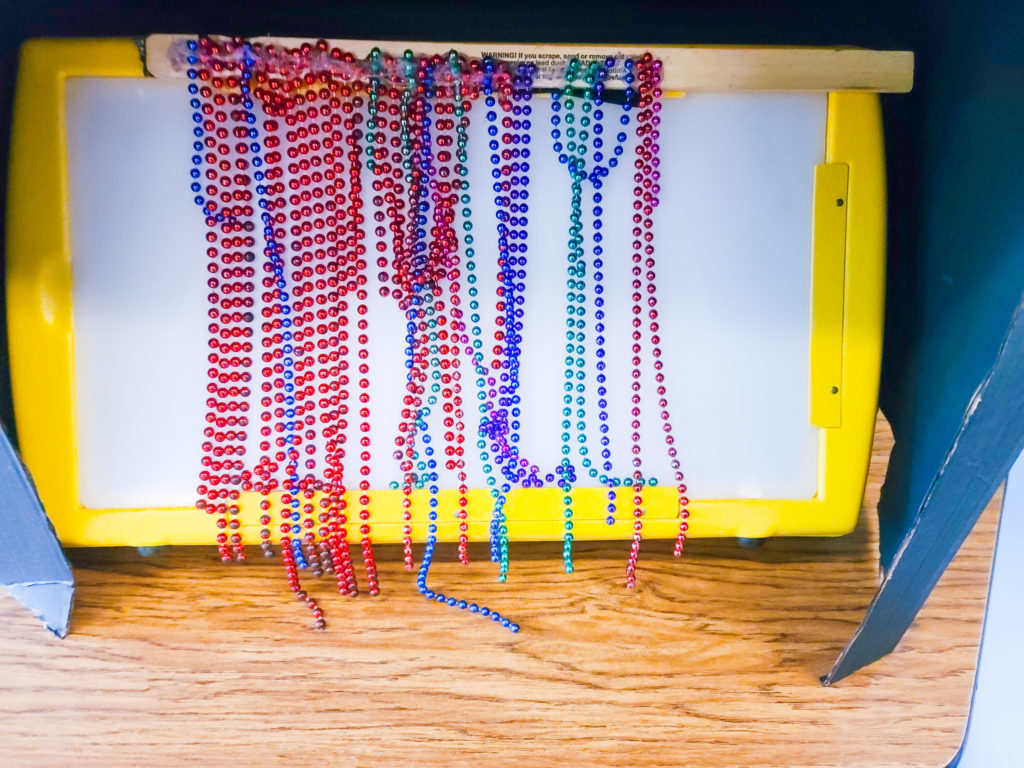
I learned how to make a lot of activities that are stimulating for my students like the ‘bead bar’ (tutorial here!).
Computer Table
I also have a separate computer area. Here we use a program called “teach me to talk”, use our eagle eyes eye-gaze device, and play switch activated computer games.
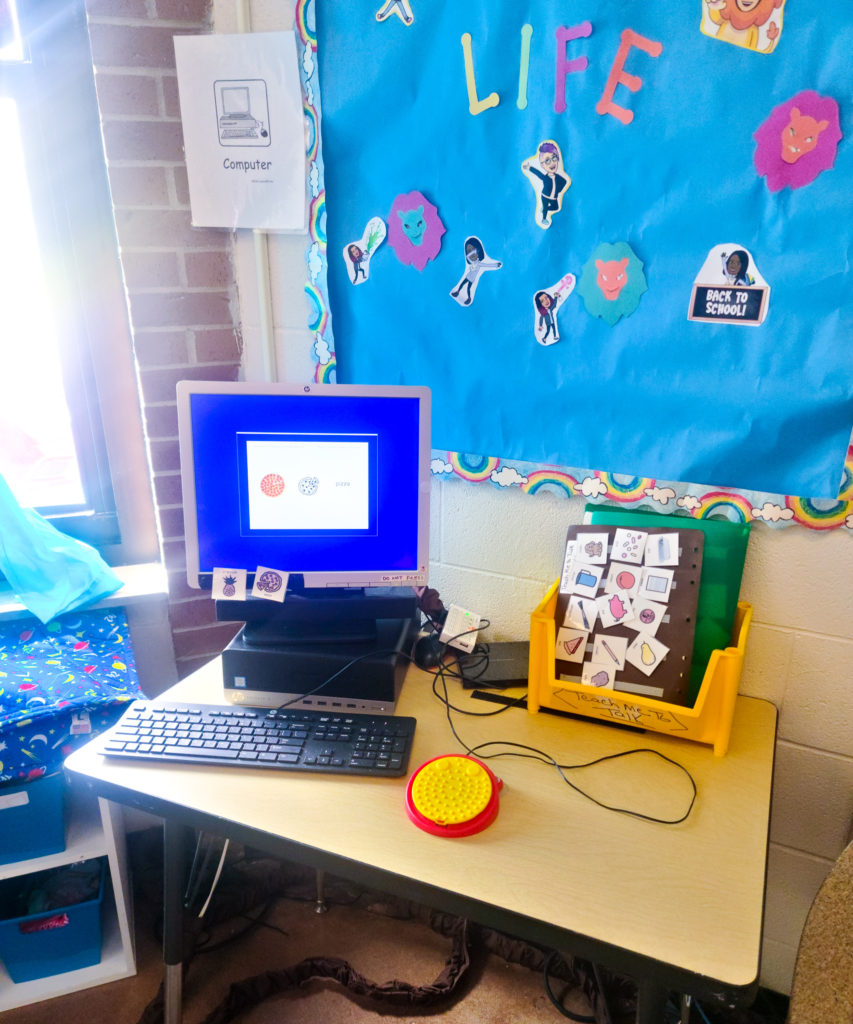
I really love using the Ian Bean website with my students. Our favorite area is the music area. I love how the musical activities encourage students to reach out and touch the switch by stopping the music and video. The best part is that the website is free! All you have to do is register.
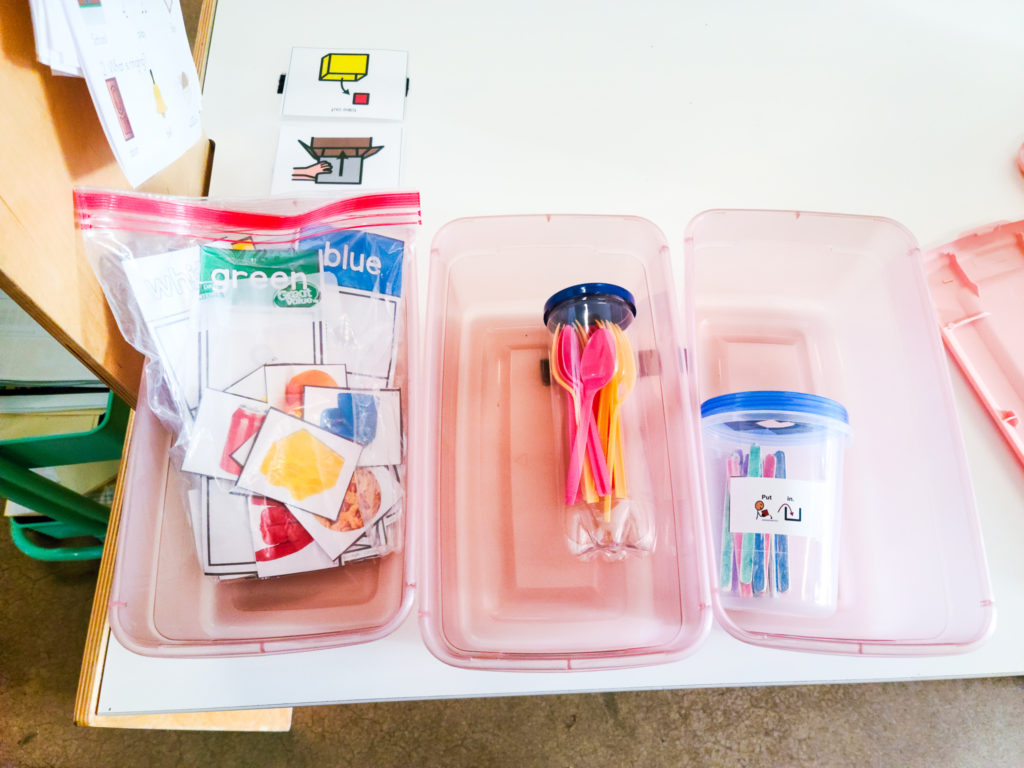
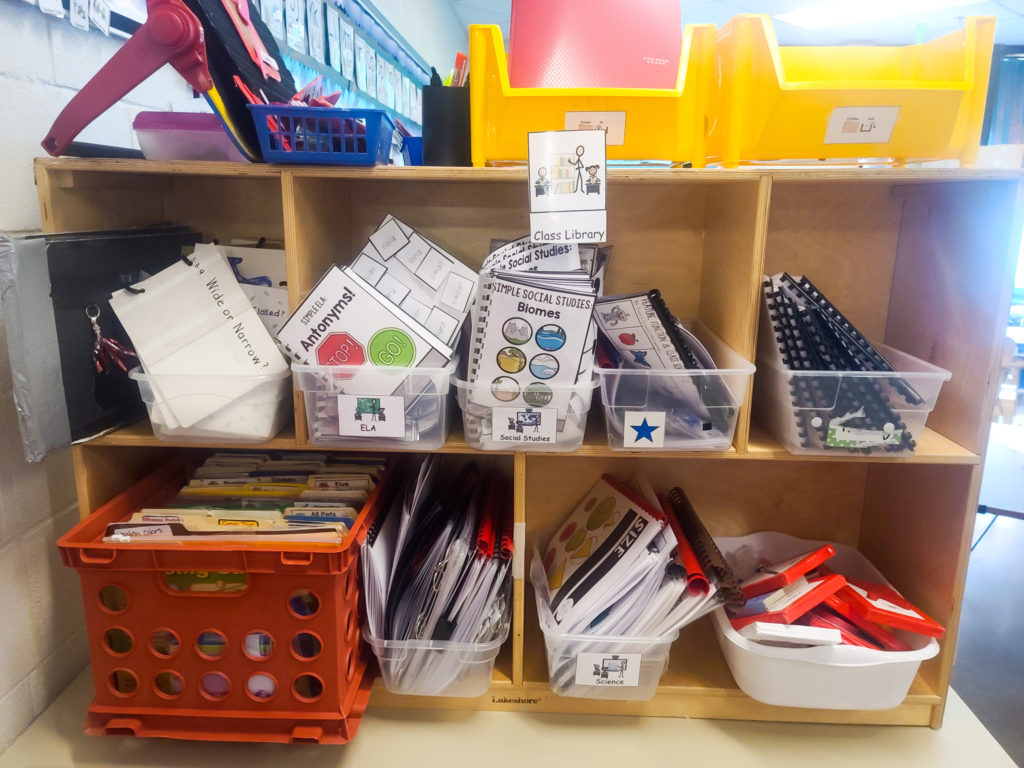
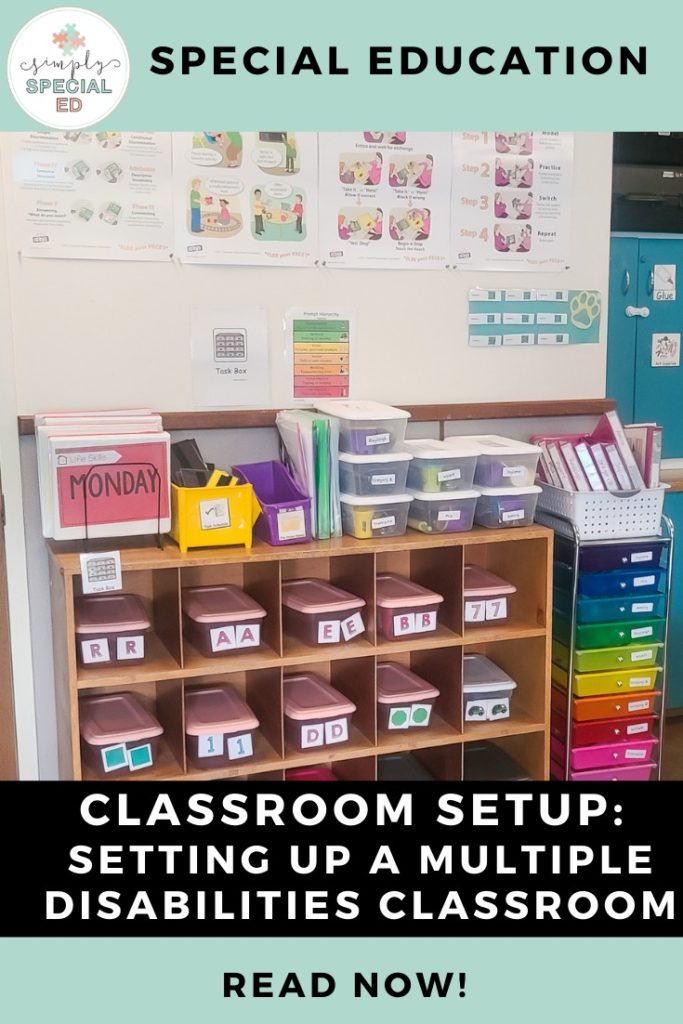
Task Box Shelf
I have far more task boxes than this, but I only have a few out at a time that relate to our theme and goals.
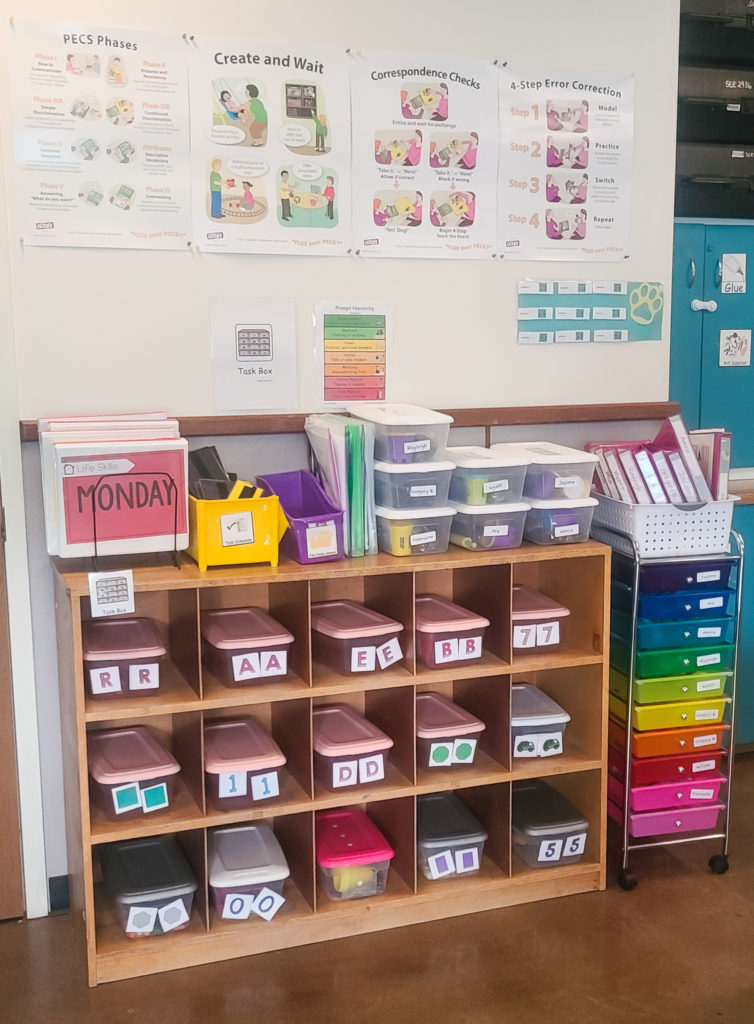
My students are learning to match the images on the boxes with pictures on their schedule. They each have their own sensory materials bin that I keep on top of this shelf. I switch up what is in the box, but a student never shares sensory materials with another student (because of COVID-19 regulations).
During a regular school year I would have my students go to the task shelf and bring their task back. This looks like helping a student use their wheel chair to go to the shelf and putting the box in their lap. This year I bring the boxes to their table to reduce contamination and then immediately sanitize the box and contents when they are finished.
Each student has a mini schedule with their tasks on it. We ask them to choose which activity they would like to do first. They do this primarily by using eye-gaze.

If I have an activity like the color sorting activity above, I can easily modify it for my students. Since most of my students need accommodations for cortical visual impairment I will present the choices on a black velcro board.
I also keep whatever file folder activities students may need to use for work tasks on top, as well as a set of daily themed life skills binders. The extra boxes are stored in photo boxes on top of my long blue cabinet. The blue bin is full of various kinds of “put in” tasks.
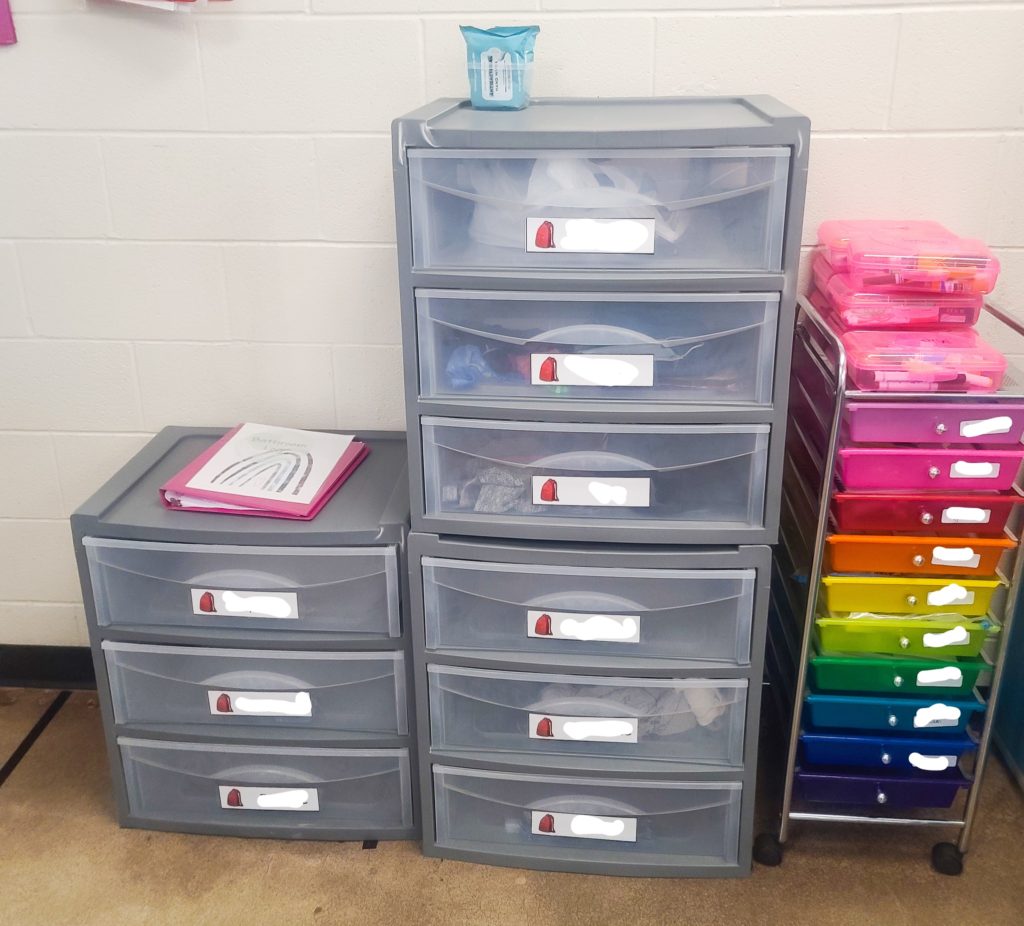
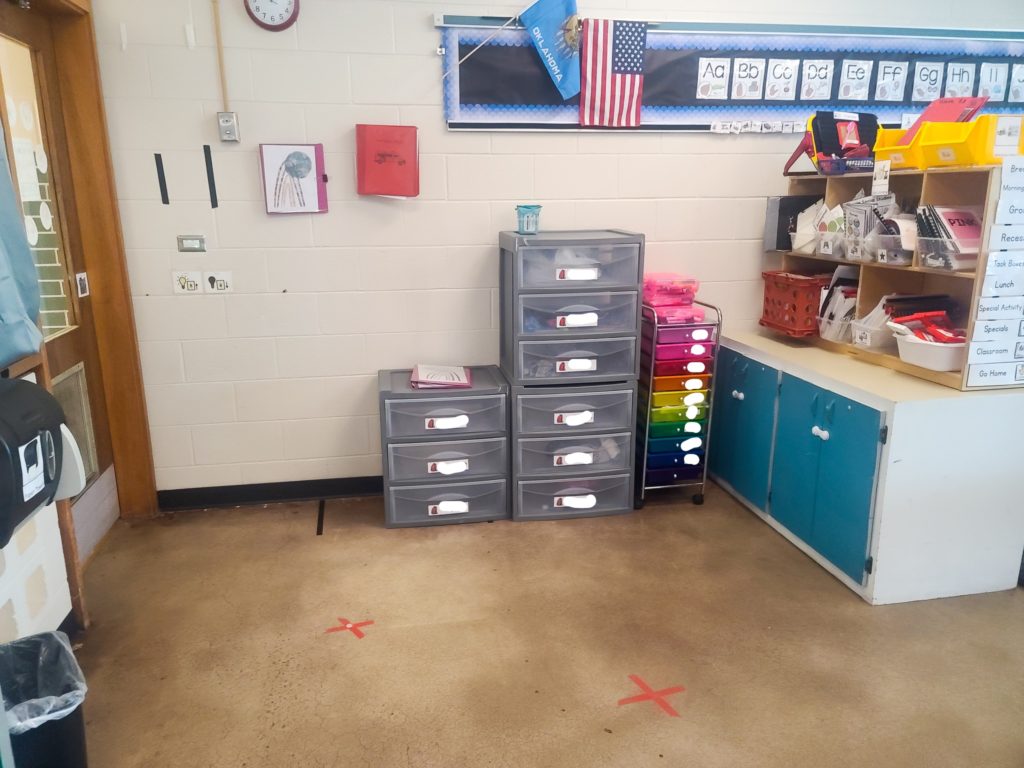
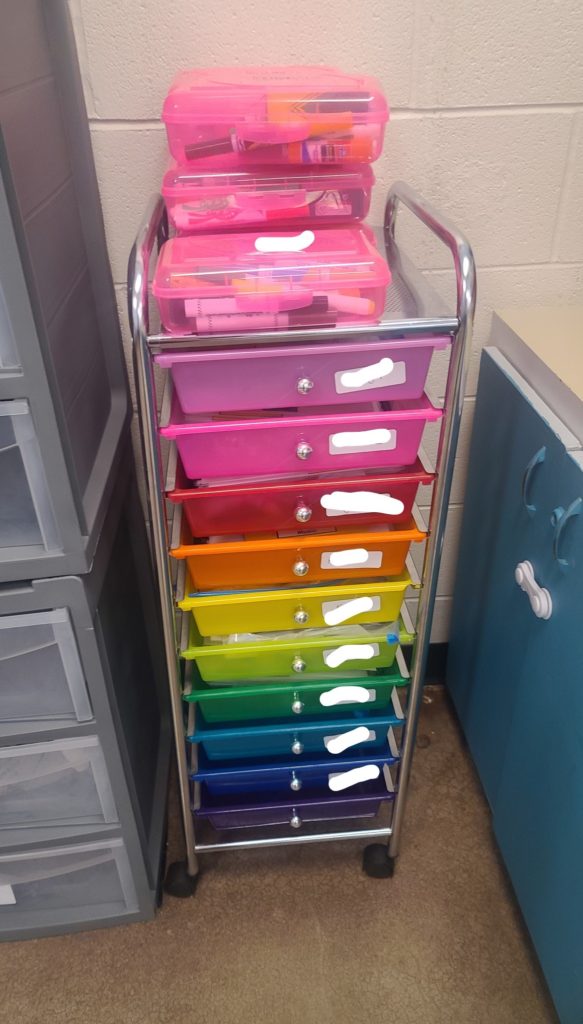
IEP Drawers
Each of my students has their own drawer in the rainbow cart. Each shelf has everything they need to measure their current IEP goals in separate baggies in their drawer. On top of the cart I keep a white basket with their data binders and on the wall I have QR codes that go to each student’s digital data sheets. We scan the codes and add the data in the binders at the end of each week. This has been a huge time saver for myself and staff. It’s easy to just grab the binder and everything in the drawer to take data.
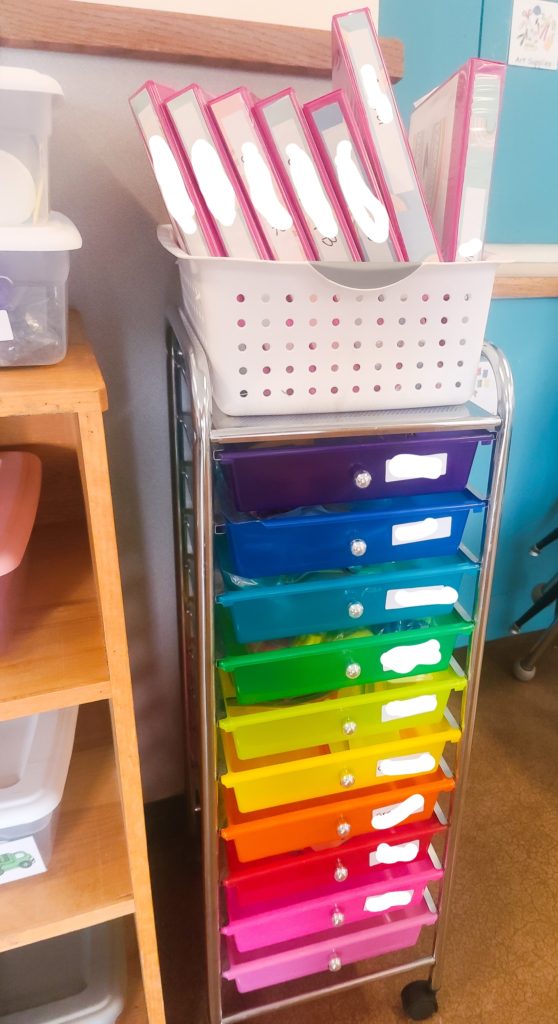
Whitney talks more about IEP bins and gives a full setup tutorial in her blog post, here.
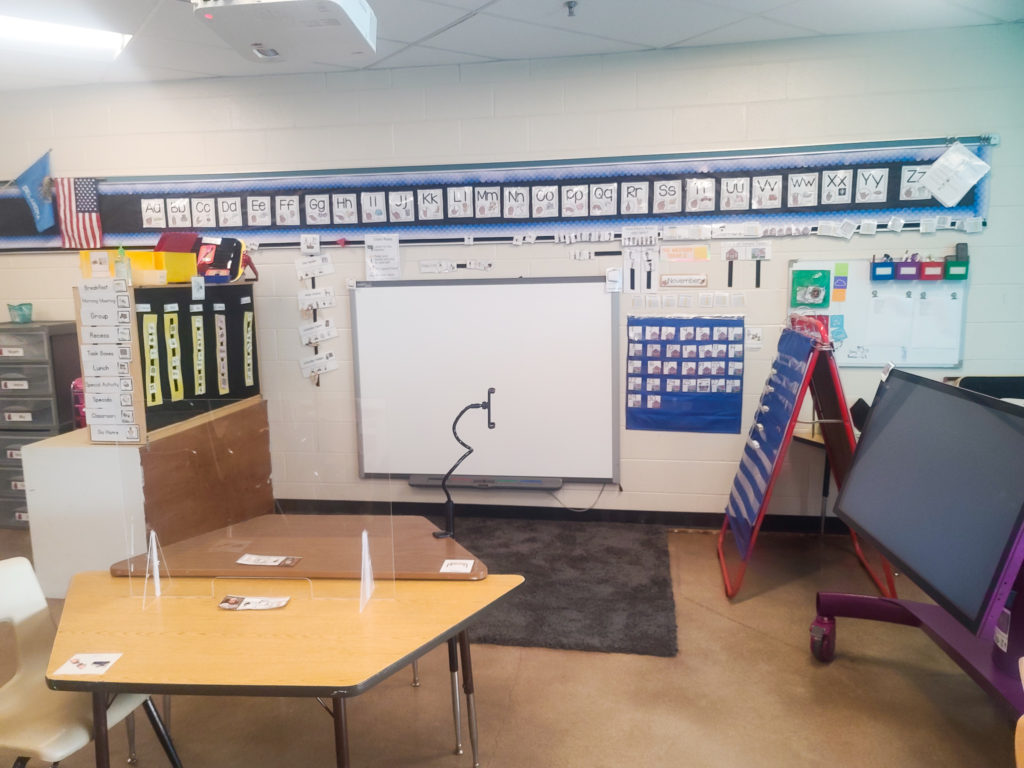
Group Lesson Area
We still do group lessons, just distanced in the classroom. I have an apple TV so I may project a board game I made in lessonpix on to the screen from my Ipad and have the students use our adapted spinner to roll the dice.

I project our calendar time routine on the board from my iPad and I share whatever ULS (unique learning system) lesson we are on or videos that go with our lessons. I also have our actual calendar set up and behind the blue chart with our current math model I store all of the things I need for the week. This includes switches, velcro boards, mini velcro boards, adapted books, and any visuals I may need.
TapIt
The large purple screen is a TapIt. It’s an amazing tool that my school district has provided. It’s a large touch screen that is adjustable so that I can position it for a student that is sitting in a wheelchair or for a student’s field of vision. We will do our ULS activities here, Boom Cards, the Ian bean website, seesaw activities and more!
We use it in group learning, but it also doubles as its own station. A student can work on the Tapit while another student does something else. The Tapit is an awesome tool for a multiple disabilities classroom.
Class Library
We have many more adapted books and activities than this, but I specifically curate this library to be usable for what we are doing for our theme that month in our multiple disabilities classroom.
These are often extension activities and adapted books or books we need for our science and social studies lessons. As you can tell I use a lot of products from Simply Special Ed! I used them before I started blogging with SSE and it’s part of the reason I wanted to join the SSE team. I just really love the products!
Here you can see the Simple Dry Erase Set, the Simply Geography Set, the Simply ELA Set and more. I also store my tactile schedule pieces that are in use here and my texture books.
Entrance Area
This was my solution for student cubbies. Each student has their own drawer where we keep their backpack and spare clothing. I do not keep toileting materials here. I do not have my own bathroom, but my pod (which houses our self contained classrooms) has an adapted bathroom with an electric changing table (my favorite thing ever) each student has a bin labeled with their name in the bathroom that holds their materials.
I have our emergency binder, with student health plans, our seizure/feeding log, and bathroom log all stored here.
Next to the plastic drawers I have another rainbow cart labeled with each student’s name. Inside I keep their token board, first then, morning binder, and any other student specific materials (like picture cards, adapted spoon, finger lights for spotlighting ect.).
On top of that I keep each student’s materials box. Every student has their own set of art supplies and expo markers. The boxes are hot pink because they were .30 cents each at Walmart. That’s a teacher win!
Student Seating
In each grouping I have an average of 5 students. I made sure that each student has distanced seating in the classroom. On 2 of the tables I use plexiglass dividers to further separate students.
Instead of doing rotations this year, all of the materials come to the students in their area. They still move to use the computer, TapIt, lightbox, switch activities, or positioning equipment (once again we sanitize everything and let it dry before the next student uses it). However, their sensory and academic activities are done at their assigned seat.
I actually use the Simply Special Ed Functional Name Tags for my students seating. I don’t have an image due to confidentiality, but I can tell you my students really respond to their pictures and familiar PECS symbols. You can learn more about Functional name tags in Alyssa’s blog post, here.
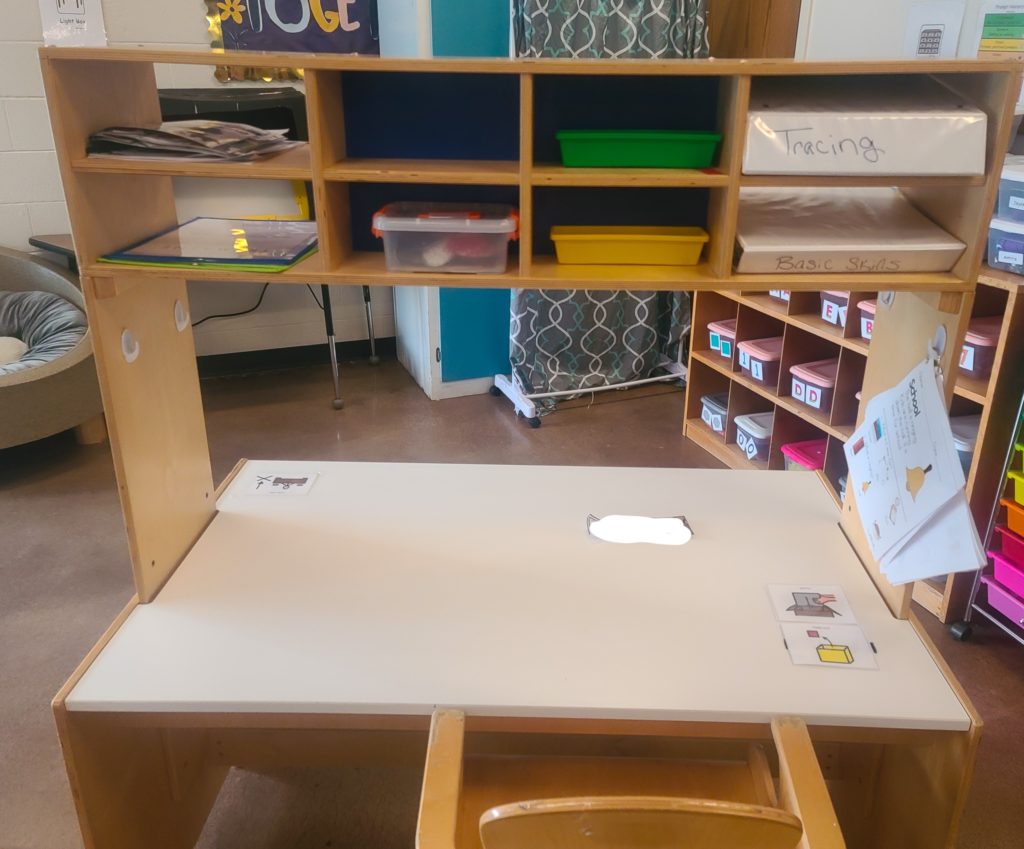
I use the SSE tracing binder and Picture Comprehension here. I love how this desk allows for storage above for easy access. Perfect for a multiple disabilities classroom.
Schedule Area
I keep my main class schedule on the side of this cabinet. The schedule board I use are the Simply Special Ed whole class schedule, but with my own picture symbols.
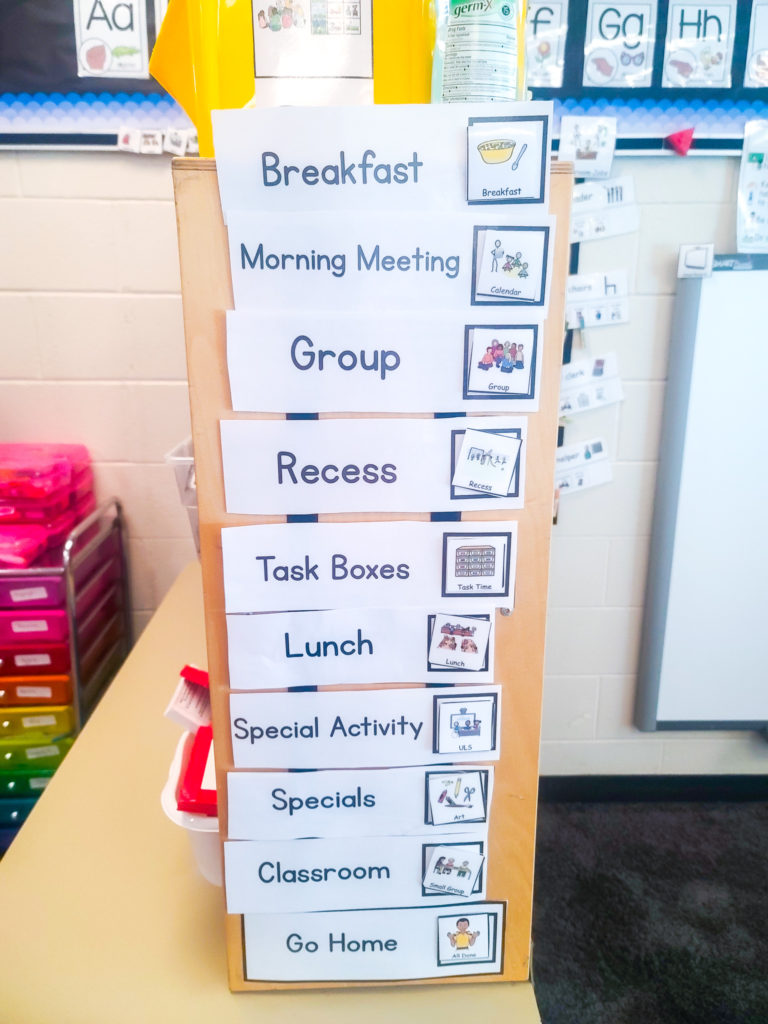
The back of this cabinet is a felt board. This is where the individual student schedules are. Each schedule is laminated with hard 10 mil. laminate and is brought to a student. The student helps take off the piece and puts it in the all done box. 2 of my students use tactile schedules. I keep their schedule boards on top. The super hard laminate makes it easy to sanitize each schedule.
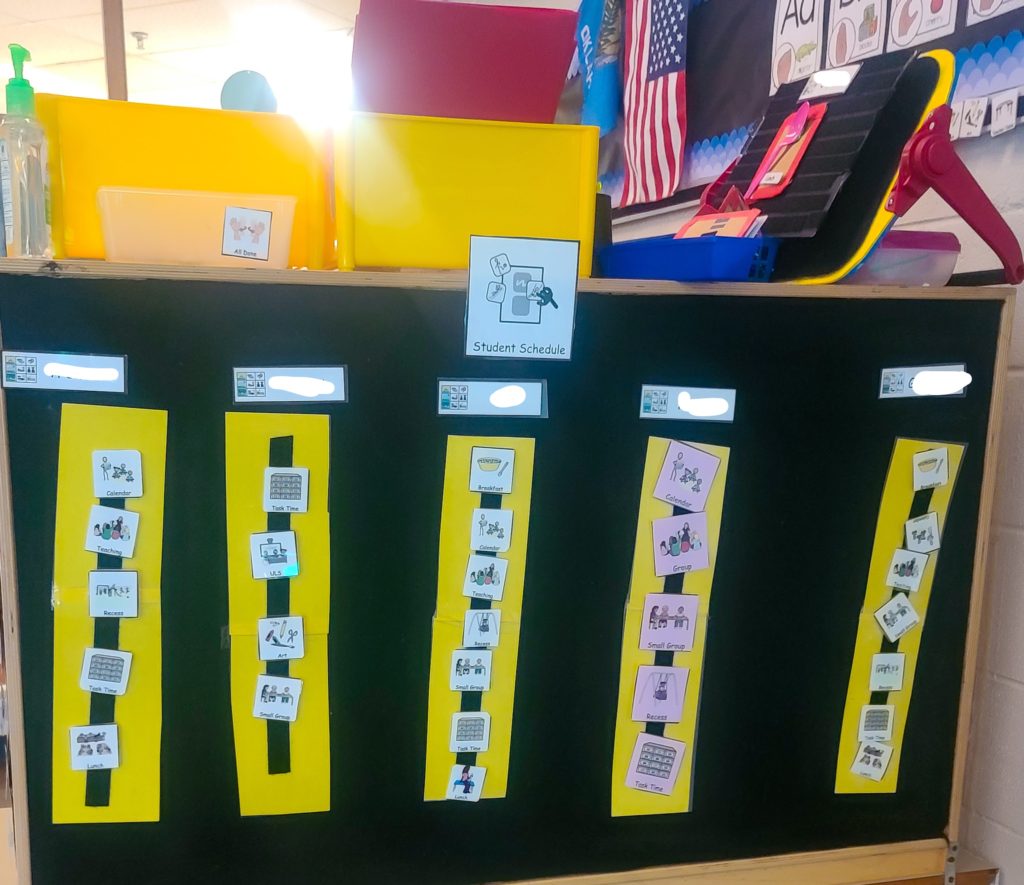
Alyssa has a tutorial for creating individual student schedule boards in this blog post.
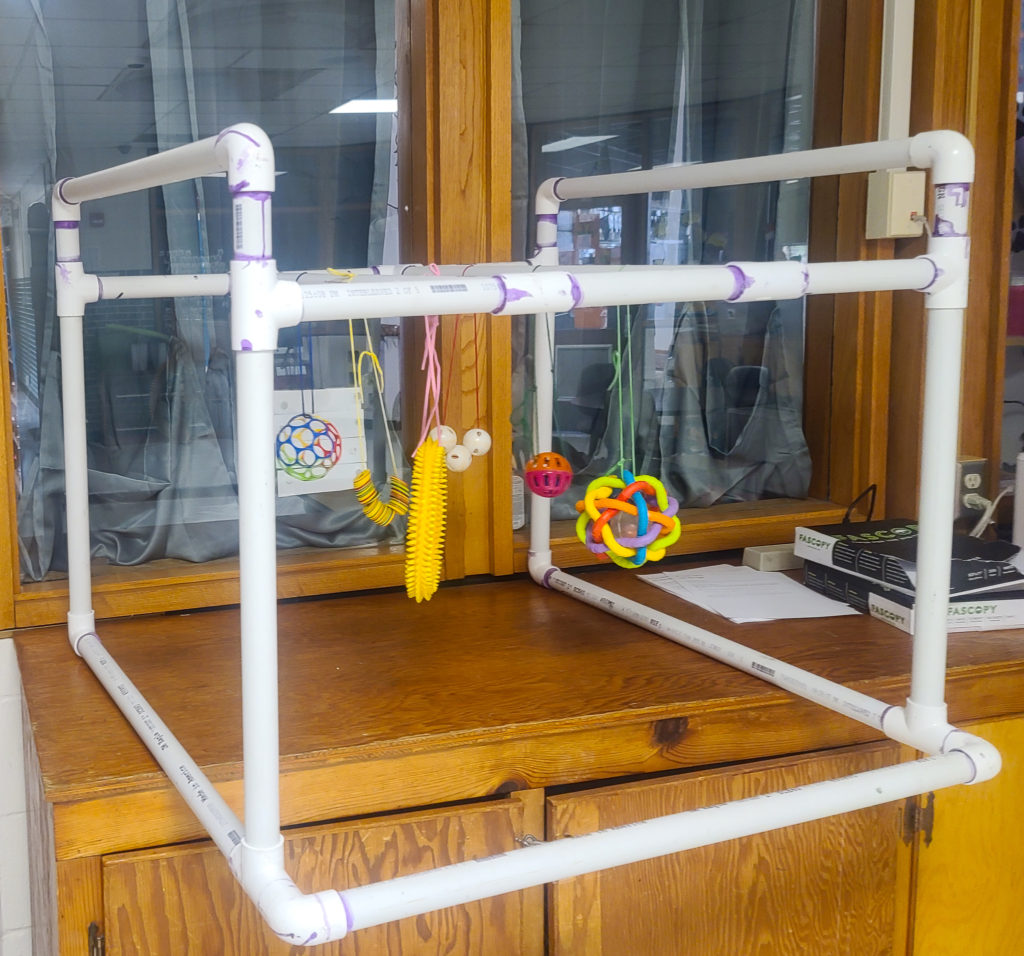
Equipment
I keep the active learning activities behind the u-table. That includes 2 bead bars and 2 sensory boards and 1 hanging activity frame (this actually stays outside of the classroom because it is so large).
If you haven’t been to the active learning website you definitely should! It has so much good information for working with students with disabilities.
All of our positioning equipment is actually stored in the pod or in the PT/OT closet.
Staff Storage
Near the back door I have another plastic drawer container that staff use (including myself) to keep their personal belongings in.
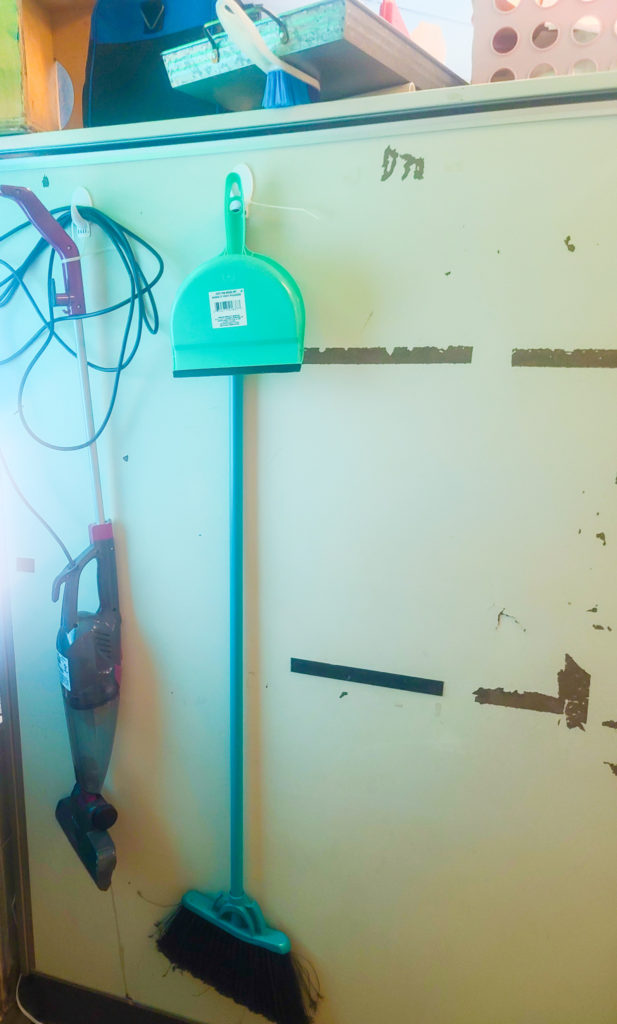
I also store staff PPE back here (like extra gloves, alcohol wipes, face shields, masks, and gowns). On the back of this shelf I keep our vacuum and broom.
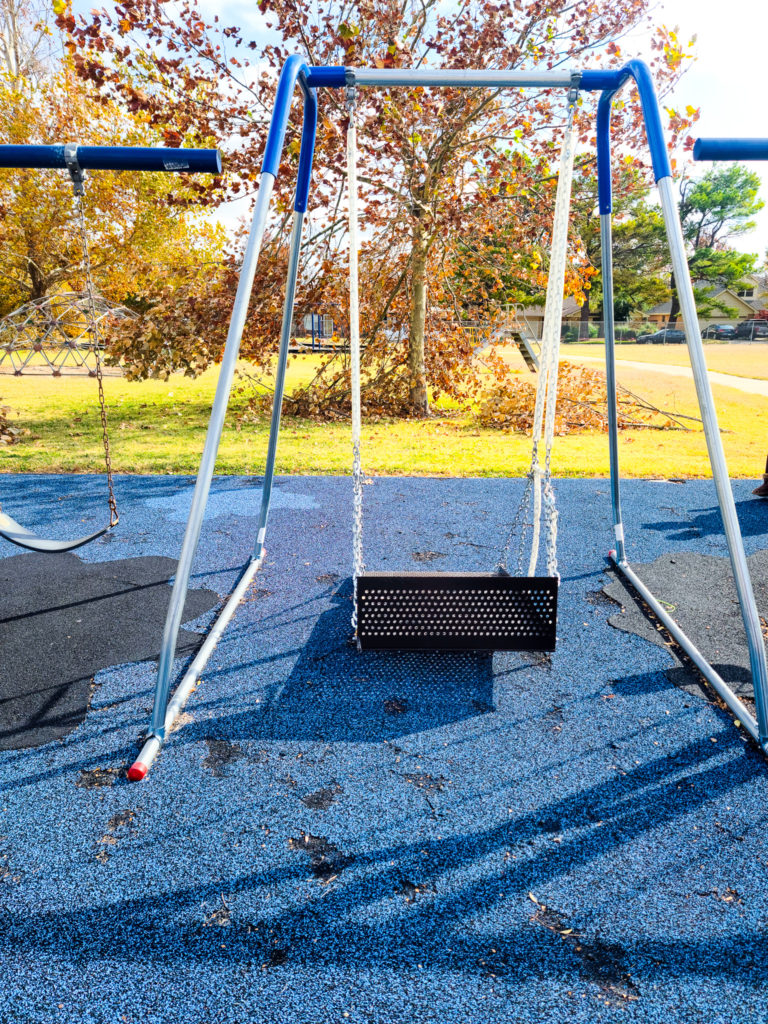
Bonus: Adapted Playground
How cool is it that our playground is adapted for student use? We have a wheelchair swing! I love that I can take my students to swing . We also have a shake and sway boat with a ramp and our big toy has a ramp as well. My students can go wherever they like on the playground! I love how inclusive my school is.
This is how my classroom is set up for students diagnosed with multiple disabilities. It took some trial and error, but we have a system that works. My classroom is small and does not have much storage, but I feel like it is really working well this year despite those limitations. If you have any questions about how I set-up my classroom just let me know!

Need more support in your classroom setup?
Learn more about Simple Self-Contained Setup 101®: the bingeable online course made specifically for self-contained special educators! Reduce overwhelm and anxiety during back-to-school season with the proven methods I teach you in this course! Click here to learn more and join the waitlist now!
How much did the TAP it cost?
Hi! According to this website about 10,000$. We are very lucky to have one!
Wow! This is a fantastic post. I hope to become a teacher in a multiple disabilities classroom next year and finding material this informative is really challenging. Your classroom design really reflects the day and student needs. Well done and thank you for sharing (particularly the links/videos). I hope you’ll be writing more blogs from the multi perspective! 🙂
That is my plan! I hope I can give someone a jumping off point for their own classroom. 🙂