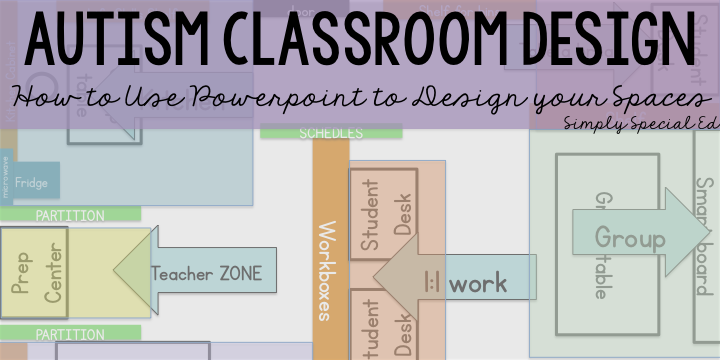
Today, I am talking about how I DESIGN my classroom, before I even get to step into it for the new year!
I know what you are thinking, “ALREADY?”…
I am the first one to tell you to take the time to RELAX, have FUN with family and friends, and take time to yourself and leave that book bag aside.
But with August around the corner, it’s back to the drawing board. I am ready to get to thinking about my classroom. This year, I am finally getting the chance to move into a NORMAL sized classroom, yay for no more closets! But with this comes some downfall, in the past I had a separate smaller room for my desk. This was SO GREAT because I was able to keep all of the adult things separate from the kids and keep the clutter and distractions low in my tiny room.
This year, I knew I would have to find a way to make the larger space work for ALL needs. I really think this might be even more challenging than making a smaller space work! TOO MUCH SPACE is not good for wandering students. So I know, I have to make sure I keep each space separate and distinct, like a bunch of little rooms in one!
“But I’m not allowed in my classroom yet!”, TECHNICALLY neither am I…. but I may have snuck in a few times to peek…. 🙂 (make friends with the janitors, bring them coffee, and they will love you forever!)
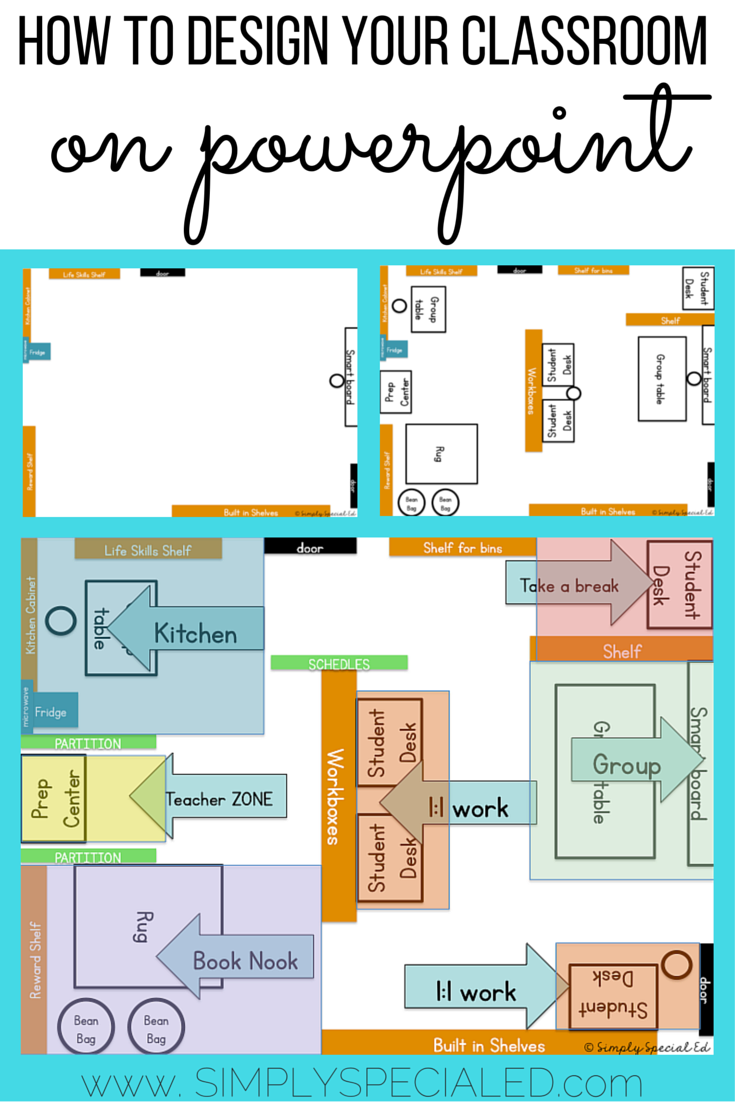
But if you really can’t peek, make sure you have an idea of what the classroom may look like. I use PowerPoint to design my classroom layout, from the comfort of my bed on my laptop on a Saturday morning 🙂 It’s the easiest way to start thinking about school when you just aren’t ready to go back yet!
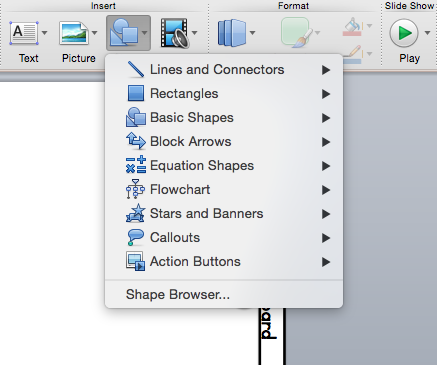
To start, open up PowerPoint on your computer, change the page layout to landscape, and get ready to use that shape tool! Here’s what it looks like!
Next, I’m going to give you a step by step:
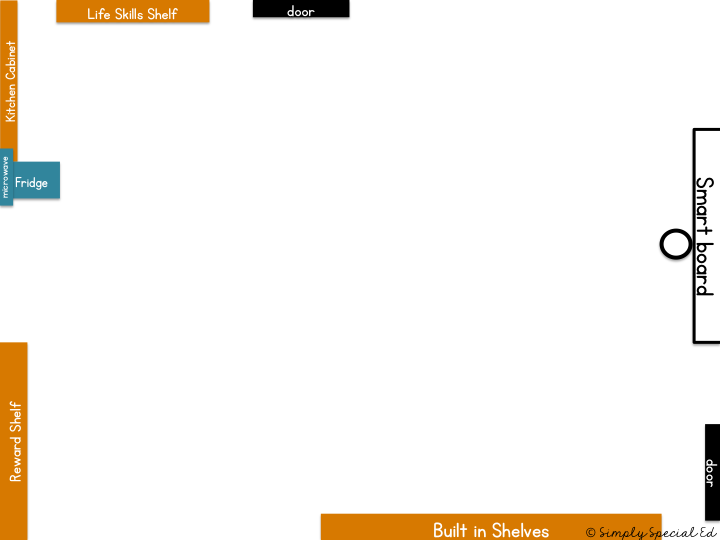
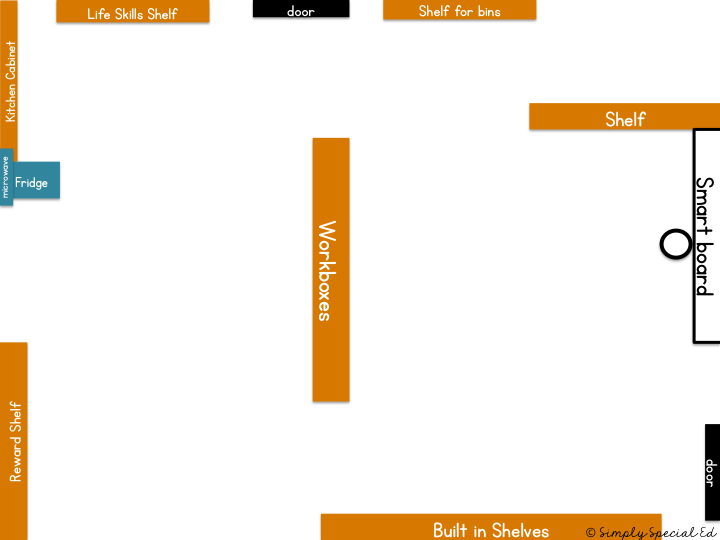
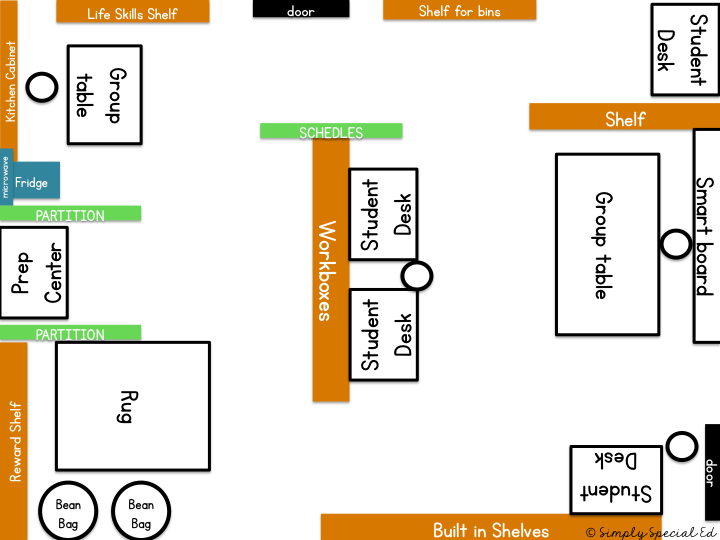
You need think about what furniture you have, and where doors and NON- NEGOTIABLE items are (this means you CAN’T move them). I like to color code a bit, black for doors, white for boards, blue for appliances and brown for shelves.
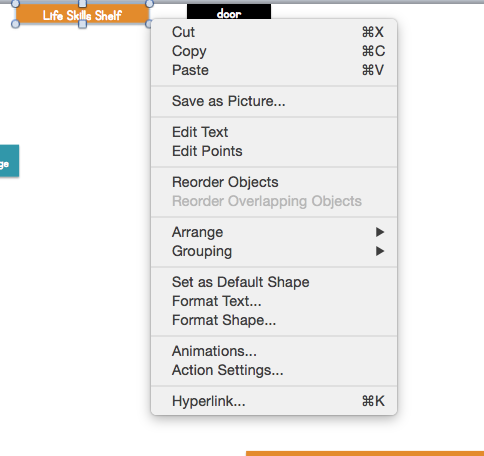
To insert the shapes, go to the shapes tool on PowerPoint (see above!) and add in some rectangles and circles, depending what you need! To change colors, right click, format shape, and fill with whatever color you want!

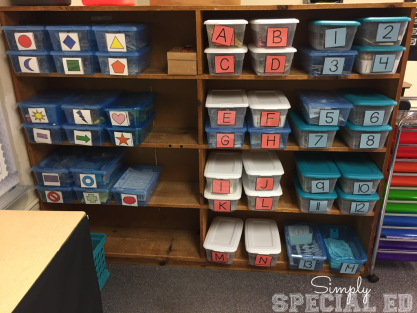
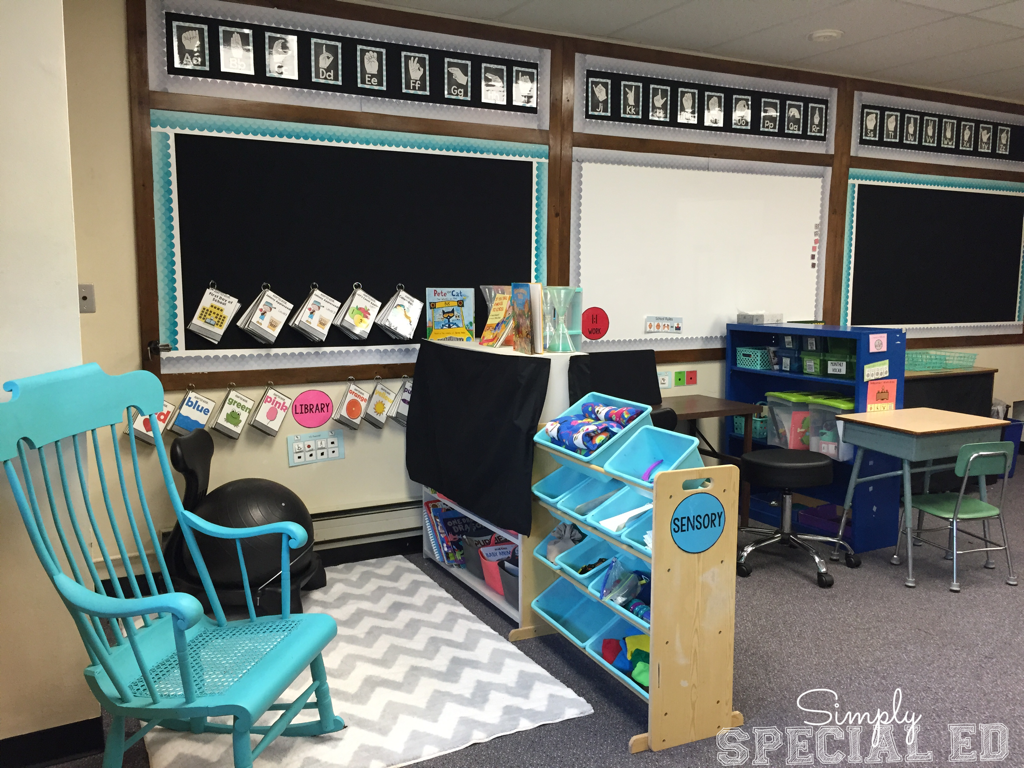
Next, add in your big furniture pieces that are most important to your space! For me it’s my HUGE workbox shelf… I need to have the PERFECT space for that. This year, I have decided to use it to split the room into two sides: life skills/leisure, and WORK!
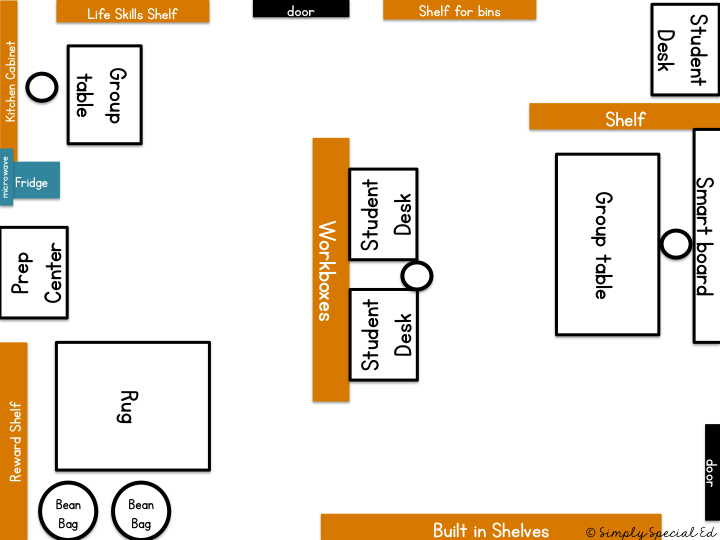
After that I add in more smaller furniture pieces, rugs, student chairs, and my prep center. The room is starting to look functional and I am slowly creating a space with each student, center, and skill in mind!
After all of my furniture is in place, I add in some spaces that need higher partitions to reduce distractions. This is a SIMPLE but important step!
After all furniture is in place, I like to make sure I keep in mind how I will be designating each space. During this step, it is so important to keep student needs in mind. What is right for my students, may not be what your students need! But if you keep your students first, you will always be doing the right thing! Classroom setup should be student centered, not what is best for pinterest or instagram 🙂
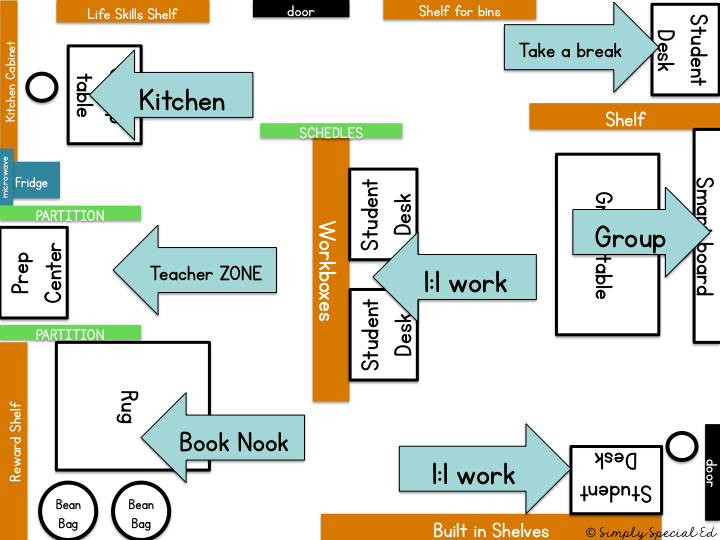
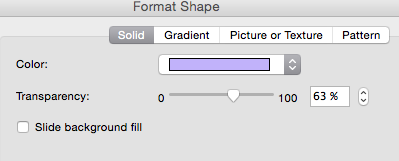
I like to create transparencies to show defined spaces. It makes it CLEAR what area is for what perfect! I end up putting a copy of this in my para binder for paras and subs to refer to.
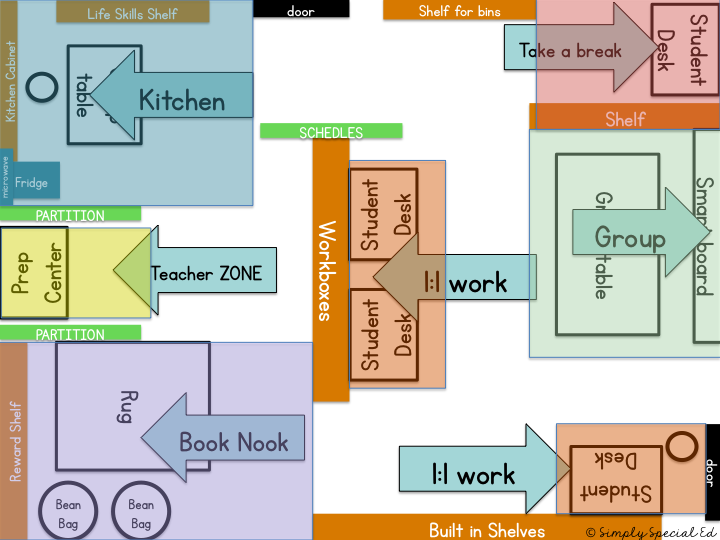
Insert a solid shape, right click, Format shape, and drag the transparency bar until it looks how you like it!
Again, keep your students in mind the WHOLE time you are designing! What space works best for them? What areas do they need to be successful? What life skills do they need to work on? What furniture is more important!
Did you know that I snapchatted the WHOLE WAY THROUGH designing my classroom on powerpoint? Join in the fun, ask questions directly to me about certain pictures and more! Snapchat Username: SimplySpecialEd
Check back later this week for scheduling ideas and tips!
Want to check out my classroom reveal from last year? See it HERE!


Hi,
I’m new to your blog and loving it so far. So many great ideas!! I’m wondering if you could tell me more (or direct me to a post) about your para binders. They sound super helpful! Thanks!