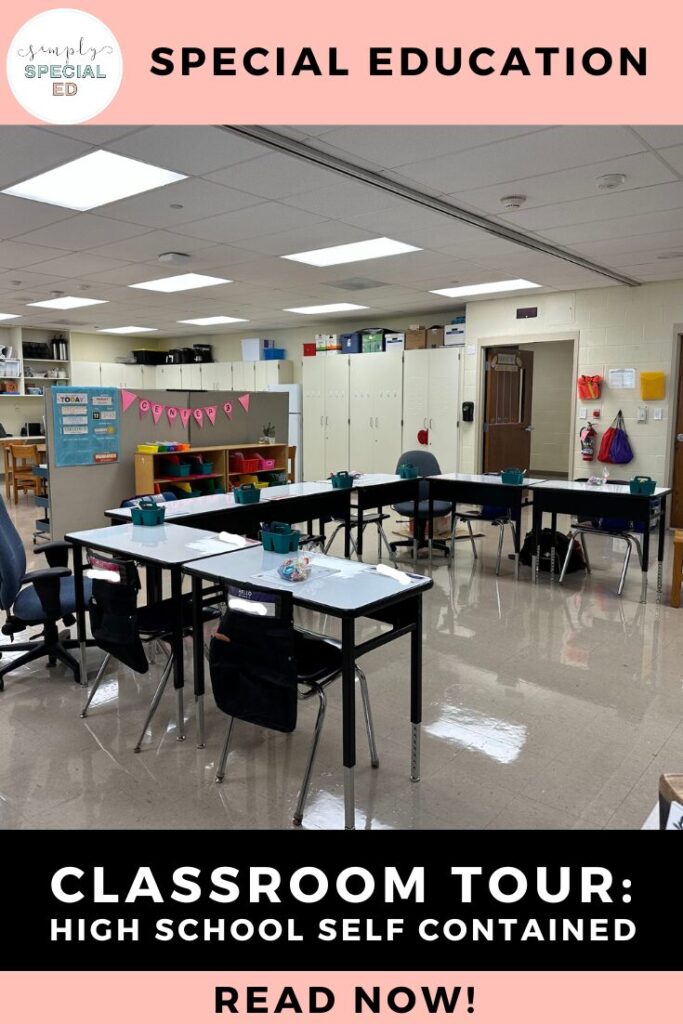
You know the feeling- you’re standing in your classroom, hands on hips and spinning in circles wondering where to start. Fingers crossed-this blog will give you the jump start you need to set up the high school room of your dreams! I’m displaying an example of my room- a self contained special ed classroom in a public high school for grades 9-12+. I have a wide variety of students on many different levels and this set up has been so helpful in cultivating a cohesive and welcoming environment for all my learners. To start, let me share a bit of how I structure things as I take you on a classroom tour!
School Day Flow
My instructional day consists of many moving parts, and the room is set up to accommodate that. For each subject area, we start with whole group instruction followed by centers, where students work either one on one or in small groups with a para professional. This time is used to review the skills taught in whole group and reinforce areas of weakness specific to particular students. After centers, students who have earned it will participate in a ten minute reward of their choice. These rewards happen organically around the room with the use of a timer on the whiteboard. After reward time, students reset and another round of whole group instruction begins.
Classroom Tour Stop 1: Whole Group Area
The first thing on the classroom tour is my whole group instruction area. I like to have the desks in a U shape, facing the board with chairs for the paras sprinkled throughout. Wanna know a hill I’ll die on? Kids with special needs don’t necessarily need to be sequestered off into their own work stations! Often times this can create a colder and less socially inviting environment, where students can become territorial over their area and refuse to interact with others. Have the U shape encourages discussion, teamwork, and helps build their tolerance for others. Then if a student demonstrates a consistent issue you can always provide them a safe space away from others, of course. But I’m a firm believer in assuming competence- and starting the year off in a more communal environment!
Helpful tip: Don’t clutter up the space in front of the whiteboard. Leave it nice and open for students to easily come up to the board and interact!
Classroom Tour Stop 2: Center Areas
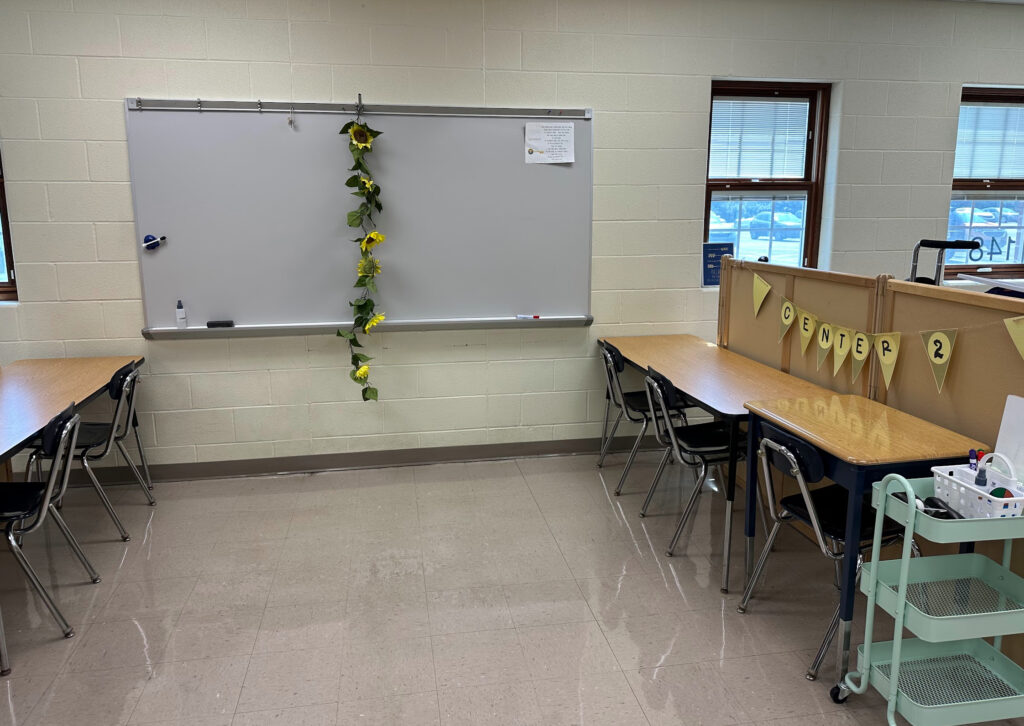
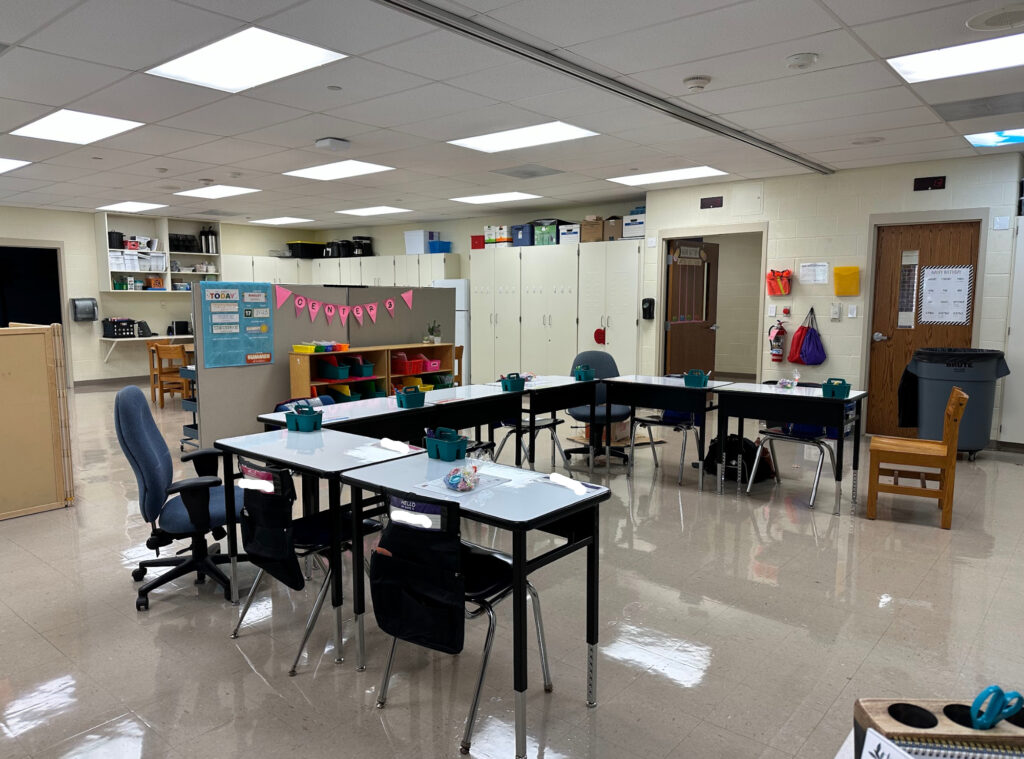
Next stop on the classroom tour: the centers! In a space away from the whole group area, I have my centers set up. How many centers depends on your class size and number of tables or work spaces. For me, I was able to create four centers. Rolling carts full of all needed materials are placed in each center. I make sure to leave a space or an extra chair for the paras here as well, as they will be leading the centers. I try to reduce visual distraction within the centers, using barriers and dividers as creatively as I can. If you want more great ideas on academic centers, be sure to check out the blog on “3 Math Centers I Use All Year Long”!
Helpful tip: Let your paras claim a center as their own! This allows them to set up materials and personalize it in a way that feels good to them. It demonstrates respect and allows them to bring their full selves and great ideas to the table.
Classroom Tour Stop 3: Reward Time Choices/Teacher Desk Area
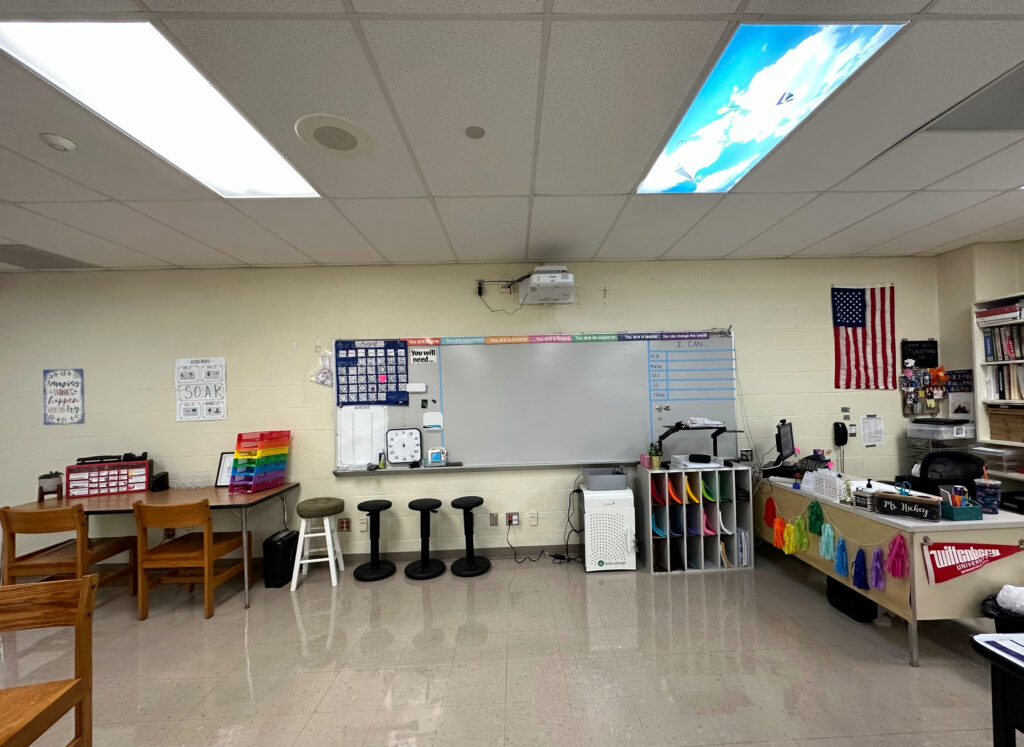
I have a small area dedicated to fidgets, kinetic sand, CD players, and other reward time choices. This typically has a black curtain covering it when not in use to take away the distraction. I like to place this behind the students back’s during whole group instruction as well, to reduce distraction.
The teacher desk I have in the front of the room, but to the side of the whiteboard. Behind my desk I am fortunate enough to have built in shelving for all the storage! Here is where I keep classroom materials stocked, as well as curriculum items and IEP information. I rarely sit at my desk during the day- I’m either providing whole group instruction or running a center. But keeping everything organized here definitely makes my days run smoother.
Helpful tip: Get a small parts organizer from a home improvement store and use it as a materials dispenser! Students can come forward and grab anything they might need without having to bother you or get behind your desk for it. When it goes empty, just restock!
Extras: Kitchen, Laundry, Sensory Room

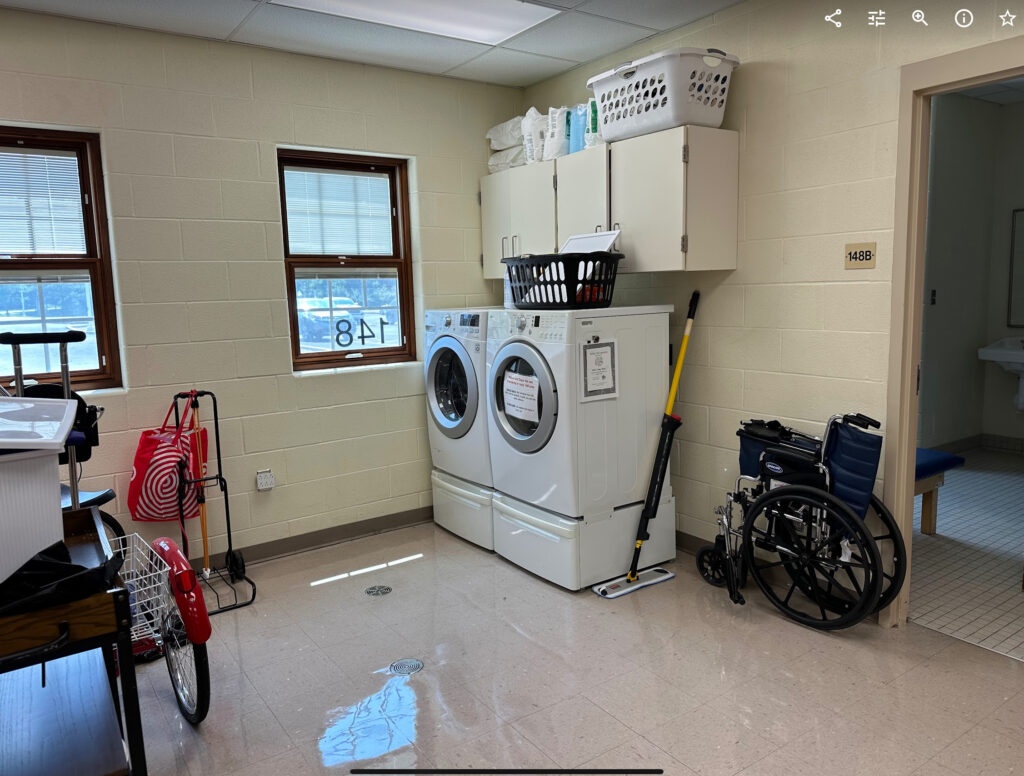

My room has a fully functioning kitchen, laundry area and sensory room all built into my classroom. Believe me, I was in shock too. The cooking area contains all kitchen supplies and our dishwasher. Our laundry area has a washer and dryer, which is a great teaching tool as well -and provides a security that no matter what spillage happens during the day we can take care of it! Finally, our sensory room has a multitude of great items: massage chair, bean bags, smart board, calming lights and a bubble tube. If you don’t have any or all of these areas, I would recommend either creating miniature versions of them within your room or linking up with a neighboring Home Economics teacher to borrow their kitchen area.
Helpful tip: Have visual labels on the kitchen cabinets for students to independently find the materials needed for your cooking lessons! Although it may take longer that you’d like, teaching them the skill of locating a skillet or a spatula on their own will be so beneficial later down the road.
In Closing…
This is hard! It can be a challenge to know what to do with your space and how to set it up. I would say trust your gut and prioritize functionality over aesthetic. Everything in your room should make sense and be accessible to all students. Don’t be afraid to make a change either! Your students can and will adapt.
The real secret? Sign up for Simple Self Contained Set Up 101! I took the course my first year as a self contained teacher, and so much of this layout is a byproduct of that program. It was so helpful to have a community of teachers like me to bounce ideas off of and share tips and tricks! Learn more here! Thank you for joining me on my classroom tour! I hope you have an awesome year!