I have seen about a million phenomenal, Pinterest-worthy sensory rooms that I desperately wanted. So, I took matters into my own hands and made my own! While it may not be glamorous or Pinterest-worthy, it works for my students and they love it. You don’t have to have a huge space or ALL the resources, you can DIY a sensory room with what you have! Let me take you on my DIY Sensory Room Tour!
The Space
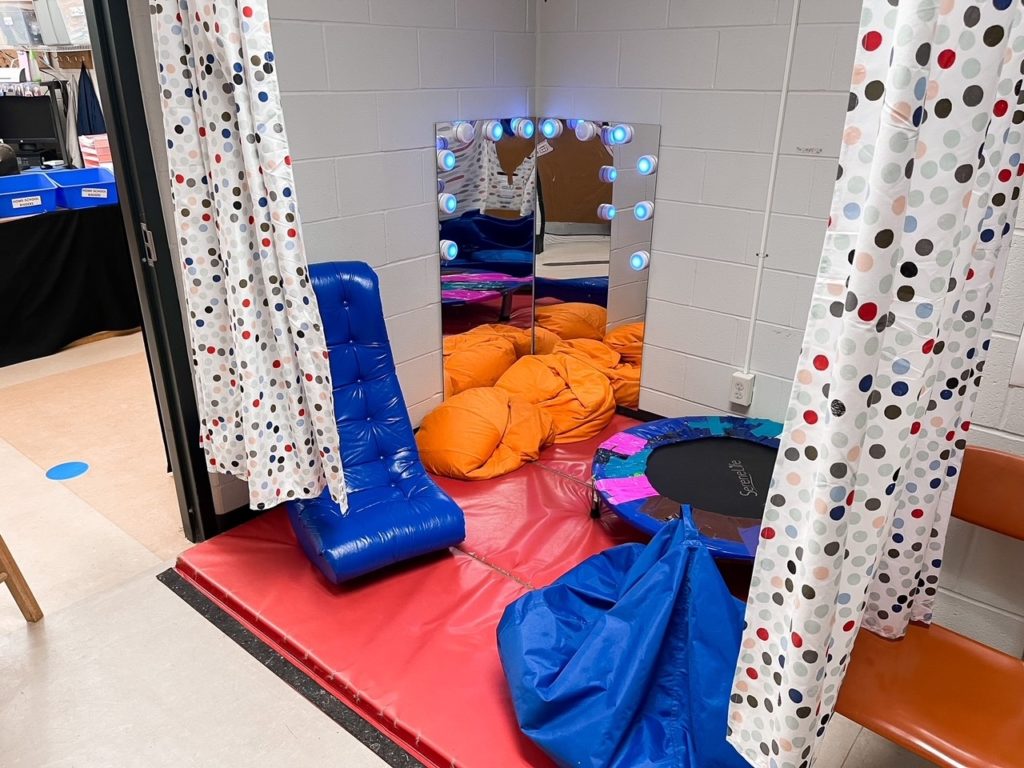
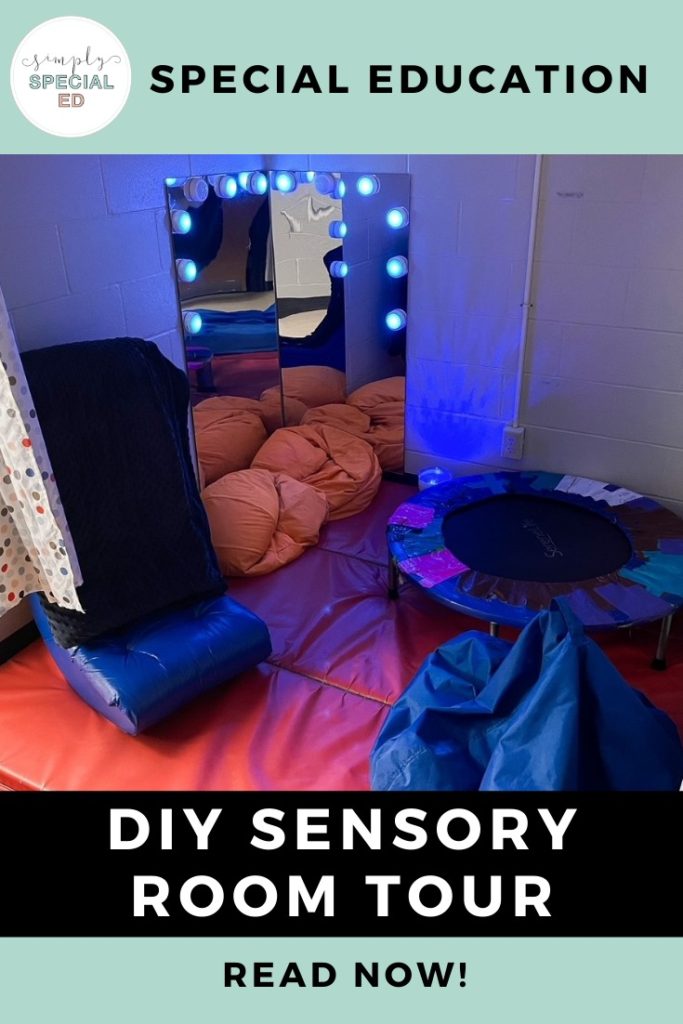
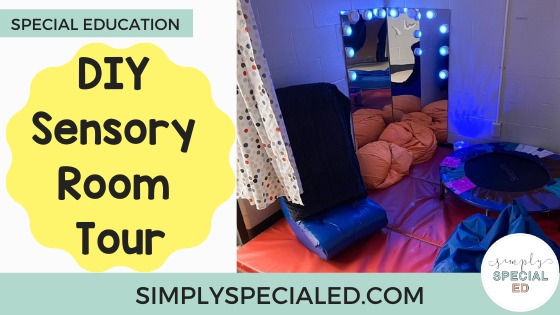
First, let me walk you through the space. Attached to my classroom is a room that connects my room to the other structured teaching classroom in my school. In this space, we have a corner of space, a door to the main hallway, and a bathroom. My sweet friend next door, the other STU teacher, let me have that corner of space to create a small sensory room. The space itself is maybe 4’x4′, so it is not large by any means but it works for us! I will give you a break down of the items I have in the space and how they were provided so you get an idea of what I purchased versus what was given to me.
The Set Up
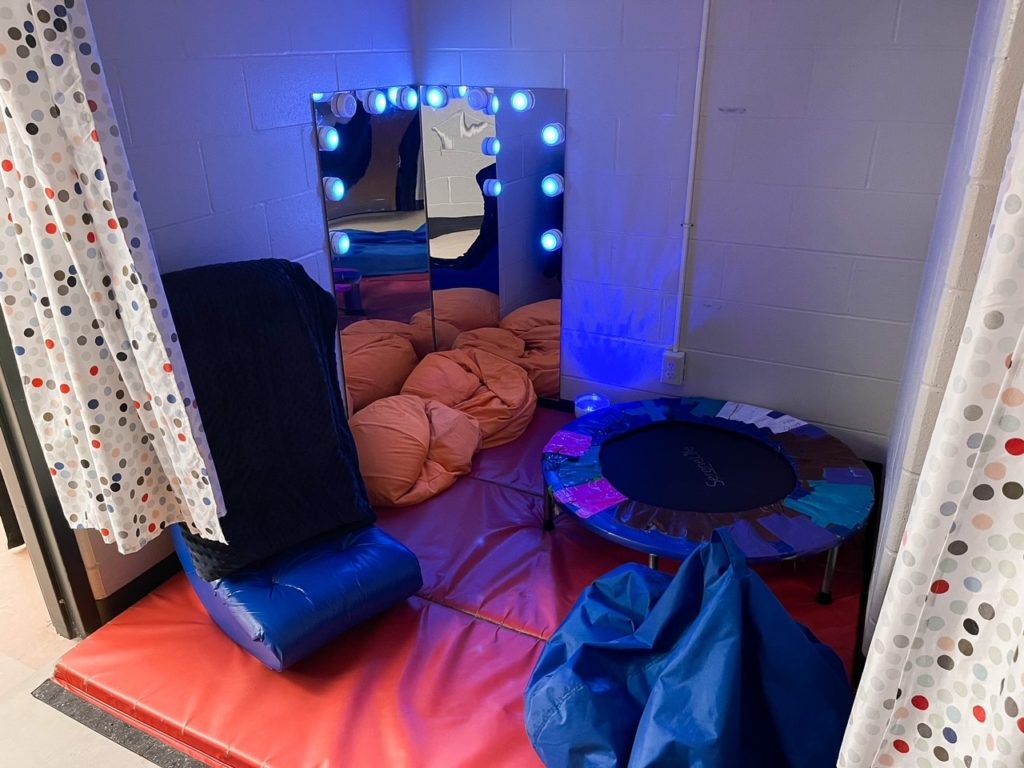
Next, let’s walk through the set up of the space. In my DIY sensory room, I have a large gym mat on the floor. This was provided by my awesome PE teacher. In one corner of the space, I have a trampoline. You see in the photo that my trampoline has seen better days. We have had to duct tape rips and tears, but it is still completely functional! My trampoline was gifted to us from my Amazon Classroom Wishlist! You can find it HERE (affiliate link.) Remember, function over looks in a DIY sensory room. In the other corner, I have two mirrors heavy-duty Velcroed to the wall. These were provided by my amazing DoSE, and they are completely safe for students! The other “big” items I have in my DIY sensory room are bean bag chairs and a rocker chair, also provided by my DoSE. This space already had shower rods attached to the walls because I believe it used to be a changing area. I was able to add some cheap curtains, and my sensory room was born!
The Extras
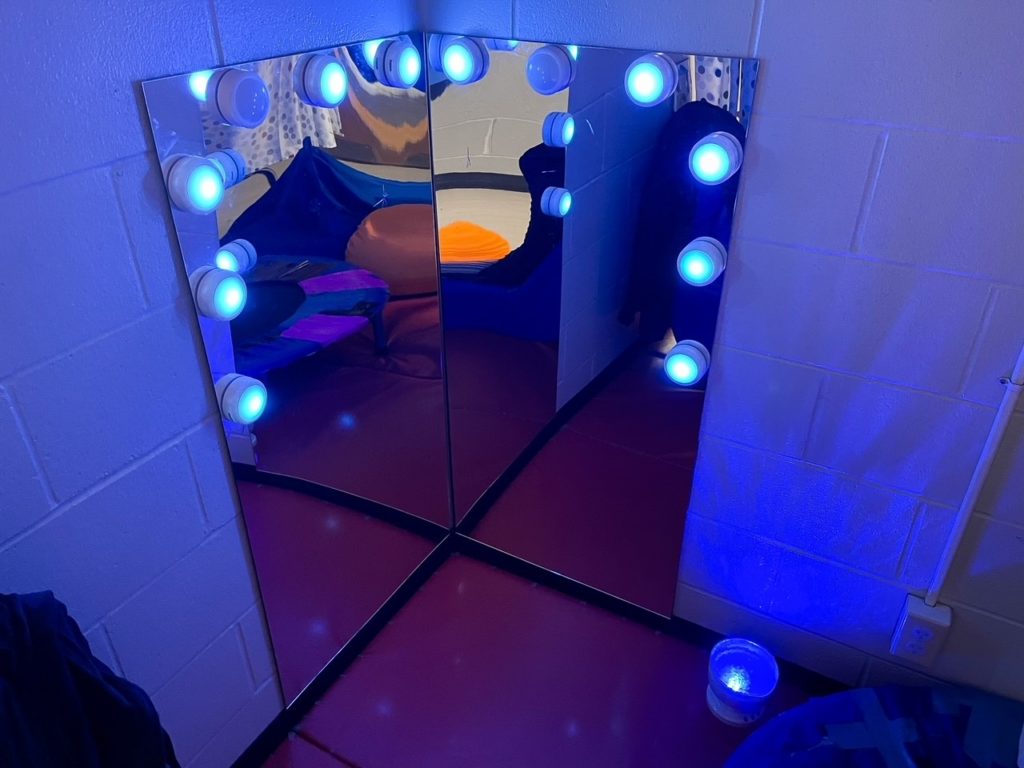

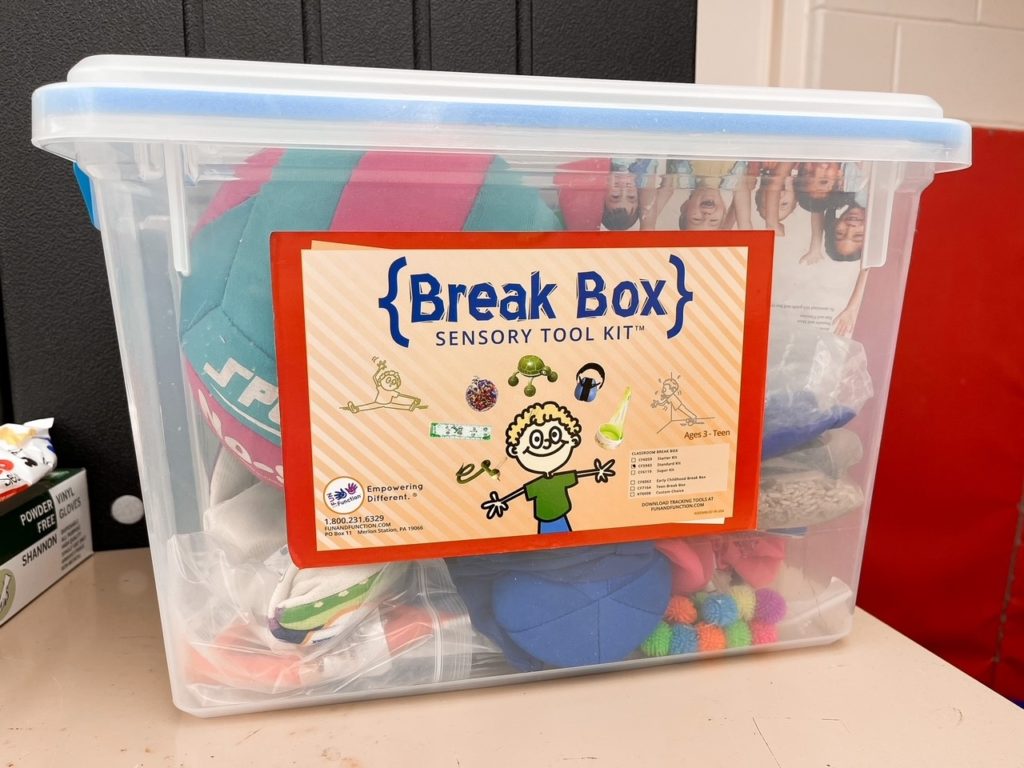
I also have some extras that are staples in my DIY sensory room. As you can see, I have puck lights attached to my mirrors. These were gifted to my classroom from my Amazon Classroom Wishlist. You can find them HERE (affiliate link.) These lights are my students’ FAVORITE part of our sensory room. I turn off all the overhead lighting and just have these on. They change colors, they fade between colors, and so much more! There is also a remote, so you can easily control them from that! I also have a weighted blanket that lives in our sensory room. My awesome OT provided it to us. My kids love to have that on while they sit in the bean bags or rock in the rocker chair. I have a Break Box provided by my DoSE that has tons of sensory items in it. This box holds all the items inside and locks for easy storage. My sensory room check in is also on the wall right when you walk in to the sensory room. This is to give the students a place to check in with their visual schedule piece, and it provides a visual to show how many students are in the room and if it is full. I let a max of 3 students in at a time.
The Sensory Shelf
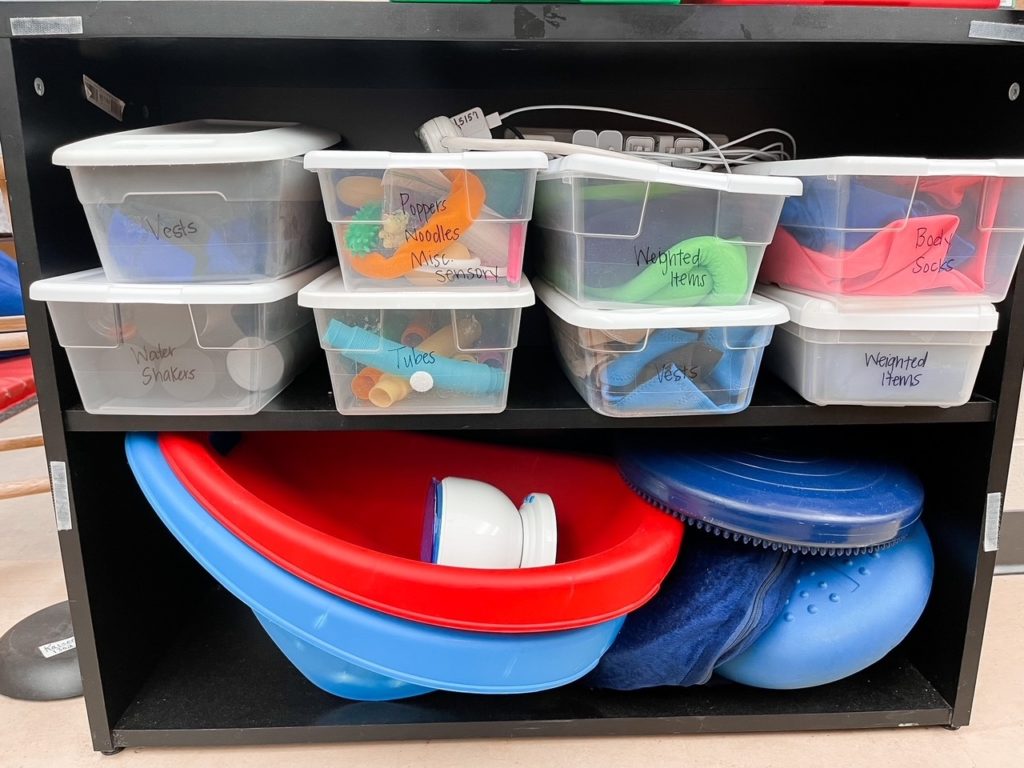
But wait, there’s more! I also have a bookshelf right outside the sensory room (inside my classroom,) that holds ALL our sensory items. Spoiler alert, we have a lot of stuff. This can get unorganized and messy quickly, so I use plastic bins with lids and label the bin with what is inside. To name a few things on this shelf, we have body socks, weighted items, hug vests, stretch tubes, monkey noodles, spinners, chewies, shaker bottles, sensory bags, and more! I also have another big light in here that we can bring into the sensory room. It projects lights and shapes onto the walls and ceilings in various colors. This is also where I keep our sound machine so I can play various calming sounds for the classroom or the sensory room. All of these things were either provided by my OT, my Amazon Classroom Wishlist, or purchased by me.
Extra Storage

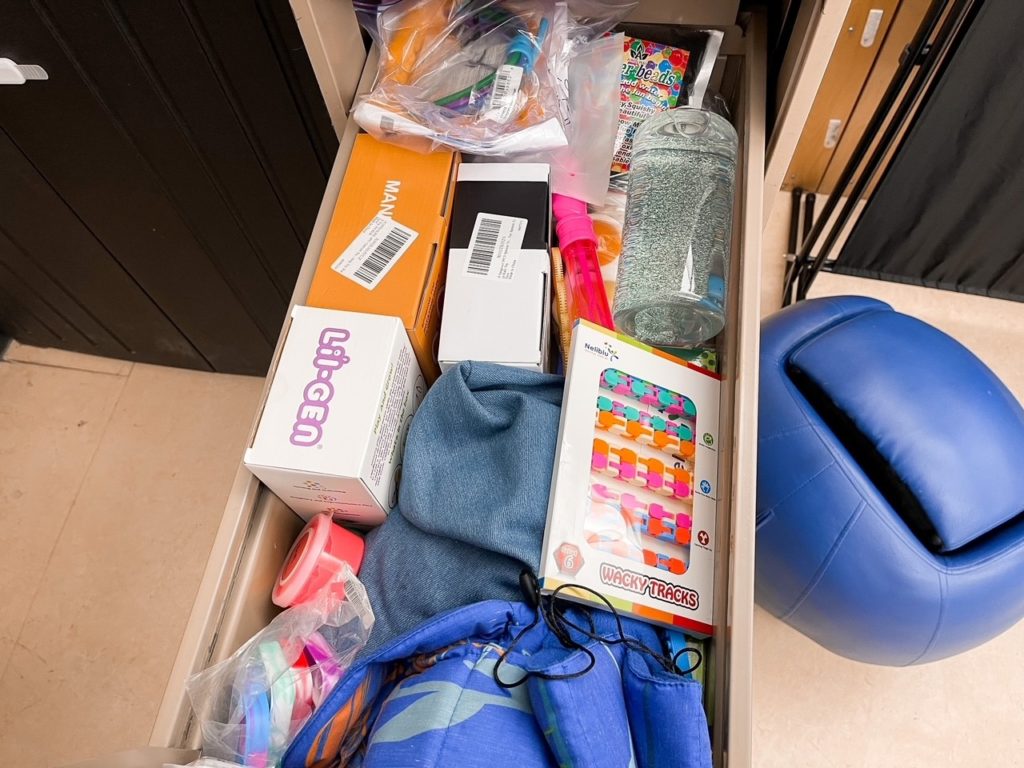
I have lots of duplicates of items on my sensory shelf or in our Break Box, so I store these in a filing cabinet labeled “Sensory Items.” Most of my duplicates were provided from my Amazon Classroom Wishlist, my OT, or purchased by me. I keep all the duplicates in here so we don’t go through things too quickly, and I can keep an inventory of what we have. When we start to run low on something, I can usually ask my OT or I’ll add the items to my Amazon Classroom Wishlist. On the sensory shelf, we only keep the items we need and use on a daily basis. When things break or wear out, we restock from our extra storage.
I hope this post showed you that you can create a DIY sensory room from items you already have in your classroom. You don’t have to have it all to make a great space for your students. My students have absolutely loved our sensory room, and I have seen so many positive benefits from them using it. What questions do you have about creating a DIY sensory room? Let me help you in the comments! If you want to see the rest of my classroom, check out my classroom tour post HERE!