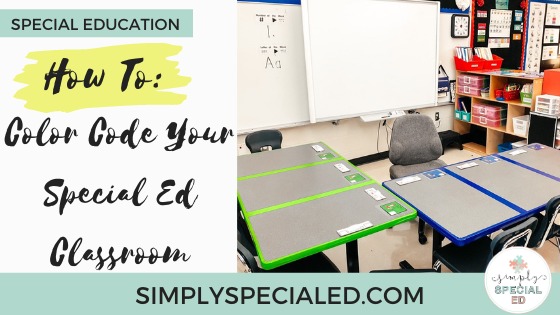
Color coding your special ed classroom can be a game changer for your organization. I have developed a system for color coding in my classroom to benefit my students and me as the teacher. Let me teach you how to color code your special ed classroom.
Assigning Colors
The first step in color coding your classroom is to assign colors. There are a couple options for assigning colors depending on the size of your caseload. I have nine students on my caseload this year, so each student has there own color. I have also used this system with 10 students. If you have more than 10 students on your caseload, you can look into doubling up colors if needed. You can get creative with how many colors you use. For example, I use red, dark blue, light blue, teal, green, yellow, pink, purple, and orange.
Color Coded Tables
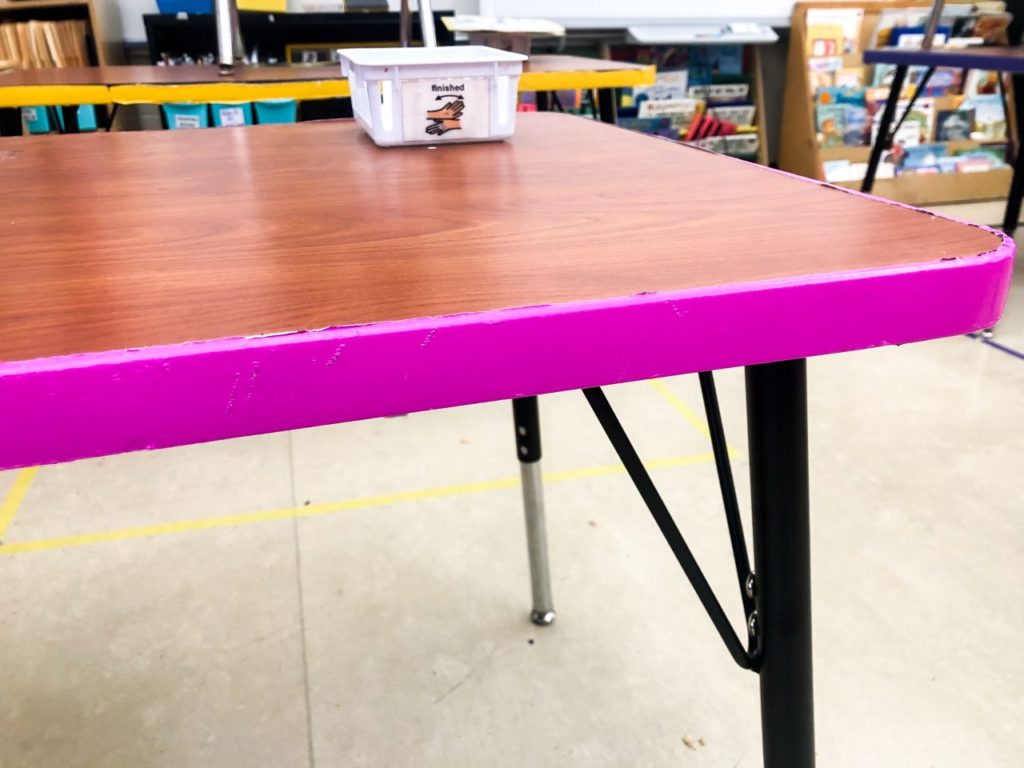
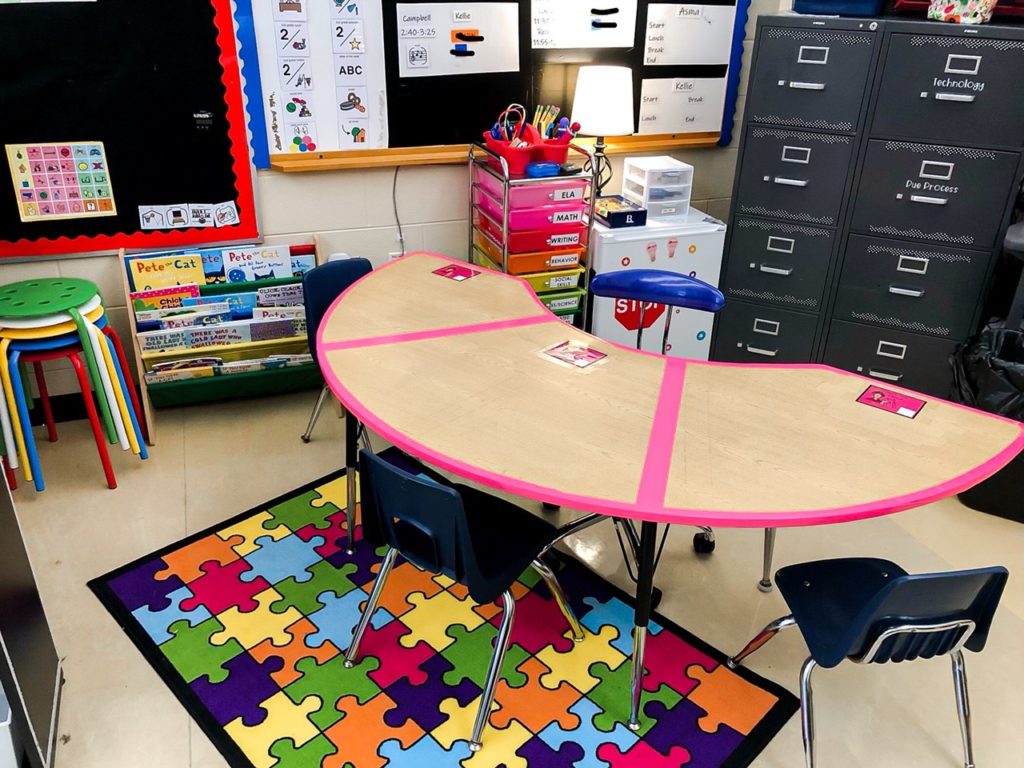
The next step to color coding your classroom is to color code your tables. I use duct tape around the perimeter of my tables to color code. I have color coded my tables in two ways:
- Color code a table for each student in their assigned color if each student has their own space
- Color code group tables with varying colors if each student does not have their own individual space
I typically follow the second way when we don’t have to social distance. For example, I would have 3 small group tables (pink, green, blue) and 2 independent tables (purple, yellow) that my students would rotate through throughout the day. On the student’s schedule, I would indicate where they were supposed to go by color coding their schedule piece, i.e. pink teacher table schedule piece indicated to the student to go to the pink table for small group. It never seemed to confuse my students that their color was the same as the table they were going to for that piece of their schedule.
Because of social distancing, each student has their own individual space, so their table is color coded to their assigned color. So, Student A is assigned green, so his table has green table around the perimeter. All of their activities in the classroom take place at their individual table, so their schedule pieces are color coded to indicate which table they should be at. For example, his reading group sign is outlined in green to indicate he is at the green table for reading. You can find great visual schedule pieces for color coding your classroom here.
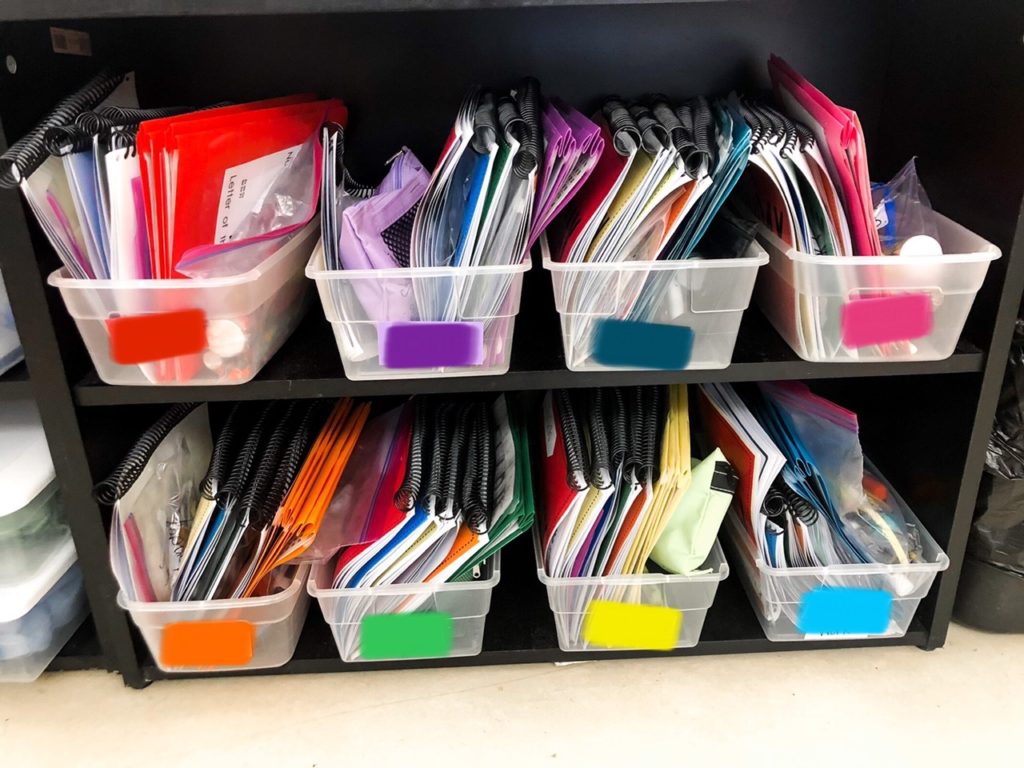
Bins and Cubbies
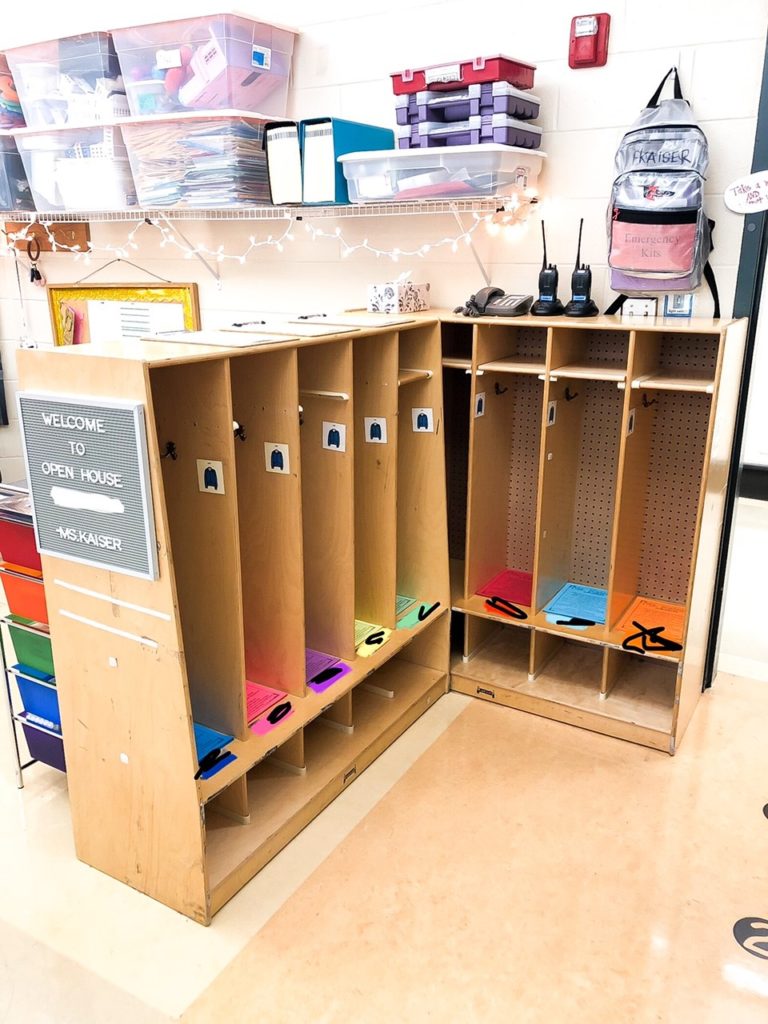
The next step in color coding your classroom is to color code any student cubbies or bins you will use. I have cubbies in my classroom for my students’ belongings. I color code the cubbies with the student’s name tag and picture on colored paper.
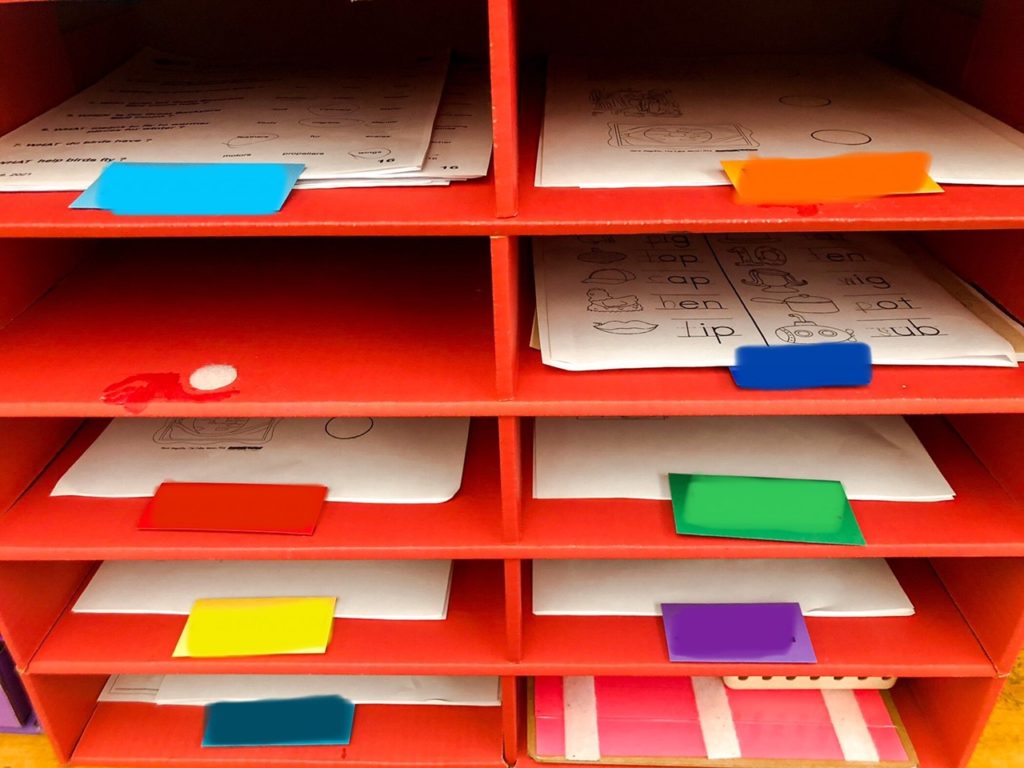
I have a mailbox in my classroom with color coded cubbies for each student. When a student is finished with their work, I tell them to put it in their mailbox and they are able to independently put it in their mail slot by finding their color coded name label. This is a great system to increase independence!
Schedules
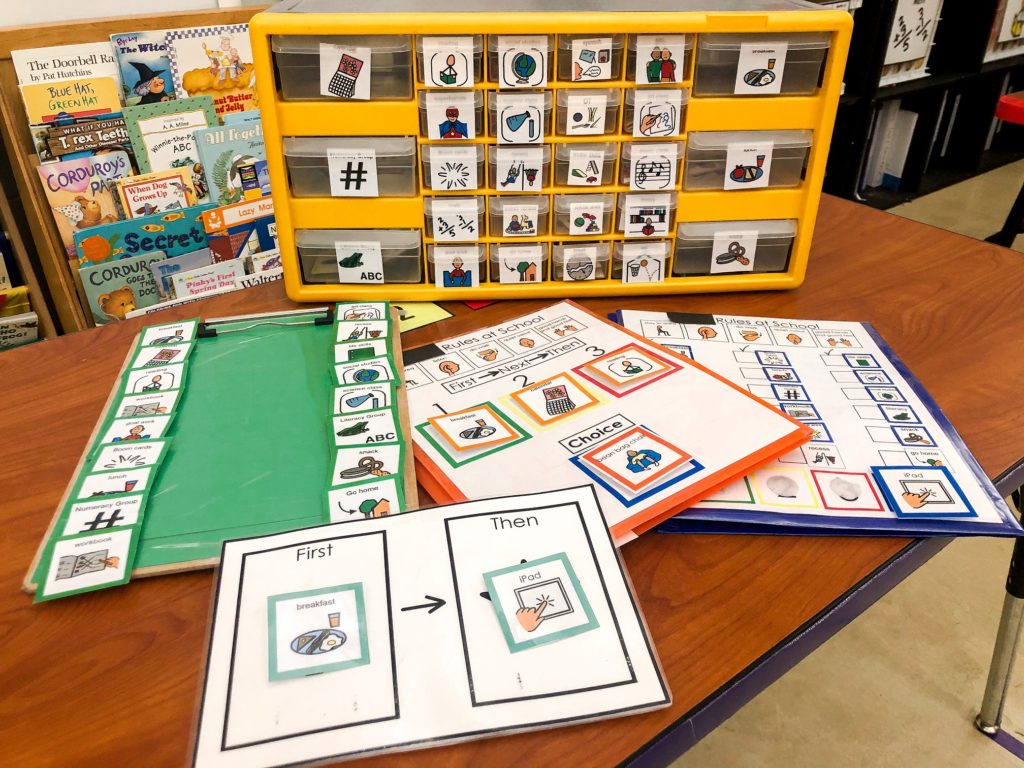
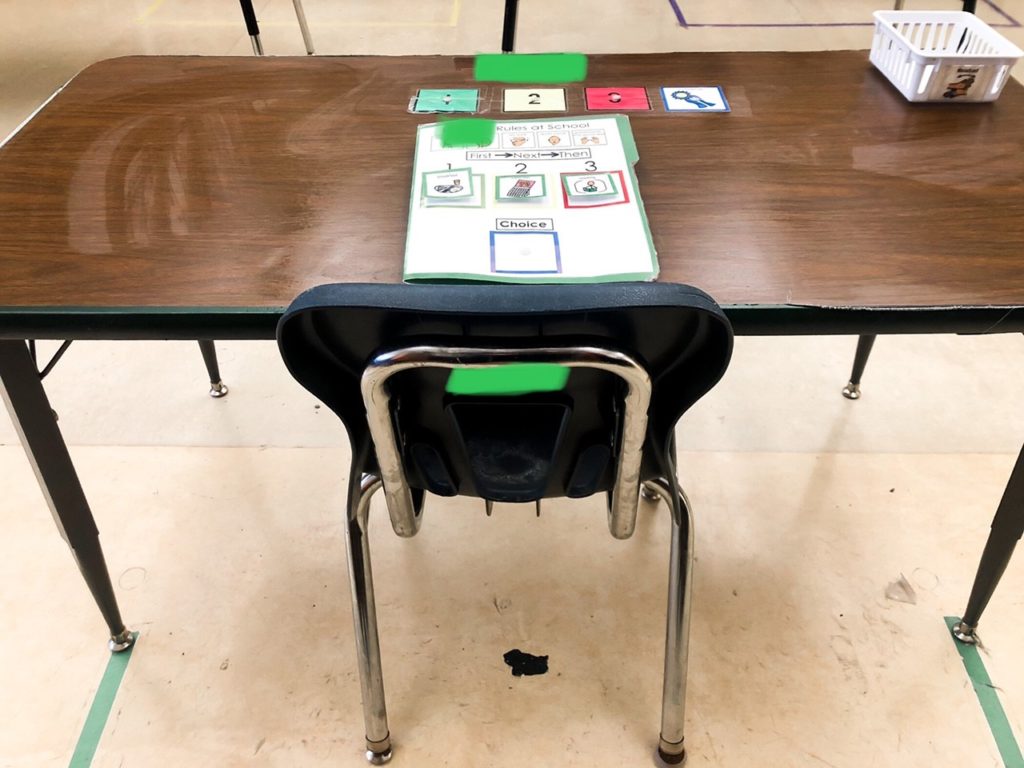
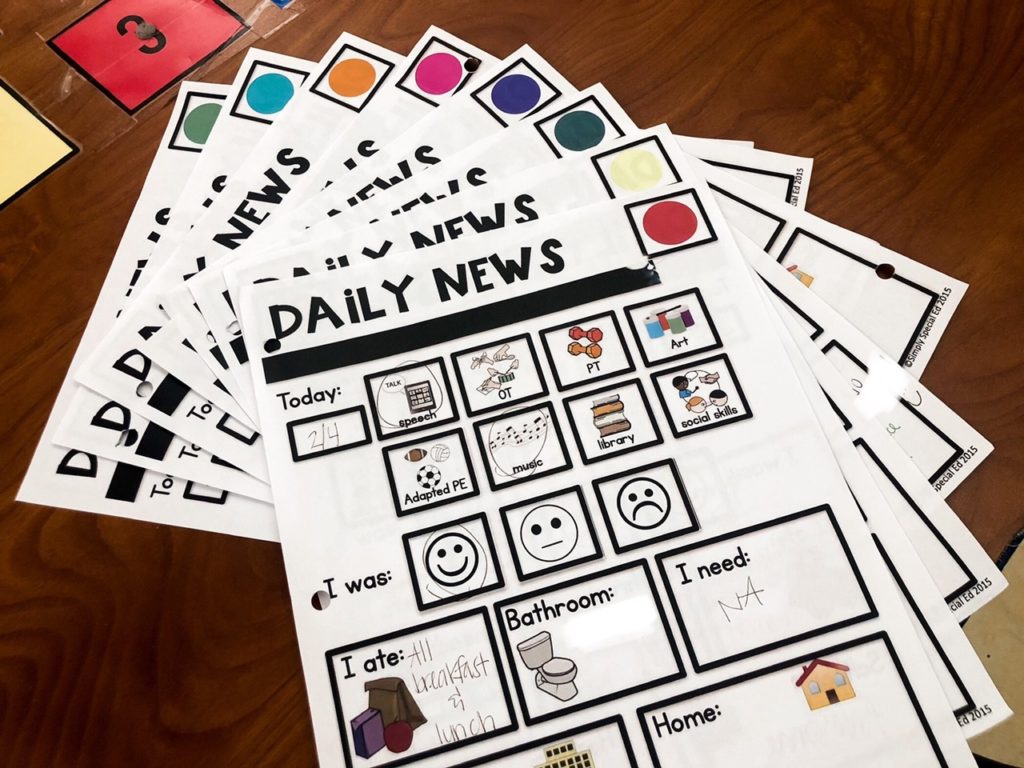
The next step in color coding your special ed classroom is to color code your student schedules. You can read more about the 4 types of student schedules I use here. I color code the folder or clipboard my students use for their schedules, and I color code their schedule pieces. You can find the type of schedule piece organizer I use here (affiliate link). I keep lots of extra schedule pieces in this organizer for whenever we lose pieces. In the photo above you can see how I color code my schedule pieces this year. The schedule pieces are color coded by student color because the activities take place at the student’s individual tables.
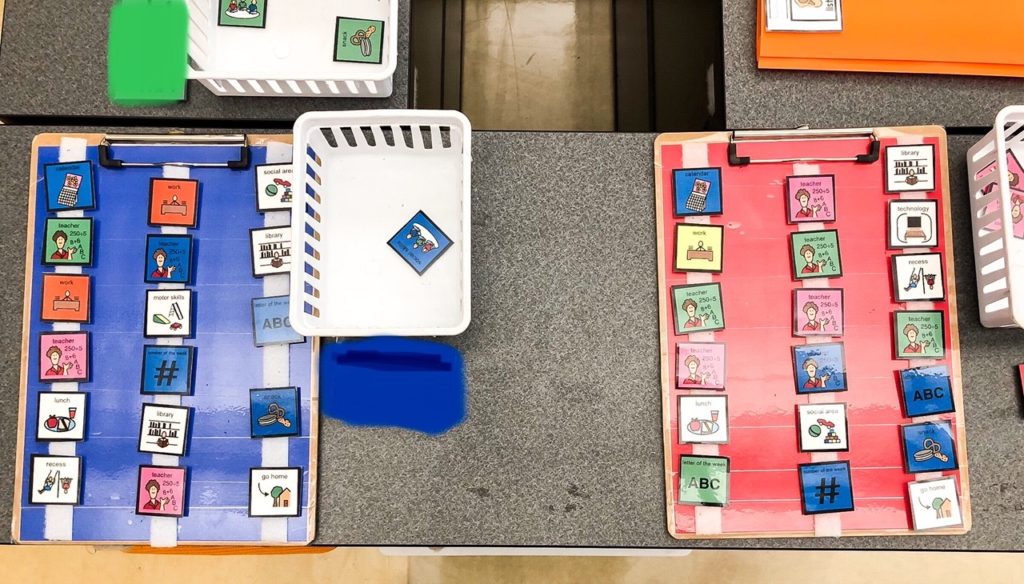
In the photo above, I have the schedule pieces color coded by table colors that the students rotate between throughout the day. For example, the dark blue schedule indicates that Student B will go to blue table for calendar, green table for small group, orange table for independent work, and pink table for small group.
Student Materials
I also color code any student bins in my classroom. Each student has a bin with their daily work, calendar mat, number and letter of the week mat, and pencil bag. I also have other bins for each student that hold sensory items. This is a great system to keep student materials separate and organized. I make name labels printed on the students’ assigned colored paper.
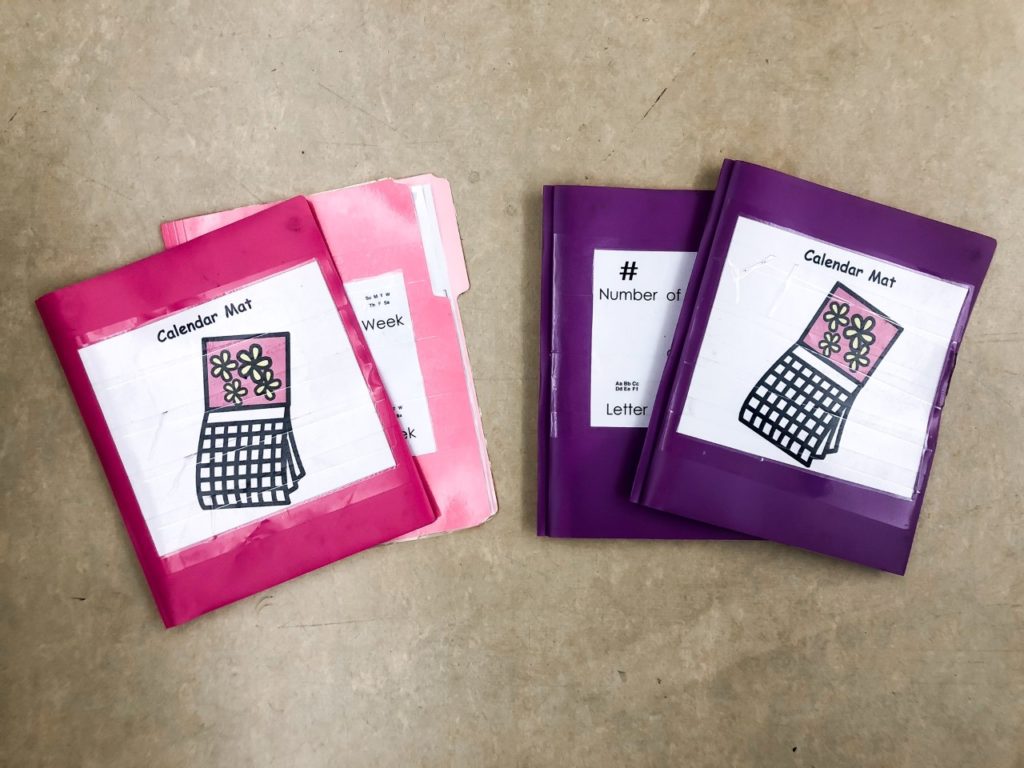
All individual student materials are also color coded. We use calendar mats and number/letter of the week mats for students to participate in each group activity. My students are able to find their own materials when they are color coded in their assigned color. Another great way to increase independence!
Color Coded Data System
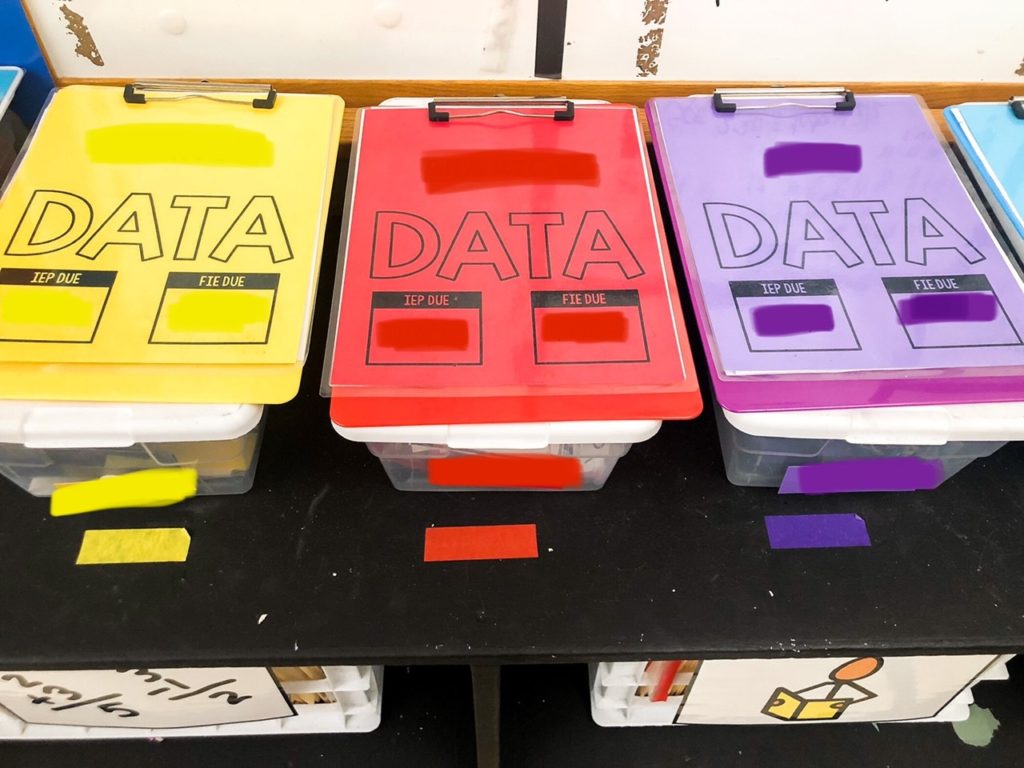
Next, you’ll want to color code your data system. I use IEP goal bins and data clipboards in my classroom. You can read about how to setup IEP goal bins here. Color coding all my data setup has been a game changer for me and my paraprofessionals. Everything is organized by student and color coordinated so it is easy to pull items needed to work with a student.
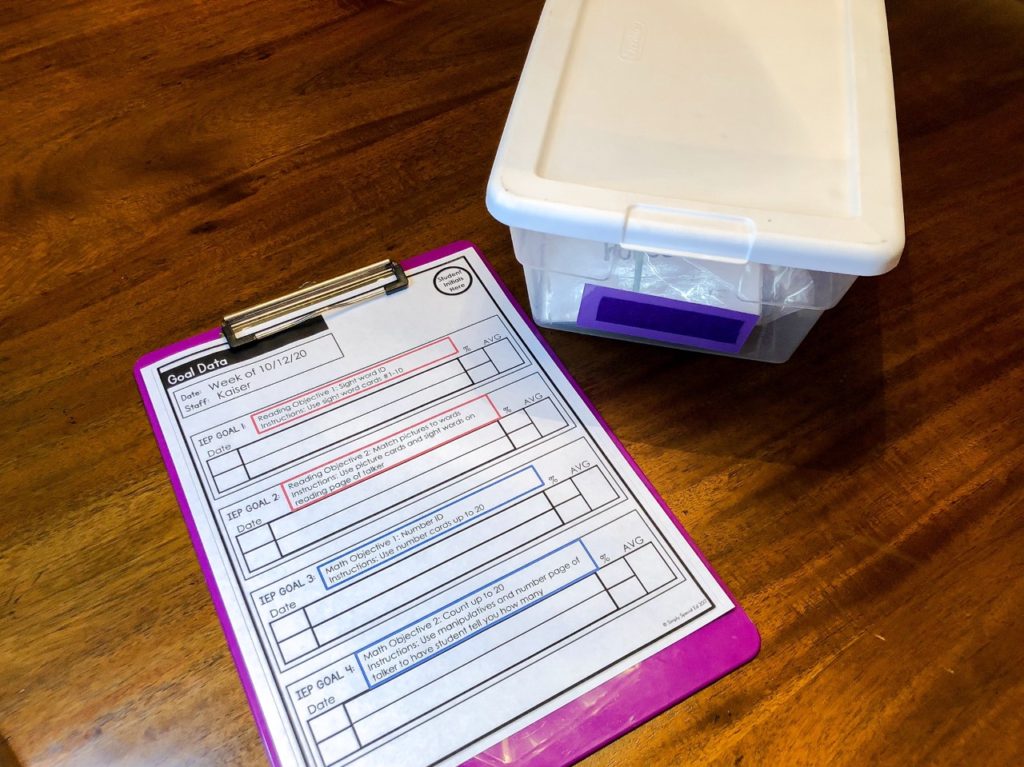
On my data sheets, I color code them by student at the top right corner. Then I make copies so I don’t have to worry about printing more data sheets all the time. You can find the data sheets I use here. I also color code IEP goals by subject. For example, reading is red and math is blue. I do this to organize IEP goal materials inside of the IEP goal bins.
Daily Communication Logs
The last step to coloring coding your classroom is to color code your daily communication logs. The communication logs I use are from the Simply Special Ed Shop found here. I color code my communication logs so that I can easily file them for the year in the student binders in my classroom. I can print and copy enough for the year so I don’t even have to think about it again.
Color coding my classroom has been a total game changer! It helps me stay organized, and it helps my students become more independent throughout their day. I hope you enjoyed learning about how to color code your special ed classroom! Any questions? Ask me below!