I’ve had a lot of changes this year. My class size almost doubled! I have a pretty small room. Having just six students, we fit just fine! Now, I had to prepare for eleven. I had a lot to think about and had to totally rethink my layout. Here’s how I set up my Junior High classroom for this year!
I work at a school in a small town in East Texas. My Junior High and High School class is made up of students with moderate to severe disabilities. I teach life skills, and we have students with Autism, low-incidence disabilities, and other intellectual disabilities. I wanted to make sure my students had the essentials:
- Space to work in small groups
- Space to work 1:1 instruction
- Whole group area for our Morning Meeting
- Independent workstation
- Relaxing area to take breaks
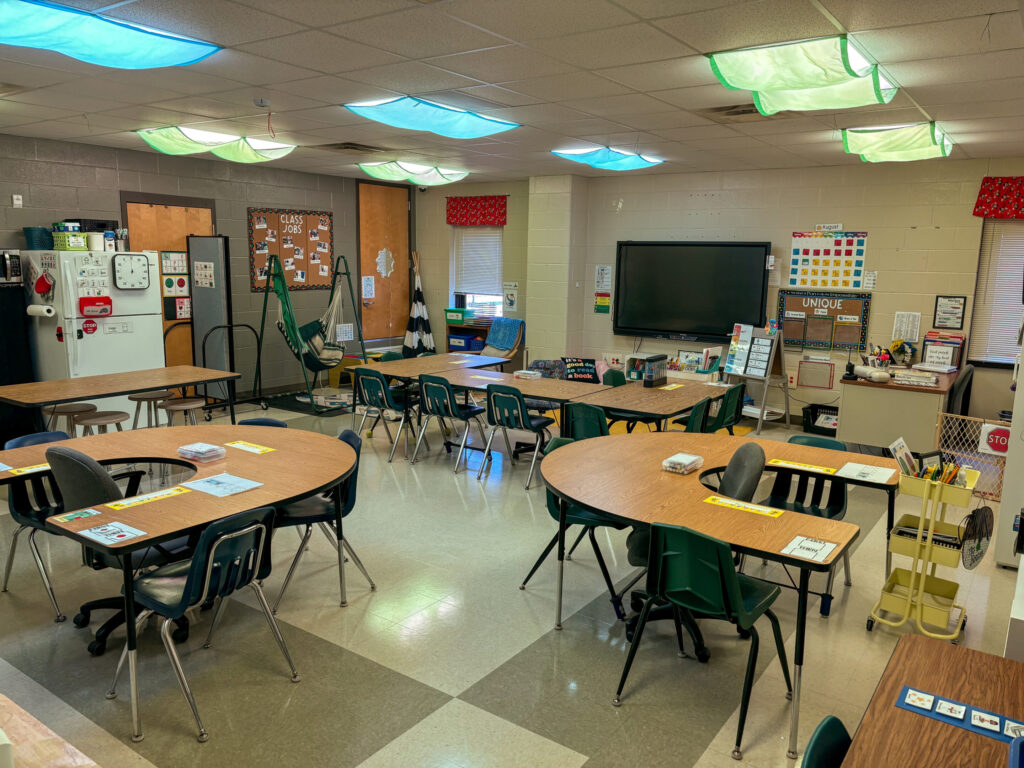
Our school has 3 dedicated classrooms for self-contained classes. 2 classrooms have built-in kitchens, a washer and dryer, and a bathroom with a shower. My classroom has 4 walls! The picture above is the entire thing. Luckily we have a small bathroom with a toilet and sink, but we had to get creative to practice other skills like cooking, washing dishes, or washing clothes.
Whole Group Area
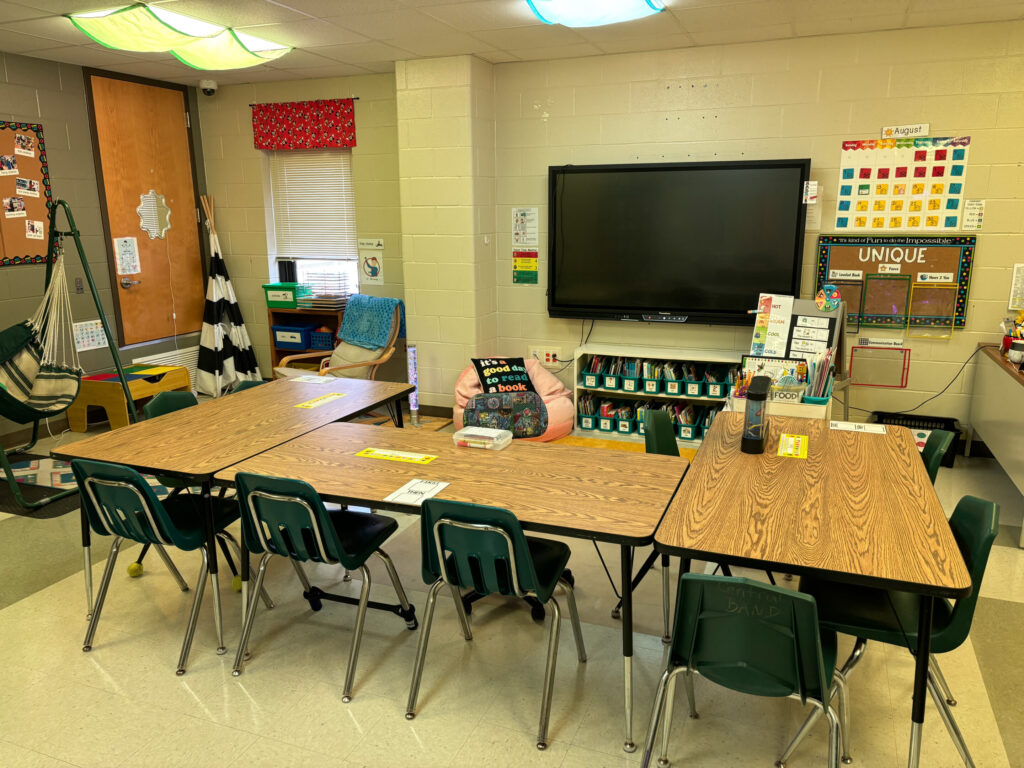
I moved my large rectangular tables together because I needed a bigger group table for our Morning Meeting and Science Group time. We created a U shape out of three tables and centered it in front of the touchscreen board. The board is where I project slides for our Morning Meeting or open the curriculum we use for science instruction. Just starting with a Morning Meeting? Check out this option with real pictures!
Students can also use the seats at the table for 1:1 instruction or practice if needed.
Small Group Areas

I have two horseshoe tables for small group or 1:1 instruction in my room. When students check their schedules for academic work, they take it to the small group tables to work with either me or one of my two paras. We utilize these 2 tables plus the whole group table for instructional centers, and students rotate who they’re working with every day.
P.S. – I LOVE our Life Skills Word Wall! Get it here! I put it on our dry-erase board so the words are easily removable if we need them for vocabulary/writing stations or as visuals for other tasks.
Independent Workstation
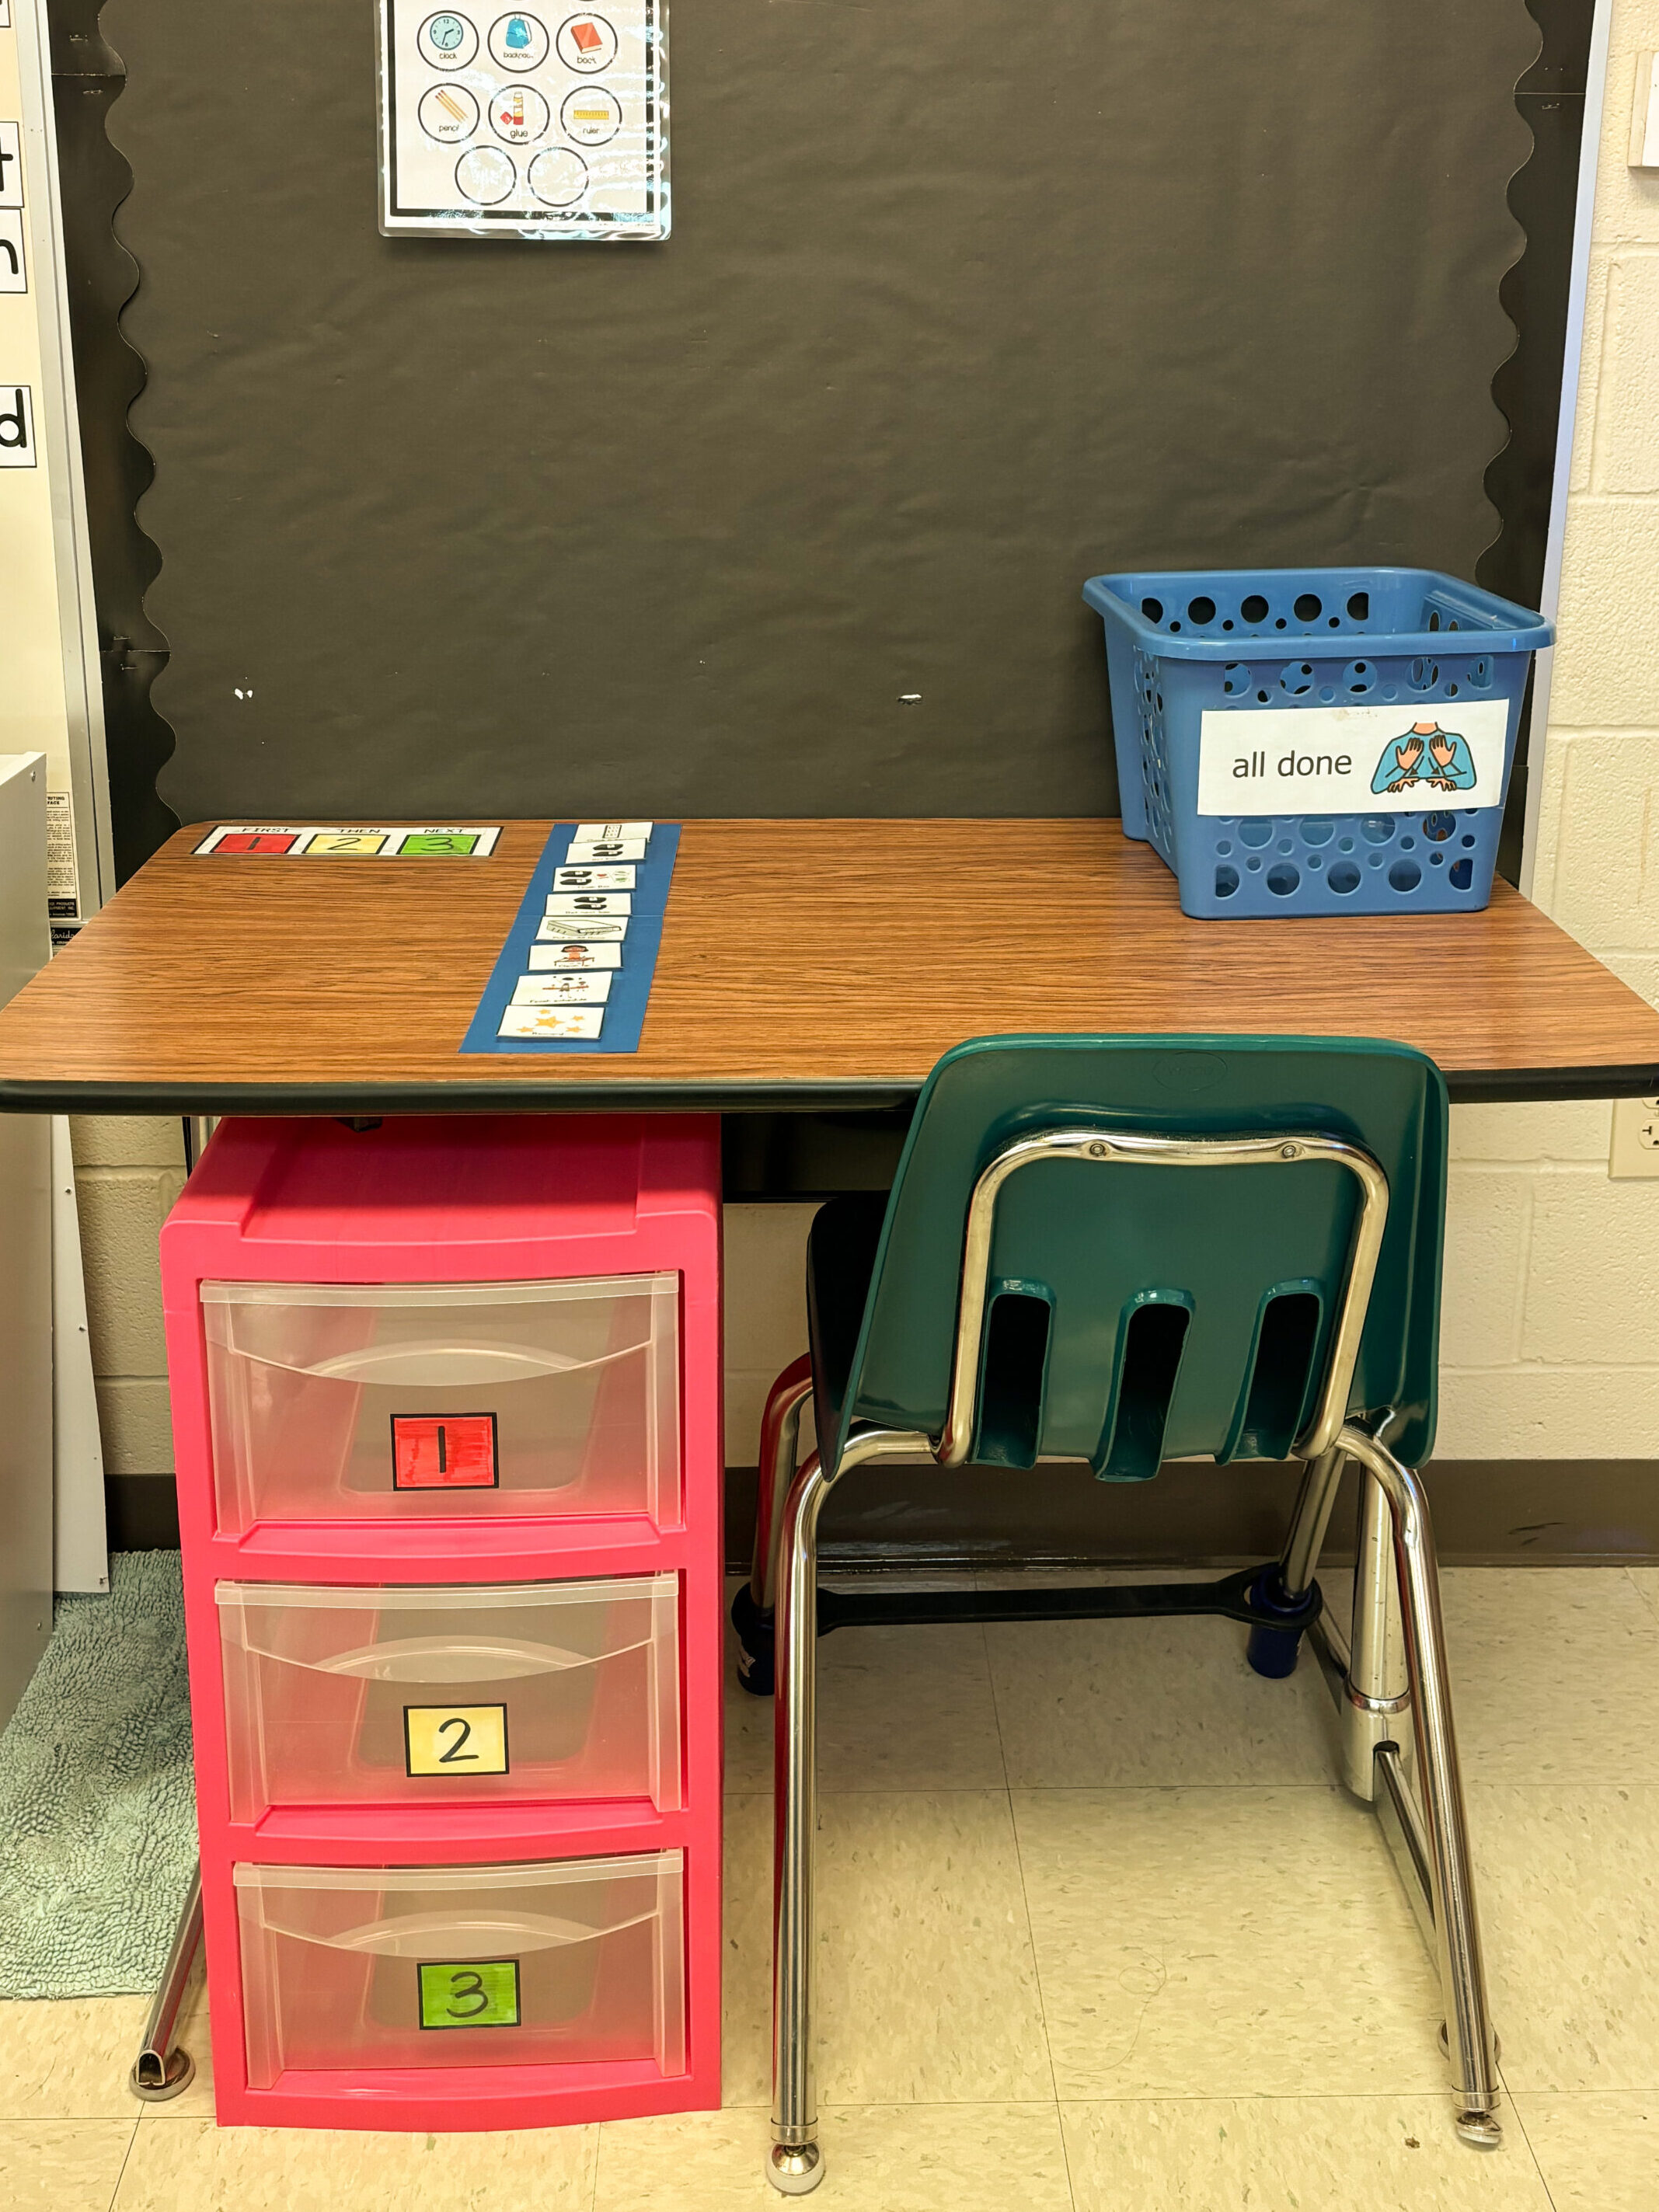
I had just enough space, and I wanted to make this independent work station a priority. Here students can practice working on their own to complete a task. I set up a 3 drawer work system.

I also love these visuals from the shop! There are many options in this bundle and they will help you to explicitly teach routines during the first few weeks of school.
Visual Schedules
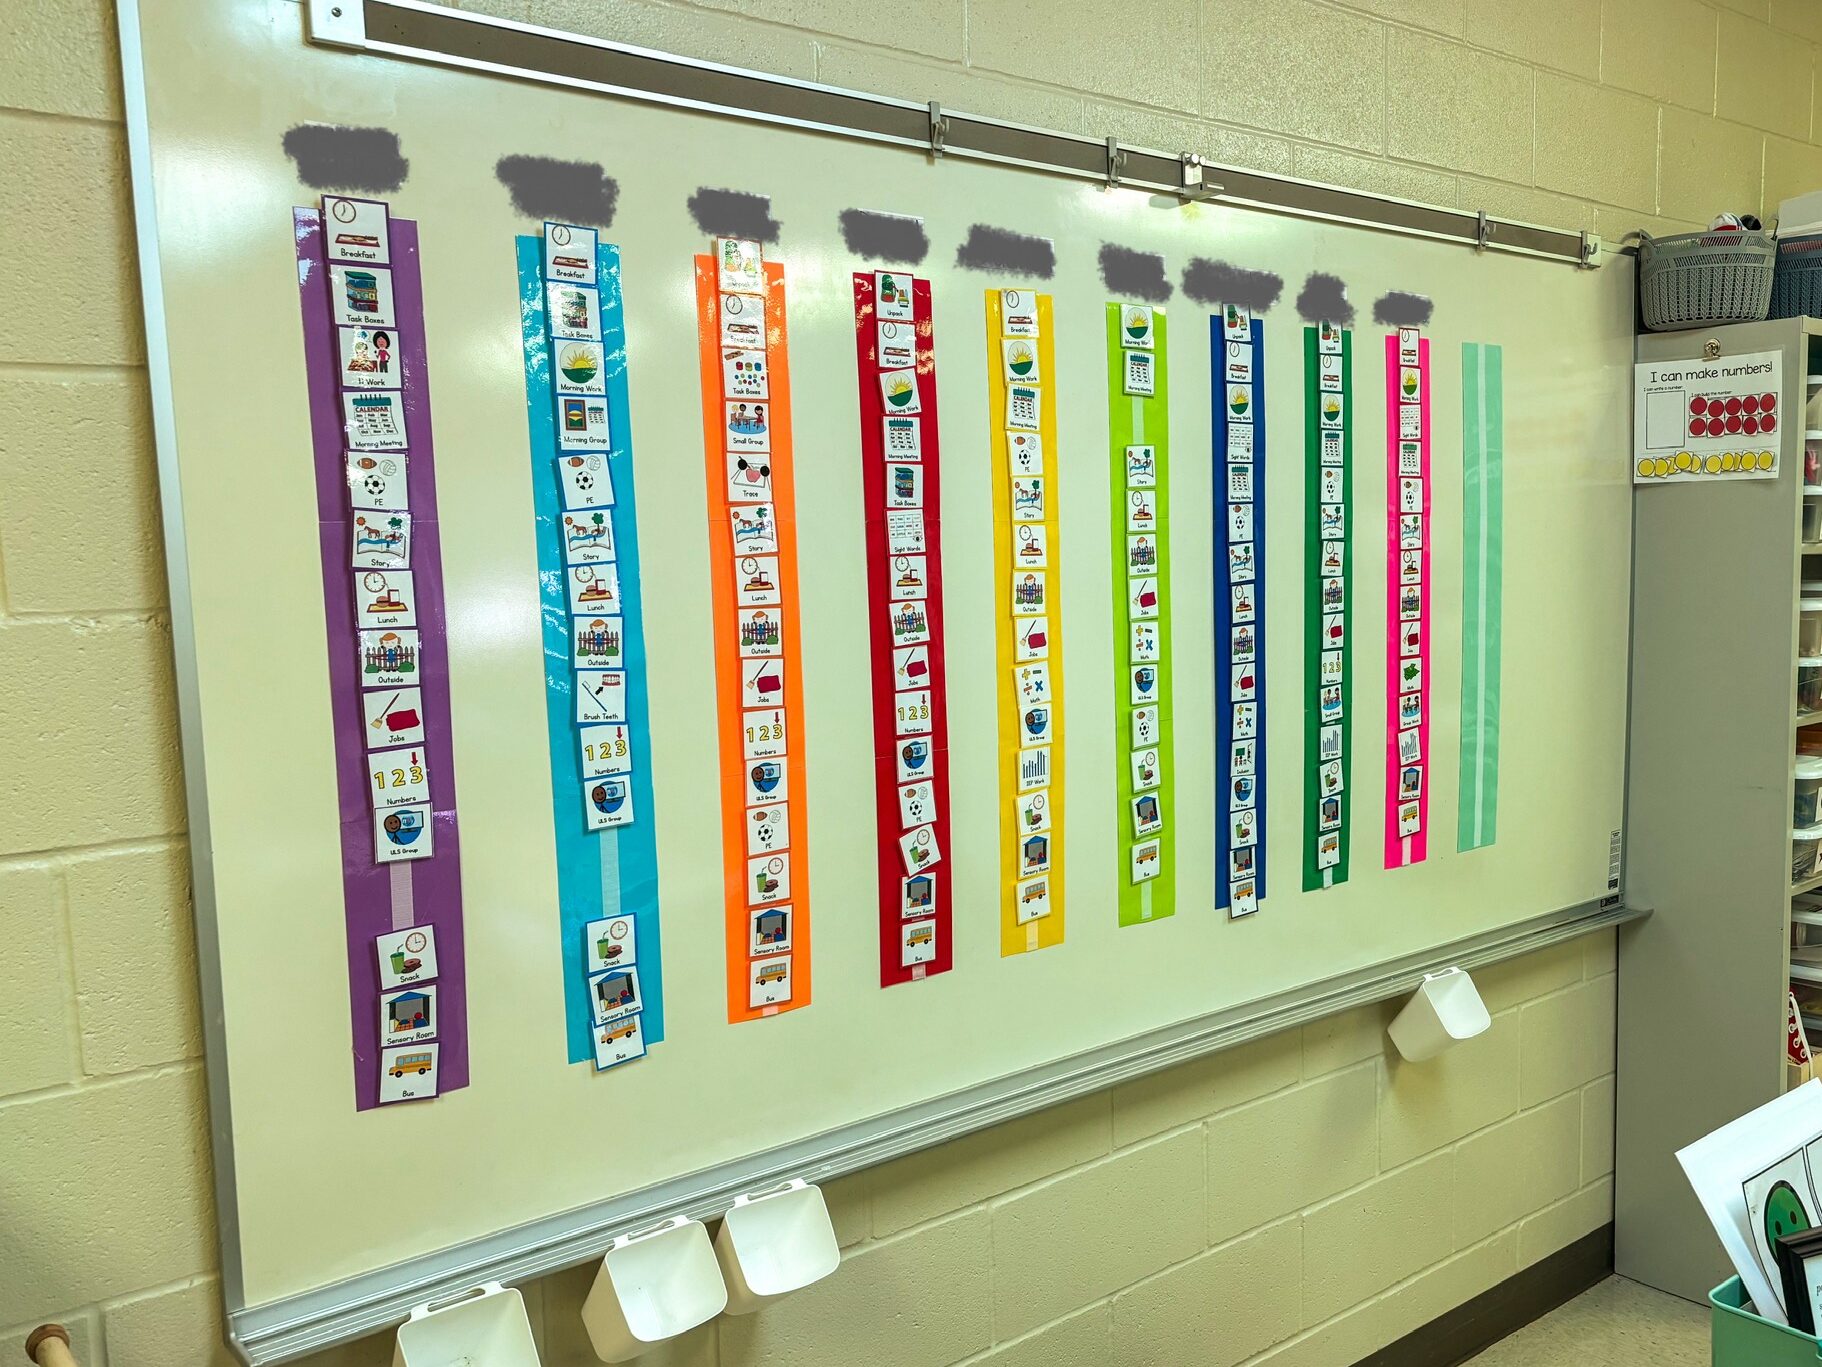
Student visual schedules are posted along the back wall of the room. Everyone has an assigned color. I love this set from the Simply Special Ed Shop because the color coding makes it easier to sort the pieces! I also placed a small bucket underneath each schedule for students to place the pieces when they’re “all done.” Students take their schedule pieces off in order from top to bottom.
Student Break/Free Choice Area

In the break/free choice area, we have a comfy chair, a swing (students LOVE the swing), a small LEGO table (that they also love), and a shelf of preferred items. I’ve also placed some of our favorite sensory items in this area like the bubble tower and galaxy lights, as well as a mirror with built-in LED. Even though we are in a Junior High Classroom, I wanted to incorporate the things my students like for incentives. We still have lots of plastic animals, cars, and puzzles.
We also have a screen that can unfold to make the area more closed off for calm down.
Kitchen Area
We have a refrigerator in our classroom where we house student snacks or ingredients for Friday cooking projects.
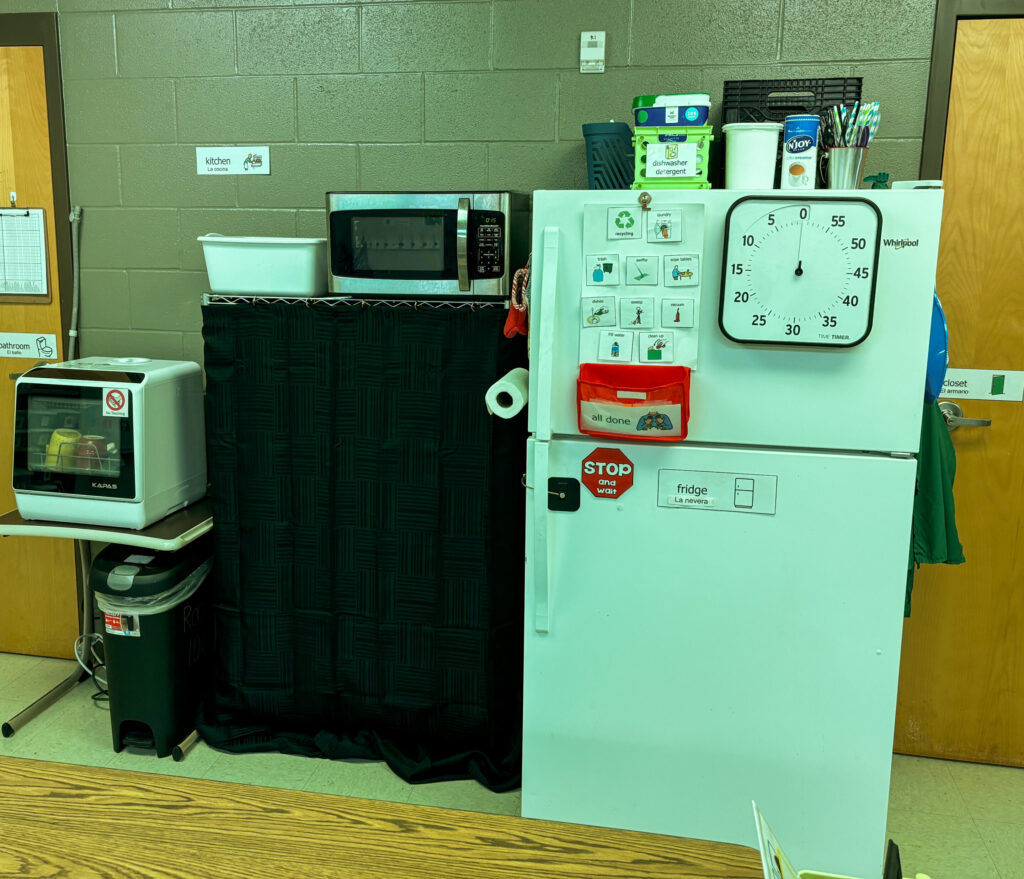
To be able to practice washing dishes, I opted for a small tabletop dishwasher (seen on the left). My students love washing dishes with it! The one I chose can hook up to a water line, but we use pitchers to fill it up from the top. Students also like to watch the dishes get washed through the open window in the front.
I keep a black curtain covering dishes, utensils, and dry foods that we don’t want students to have 24/7 access to.
Teacher Area
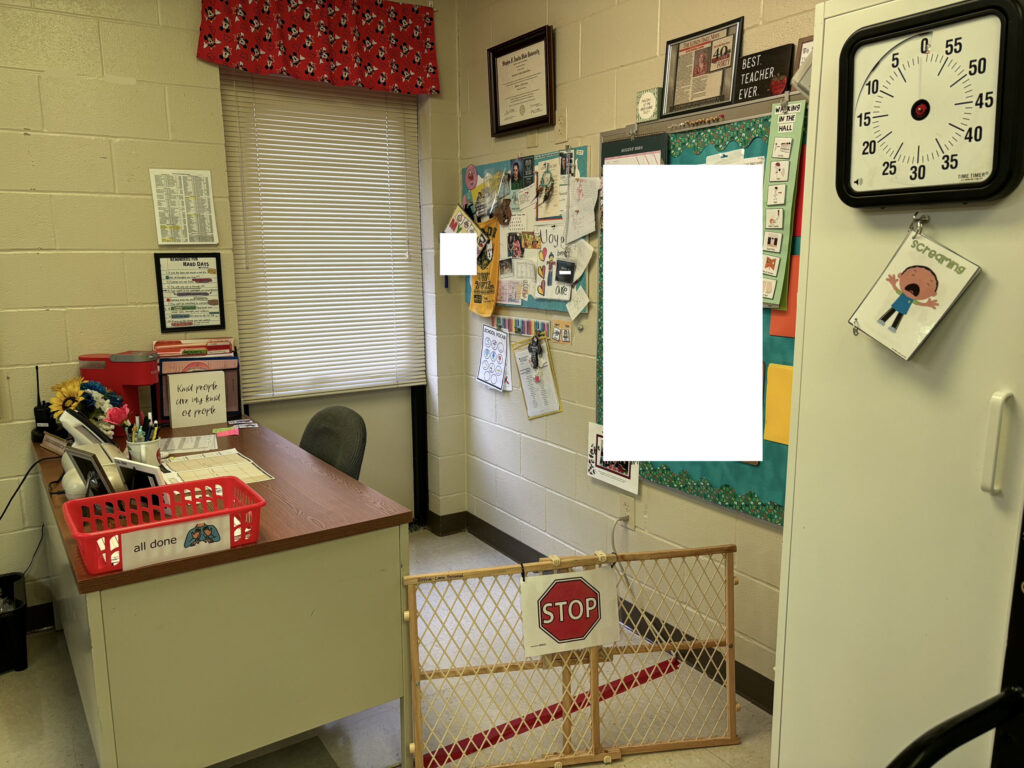
My teacher desk contains files, curriculum pieces, and office essentials like some tape, a stapler, tacks, etc. I don’t have the opportunity to sit here much during the day, but during my conference I can plan lessons or write IEPs. I have a white cabinet full of tasks that can be pulled when needed. The board behind my desk is like our “information station” for myself and my paras. It has a bell schedule, calendar, and IEP documentation sheets for us to grab and track goals. I desperately wish I could give my paras each their own desks, but we just don’t have the room right now.
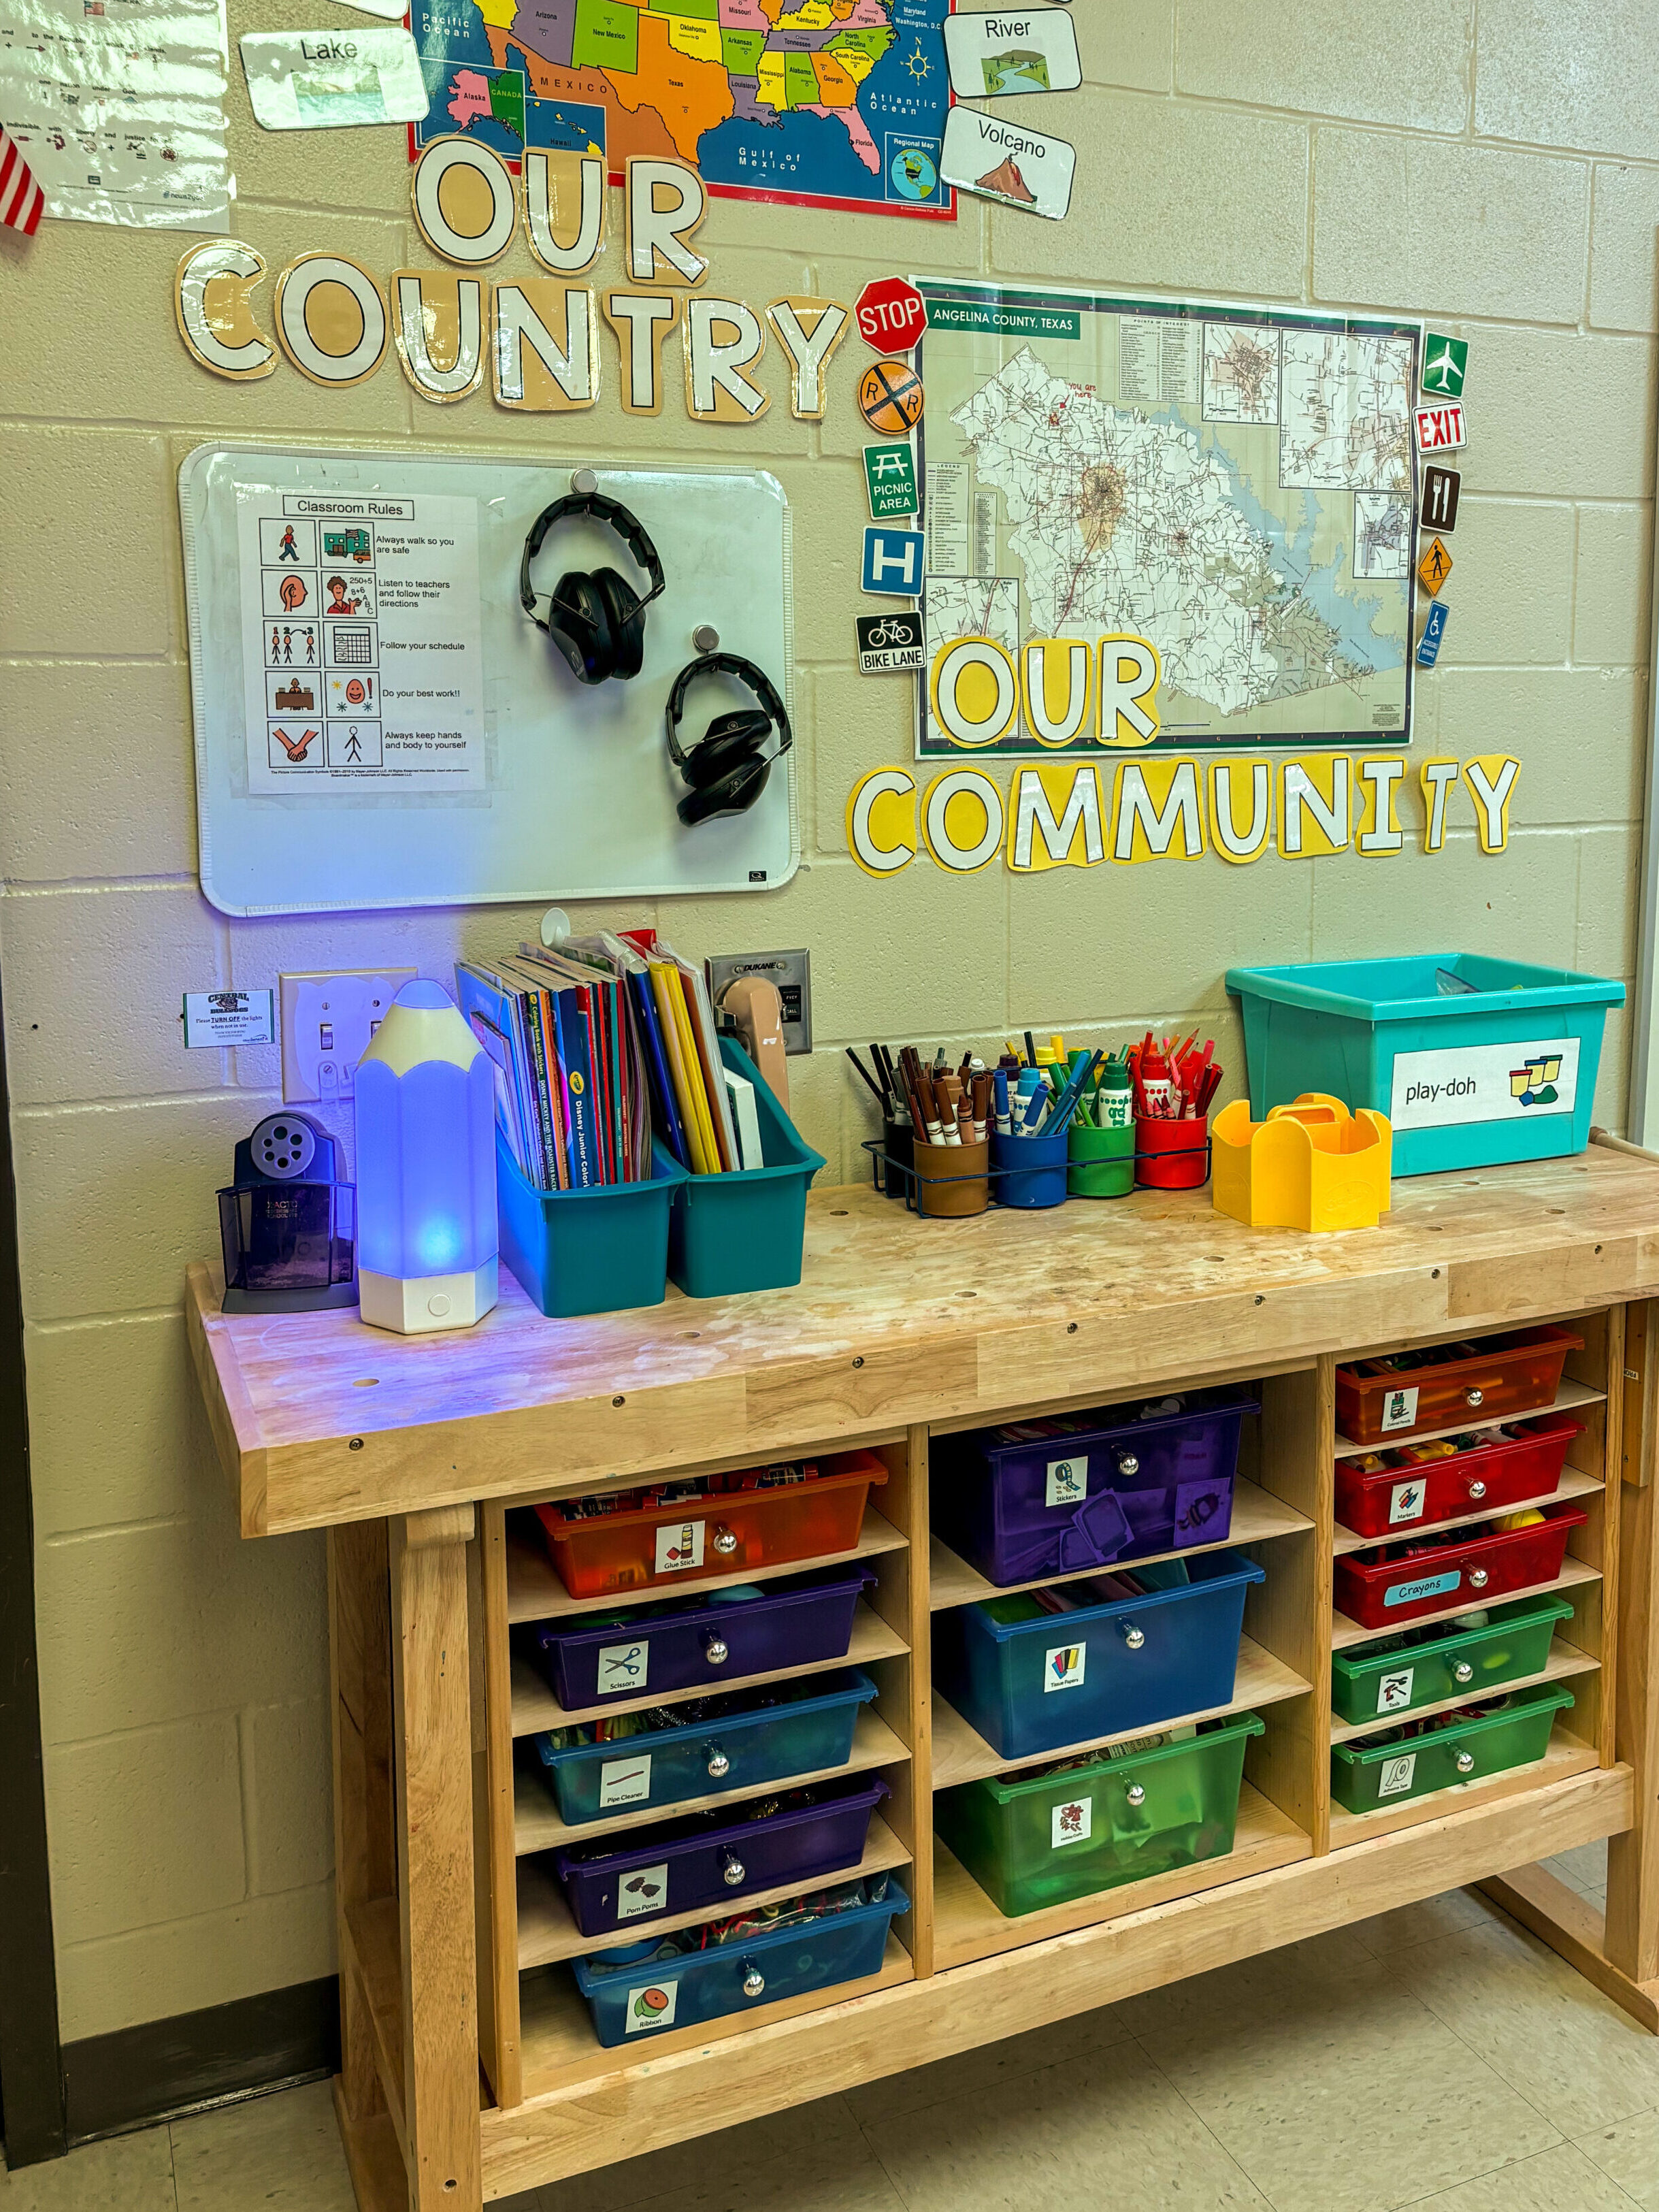
Other Things We Love
I have a supply table with drawers of supplies that students are welcome to use at any time. Additionally during academic instruction, when students need extra supplies, they know exactly where to find them. Each drawer is labeled with a visual students who are nonreaders.

We love task boxes and promoting independence! The task box shelves hold the task boxes for students to take and complete independently. Learn more about organizing a task box system here.
However you set up your classroom, just remember – it needs to work for you and your students. It does not have to be the most picture-perfect “Pinterest classroom.” My job as a teacher is to help my students learn and grow. If my classroom is functional and I’ve created an environment where my paras and I can serve the students, that classroom is perfect to me!

Whether you’re a first-year teacher or have years of experience, setting up a new classroom can become overwhelming fast! Take it one step at a time and keep it simple. Thanks for touring my (soon to be) autism classroom with me. For even more information on how to setup your classroom, sign up for the waitlist here for Simple Self-Contained Setup 101, the complete roadmap to a stress-free classroom!


