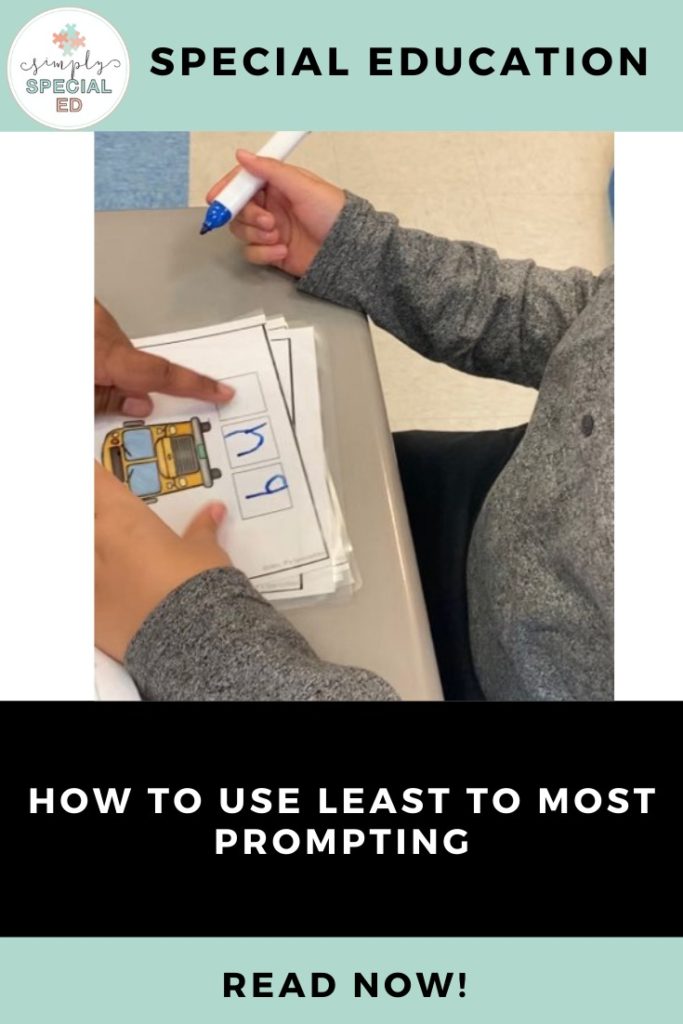
As a special education teacher, you are probably familiar with the prompt hierarchy (and if you don’t, no worries! Keep reading!) . Prompts are a great way to get your students closer to independence without doing the task for them. But do you know when to use each type of prompt or why? In this post, we will review the prompt hierarchy as well as learn how to use least to most prompting.
The Prompt Hierarchy
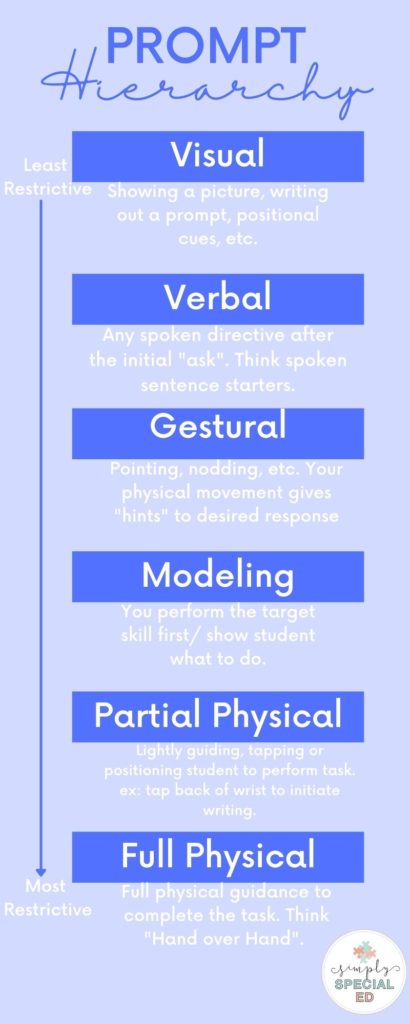
The prompt hierarchy is a visual representation of how we can support our students in task completion. Depending on which way you read the hierarchy, you can visually represent most-to-least prompting or least-to-most prompting.
You may see the prompt hierarchy represented as a ladder, a pyramid and/or a flow chart. There are lots of different ways to represent the same information; find the way that works best for your understanding! Below you will see a visual I made to explain the prompt hierarchy with some examples of each level.
What is Least-To-Most Prompting?
“A technique of transferring stimulus control in which the practitioner gives the participant an opportunity to perform the response with the least amount of assistance on each trial.”
Cooper, Hewitt, Heron 2020
Now, let me explain. Similar to the idea of Least Restrictive Environment (LRE), using least-to-most prompting is utilizing the least restrictive or invasive prompt level in order for your student to see success.
When you present your student with a task, you should know what kind of support they may need based on their prerequisite skills. It is important to note, just because you are using least-to-most prompting does not mean you have to start with a visual prompt. The visual prompt may not be helpful for a student who does not have the necessary skills to attach meaning to the visual. So, start at whatever the least restrictive prompt is most appropriate for your student.
Prompting in Action
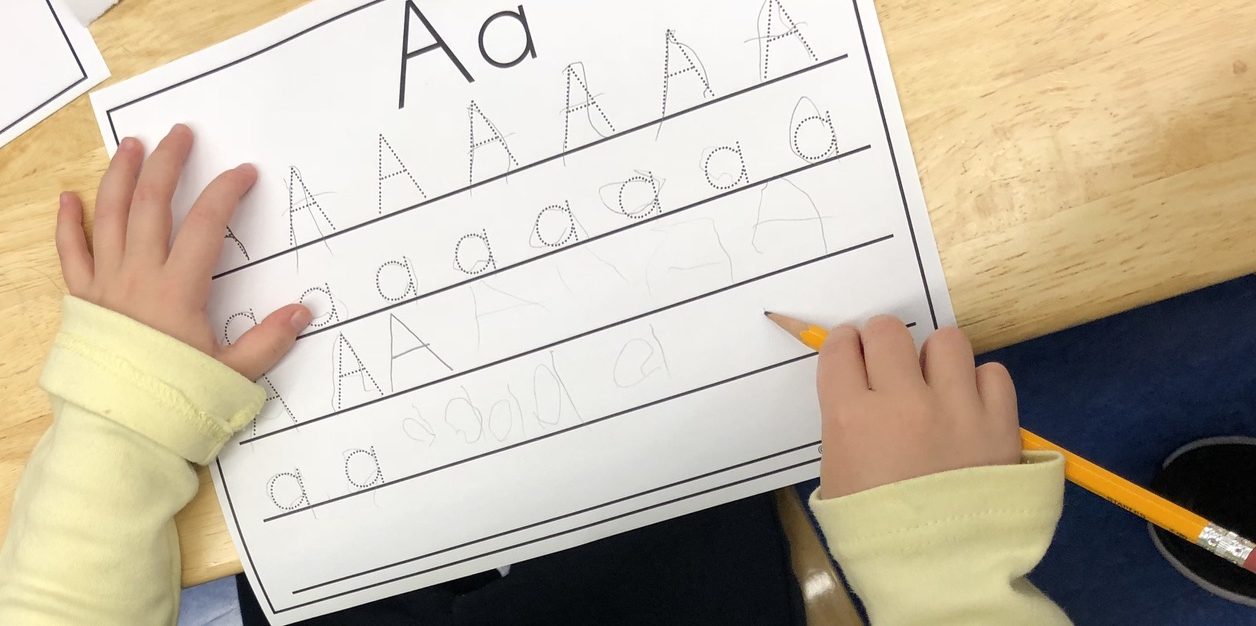
Example #1
Example #2
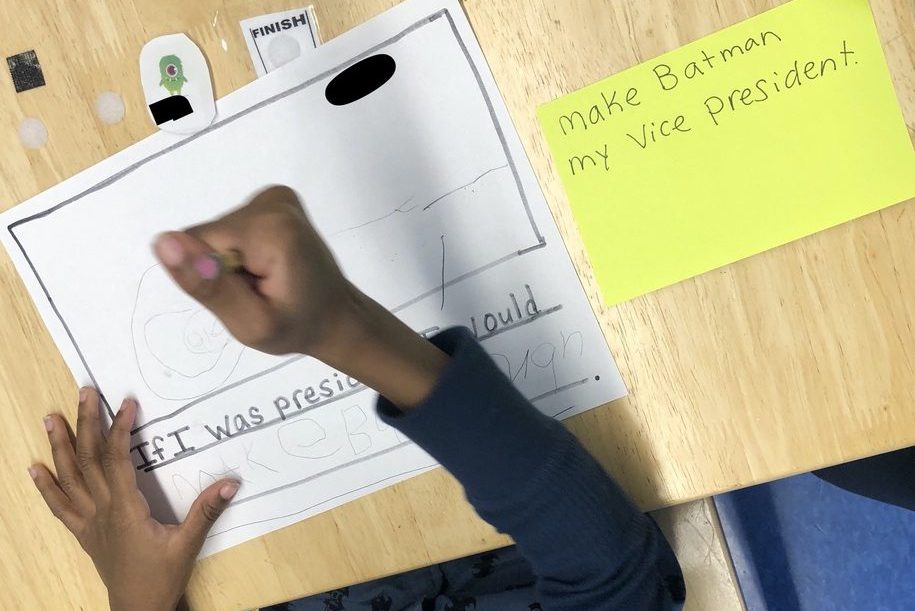
Both examples 1 and 2 are examples of visual prompts.
As you can see in Example #1, the prompt is written on the page for them to trace. This visual prompt shows the correct letter formation. By the end of the worksheet, the prompt has been faded and the student is writing their letters independently.
In Example #2, the student is able to write their letters independently so the visual prompt was to help him remember what they was writing about. Writing the prompt on a Post-it requires the student to be able to transfer and copy (pre-requisite skill) but because of proximity to the student and their work, it can be easier than copying from the board.
Example #3
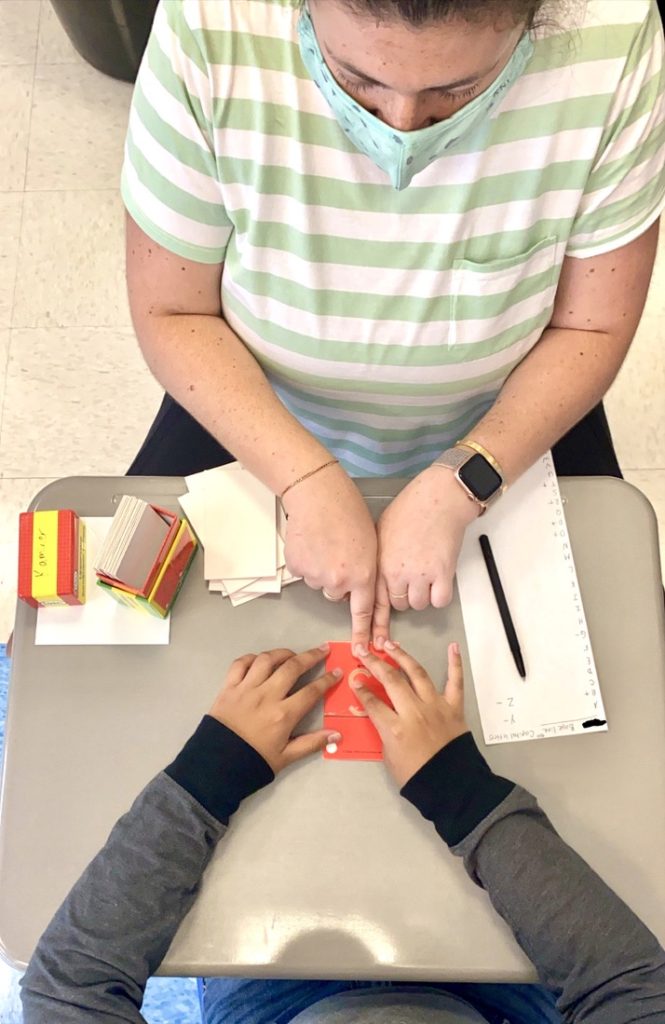
Because I am simply pointing to the card and not helping this student trace the letter, this is a gestural prompt. This gestural prompt was primarily to help the student maintain focus on what what in front of them.
Example #4
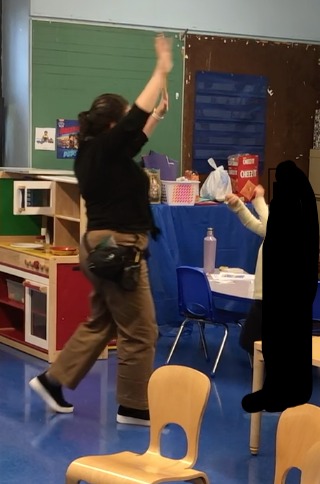
If you said that I used a modeling prompt, you’re right! I showed this student exactly what they should be doing. I kept my arms straight up until their body matched mine.
The difference between a modeling prompt and a gesture prompt can be difficult to determine. Remember, in a gestural prompt, you are giving clues to what the answer is during or after a student’s attempt to give the correct response. In a modeling prompt, you are showing the student exactly what you want them to do (prerequisite is imitation). Gestural prompts are less restrictive than a modeling prompt.
What’s the deal with physical prompts?
If you are going to use a physical prompt, ask the student before you start. Not only does this model consent, but it also allows for your student to assert their agency over their own body. Does your student elope from the group? Hold their hand (or tap their shoulder, less restrictive but also more of a risk) to remind them to stay with you. A student learning how to wash their hands? Pair a visual task analysis (visual prompt) with a mild partial physical prompt at the elbow to let them know it is time to move on to the next step. For behaviors like writing, tying shoes or any type of movement, I don’t use physical prompts.
Simply Special Ed blogger Taylor wrote a post about why she as an OT does not use hand over hand.
How to use Least-to-Most Prompts
For each opportunity to respond, the student should be given their least restrictive prompt level first.* If the student is able to respond correctly at that level, great! Continue using that prompt level. If the student responds incorrectly or does not respond, increase the prompt level (more restrictive prompt) until the student responds correctly. You may move only one level up the hierarchy, or you may move through the entirety, depending on what your student needs. Typically, I will have the student provide 3-5 correct responses at the more restrictive prompt level before I begin to fade the prompt level again.
*Note: Generally, you will know what prompt level you need to start with. If you know your student is successful with a gestural prompt but not a verbal prompt, don’t start with a verbal prompt. You do not need to touch on every prompting type in every lesson.
Fading Prompts
When using least-to-most prompting, you will begin fading prompts when the student is able to complete the task at their lowest prompt level. So if your student starts at a gesture prompt and responds correctly each time, try a verbal prompt! If they continue to be successful, continue to fade the prompting until they are completing the task independently.
Remember, the goal of prompting is to move the student toward independence.
Have any prompting questions? Drop them in the comments!