Laminating is a game-changer for special education teachers! It keeps materials durable, reusable, and easy to clean. But if you’ve ever dealt with bubbling, peeling, or jagged edges, you know it’s not always foolproof. Here are some insider laminating tips that will save you time, money, and frustration!
1. Let Your Laminator Fully Heat Up
Patience is key! If your laminator isn’t fully heated, your pouches might not seal properly, leading to peeling edges. Wait at least 5-10 minutes after the ready light turns on for the best results.

2. Use the Right Pouch Thickness
Laminating pouches come in different thicknesses, measured in mils. Here’s when to use each type:
- 3 mil: Best for flexible, easy-to-cut materials like worksheets.
- 5 mil: Great for visuals and task cards that need durability.
- 10 mil: Perfect for heavy-duty, long-term use (but harder to cut).
Always check your laminator’s settings to ensure it can handle the thickness!

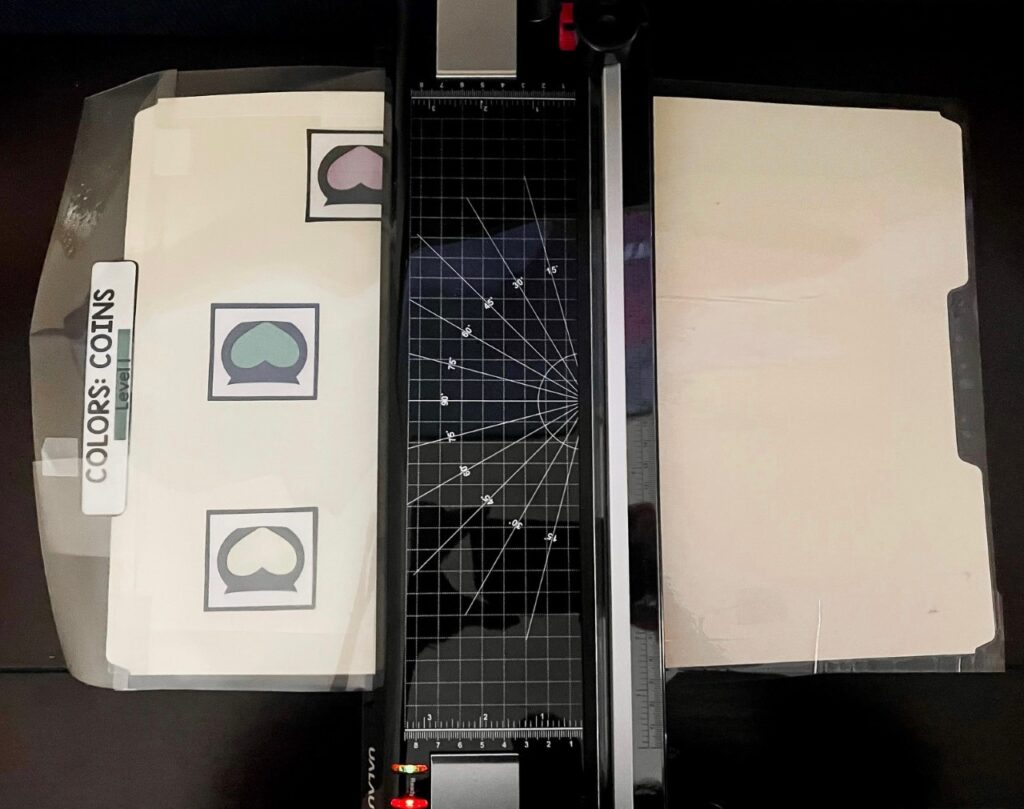
3. Trim AFTER Laminating for a Perfect Seal
Cutting your materials before laminating may seem like a time-saver, but it often leads to lifting and peeling. Instead, laminate first, then trim with a small border around the edges.
4. Avoid Bubbles with This Simple Trick
Before feeding your pouch into the laminator, rub it with a ruler or credit card to press out air bubbles. This helps prevent those annoying pockets of air from forming.

5. Feed the Sealed End First
Always insert the sealed edge (the folded side) of your laminating pouch into the machine first. This ensures a smoother seal and prevents jamming.
6. Use a Dryer Sheet to Reduce Static
Laminated materials can sometimes cling together. Rubbing a dryer sheet over your finished pieces will remove static and make them easier to separate.
7. Cool Before Cutting
Hot lamination pouches can warp if handled too soon. Let them cool on a flat surface for a few minutes before cutting to avoid curling edges.

8. Reinforce with a Second Pass
If you notice weak spots, send your laminated piece through the machine again for an extra-strong seal. Just make sure it’s not too thick for your laminator.
9. Laminate in Bulk to Save Time
Instead of turning your laminator on for small batches, set aside time each week to laminate everything at once. This extends the life of your laminator and saves time in the long run!
10. Store Laminated Pieces Flat
To prevent curling, store your laminated visuals and task cards flat under a heavy book. This keeps them smooth and prevents edges from bending.
My Favorite Lamination Items: (These are affiliate links)
- The Best Laminator
- Laminator for File Folders
- The Best Lamination
- Buying Velcro in Bulk
- Pouches for File Folders

Get More Classroom Hacks!
Laminating is just one piece of making your special ed classroom run smoothly! For more classroom setup and organization tips, check out Simple Self-Contained Setup 101®—your complete guide to creating a structured, stress-free classroom.
