You all LOVED the 4 simple task boxes I shared here, so here are 4 more! SIMPLE task boxes that don’t cost a fortune and are low level for independent work and beginning learners are so hard to find. What’s even harder to find is ones that are appropriate for ANY age. These 4 hit all those marks!
((This blog post contains affiliate links for your convenience. You don’t pay any more by clicking my link (and I actually find the best prices for you!) but I make a small commission off of sales. This helps me to test out more materials and bring you more quality content. Thanks for supporting my little blog!))
TOOLS (affiliate links below):
+ Heavyweight plastic File Folders
+ Strip Velcro (this is amazon, similar at Feiner Supply, my favorite for bulk)
+ Toothbrush Cases (variety of colors)
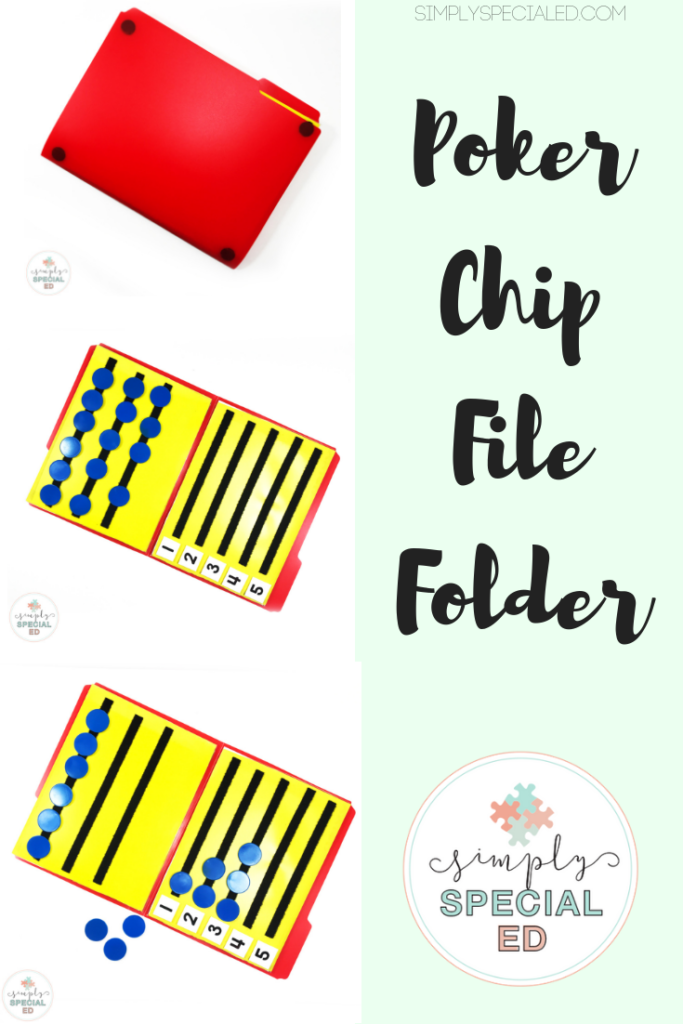
The poker chip (or bingo chip! ((affiliate link))) file folder isn’t REALLY a task box. But you can format this one any way you want. You could cut the heavy weight plastic folder into strips so each number is separate in order to fit them in a box on the shelf. Or you could stick the entire folder in a box. It’s up to you to alter this to fit your needs.

I had some bingo chips laying around and added velcro to the back of each piece. I cut another file folder to the rectangles to give the colors some dimension and make the folder more sturdy for repeated use. The strip velcro sticks well to this plastic!!!! I quickly printed the numbers out and velcroed them on, velcroing gives you the ability to switch up the order!
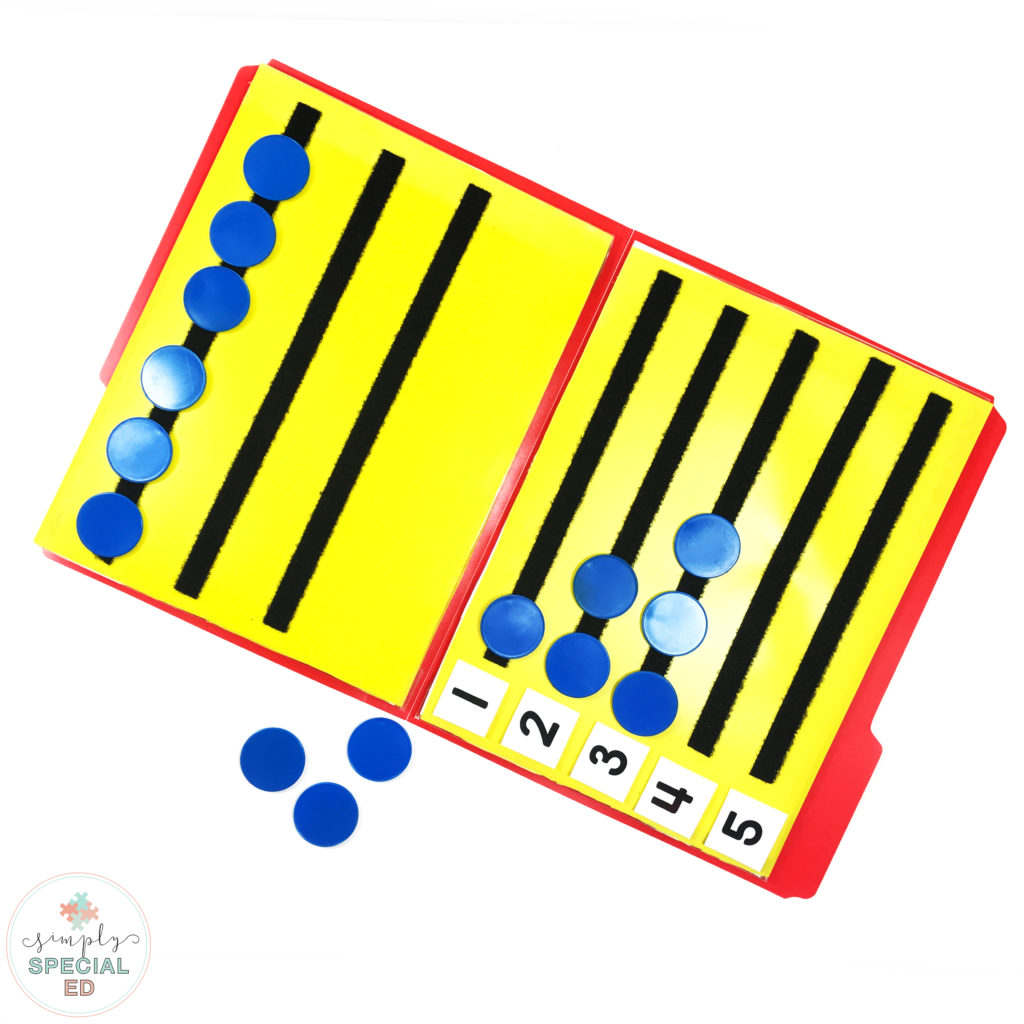
This whole file folder takes less than 5 minutes to put together once you have materials ready to go!
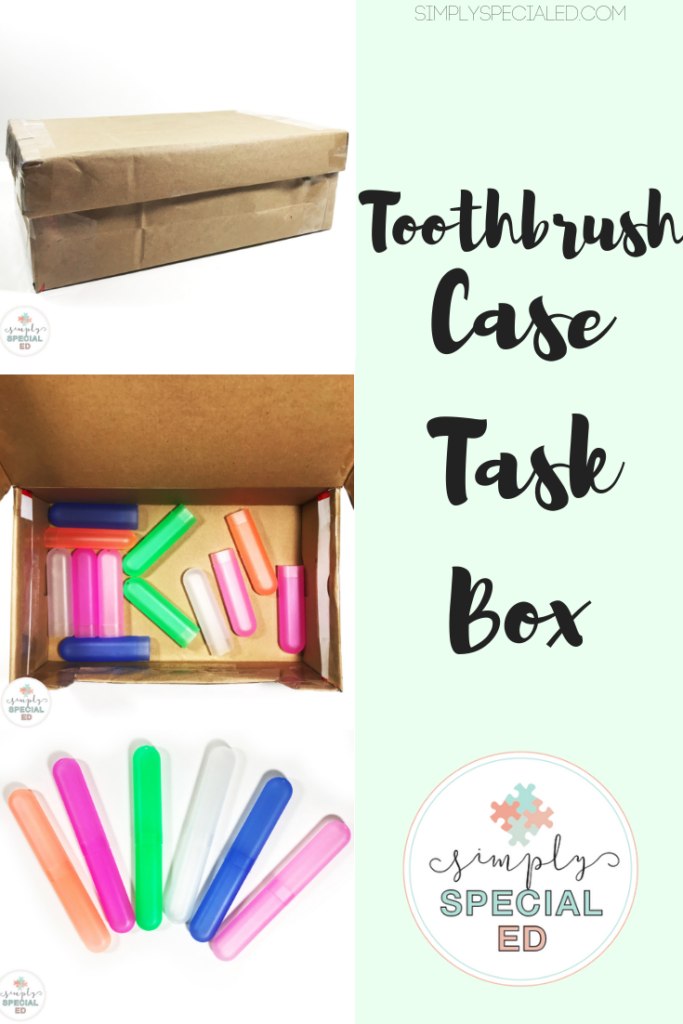
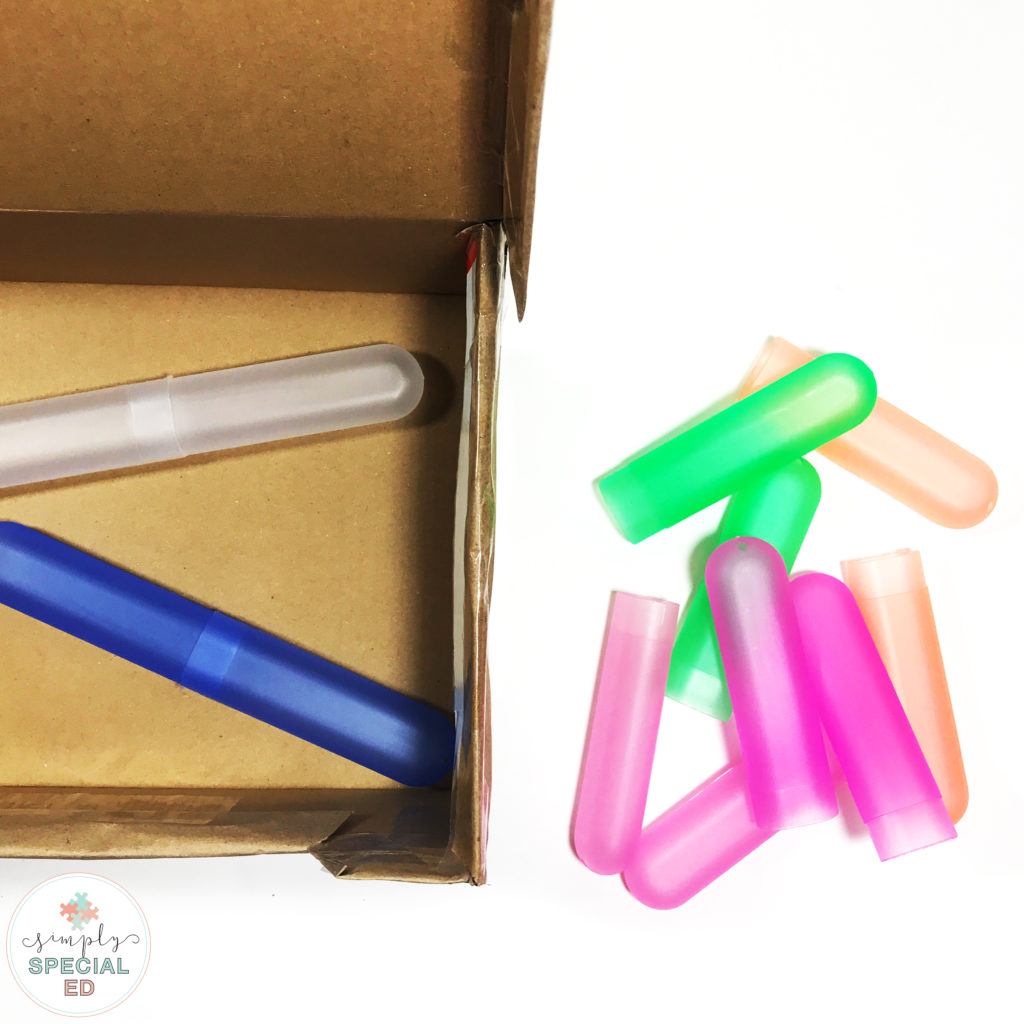
This is a super simple task box that is great for work training! This works for all ages! Tooth brush cases (affiliate link) are super cheap on amazon and come in a variety of colors.
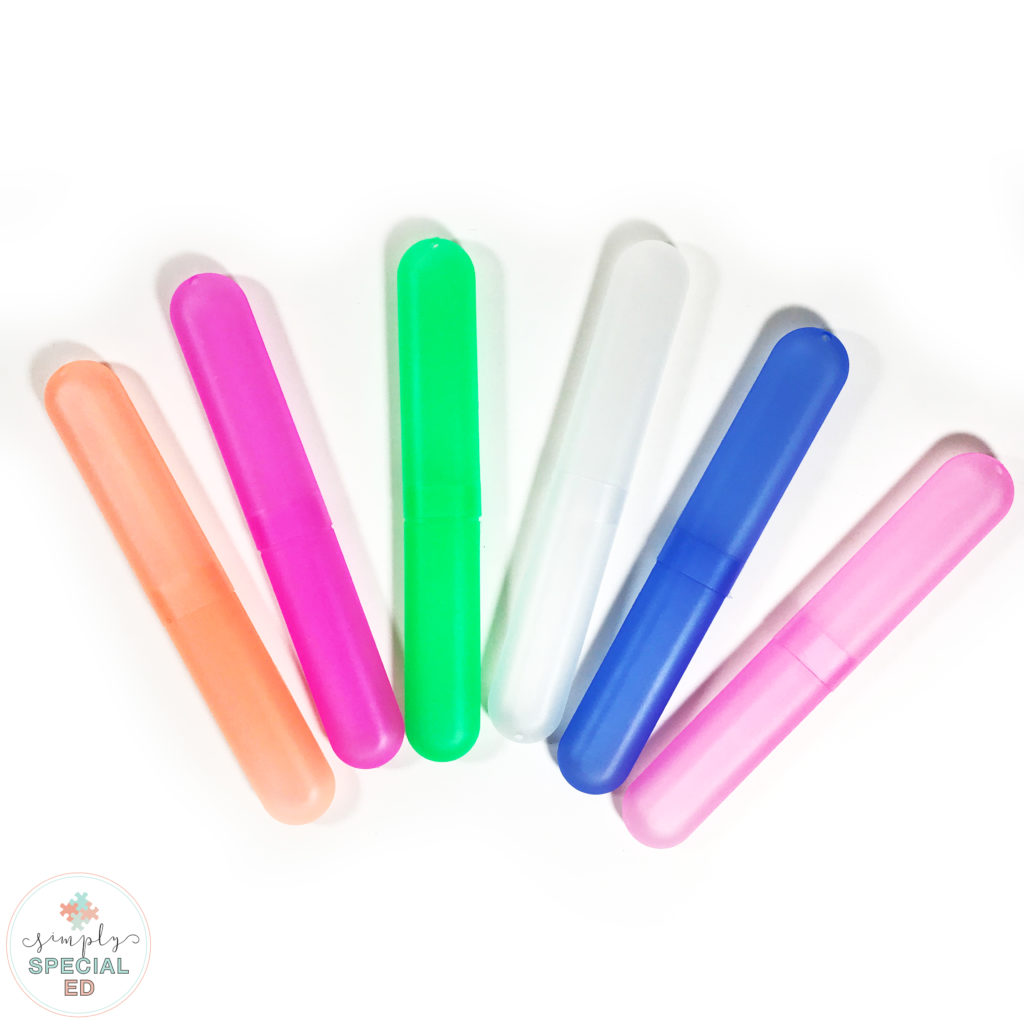
To keep it super simple, this is literally all you need. It takes a little effort to push the cases closed, so your OT will love you! The color matching is a great skill but the actual materials are suitable for all ages….. (NO MORE COUNTING BEARS IN HIGHSCHOOL, or any older kids really.!)
The box is just a shoebox covered in butcher paper. You could use plastic bins like you see here…. but shoe boxes work just fine and you probably already have some in your closet. This task box literally takes 1 minute to put together. Find a box, order the cases, and DONE. Once you have the materials you just put it in a box and hand to a student!
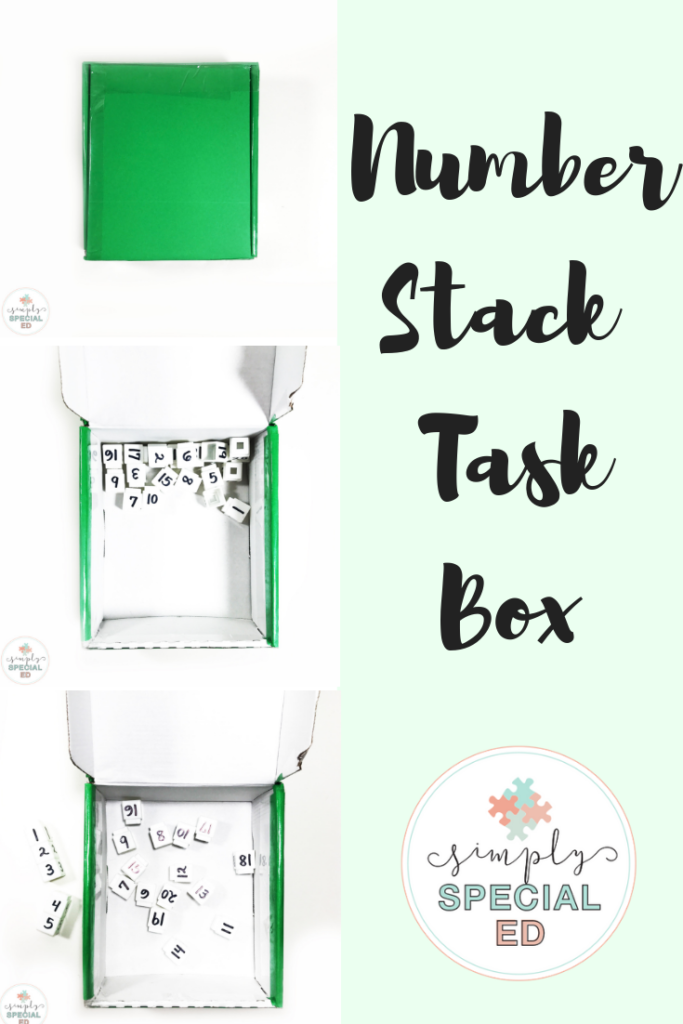
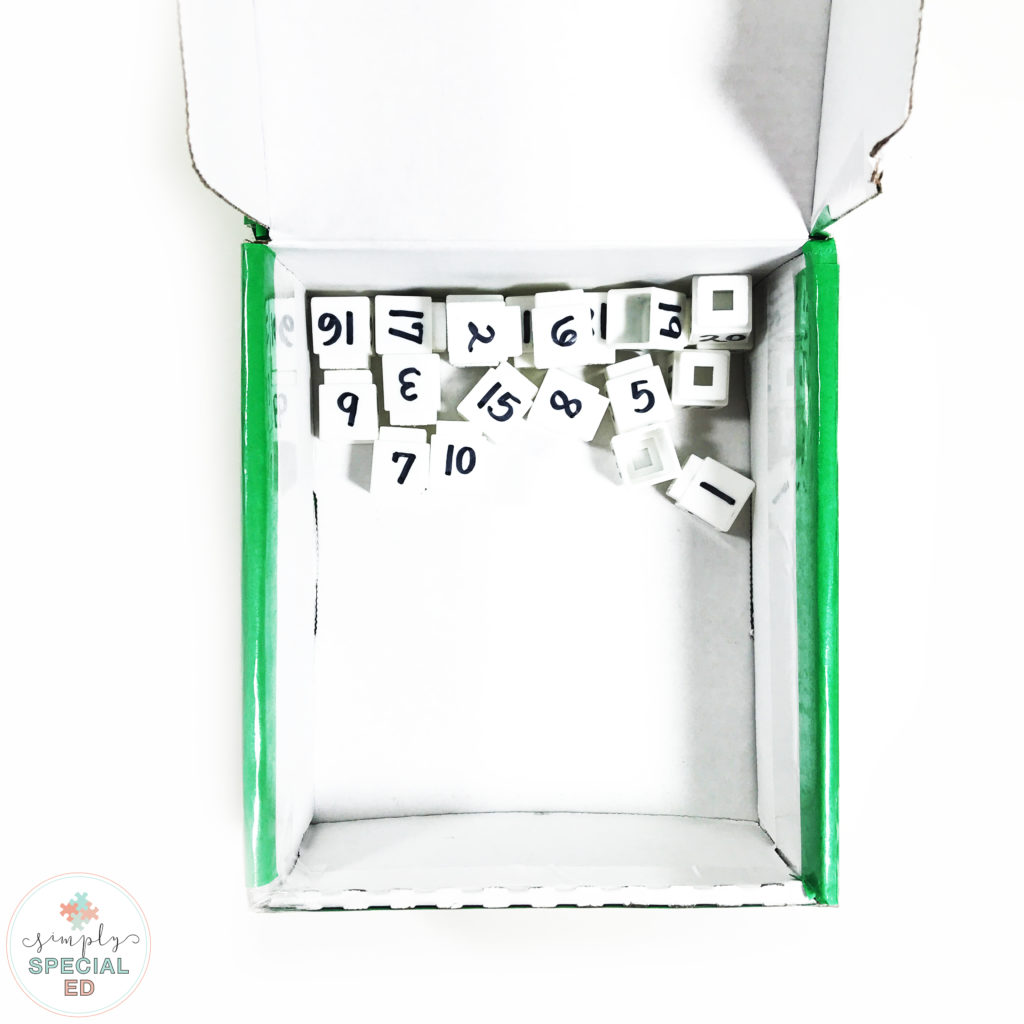
This next task box uses something that most schools have a ton of! Unifix cubes! If you need some there are some cheap options on amazon (affiliate link), make sure you get the ones with the flat face, not holes in them, so you can write on them.
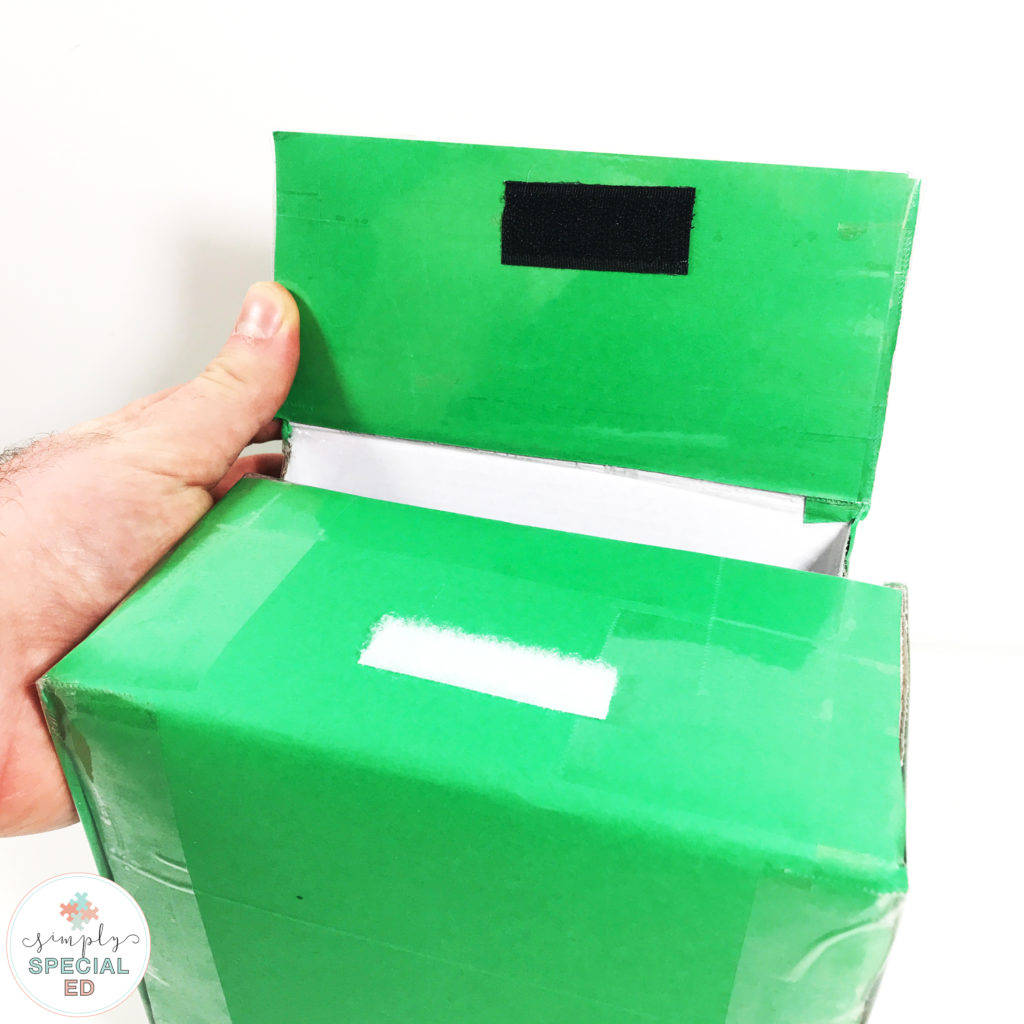
This box came from amazon and it was kinda funky. I wanted to figure out a way to use it so that it would stay closed, so velcro to the rescue as always! I used the little flap to create a closure, and there you go! A free box!
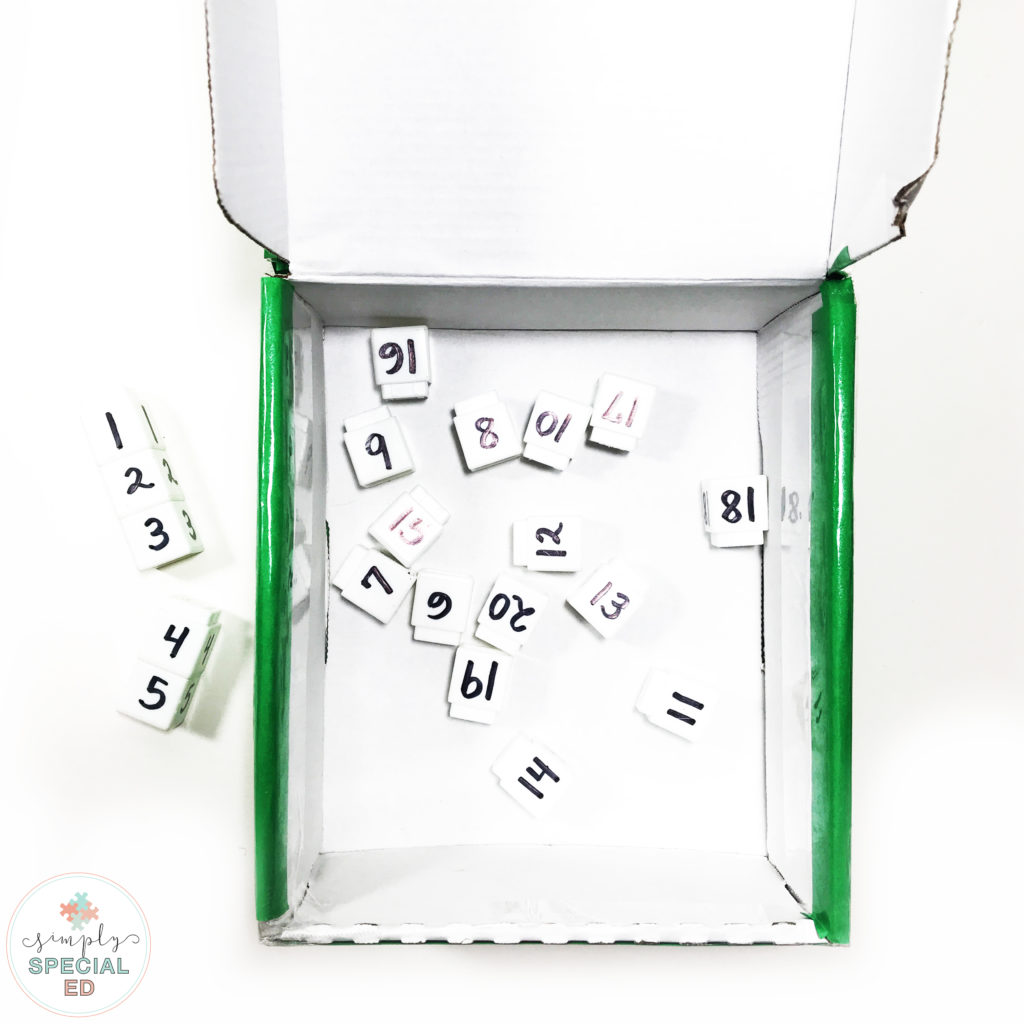
On a set of white unifix cubes, I wrote the numbers 1-20. The student simply has to build them together in the correct number order! But here is so much more you could do with writing on unifix cubes or to adapt this box. You could tell them to do evens or odd numbers, count backwards, make groups of multiples etc. So simple and so many possibilities!
Once I had my materials, it took about 5 minutes to write the numbers on the cubes and velcro the closure. So simple!!!!
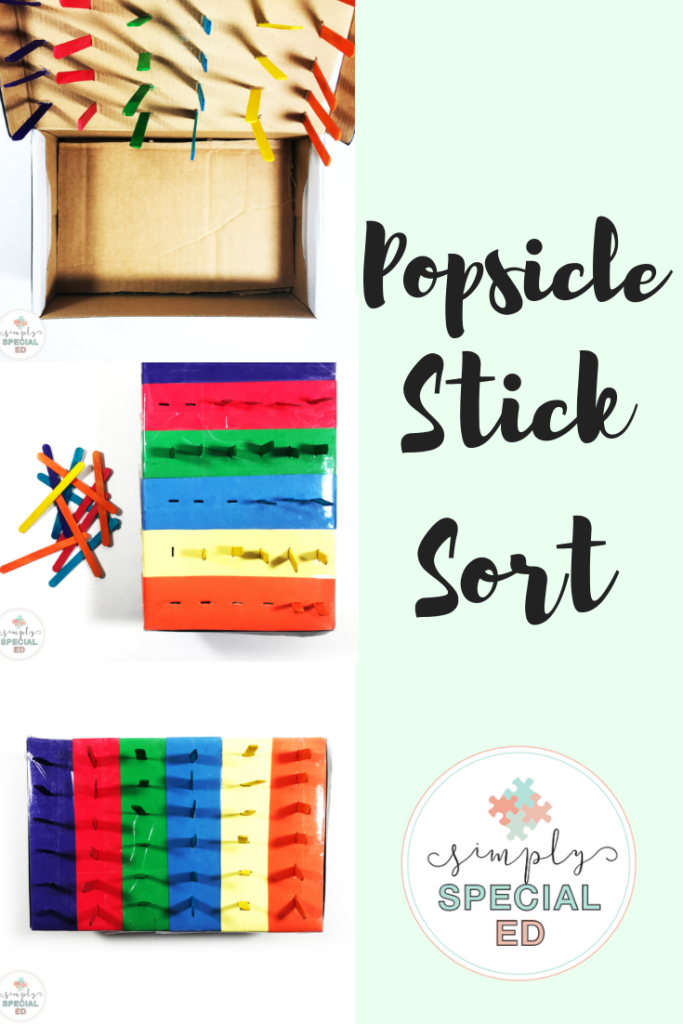
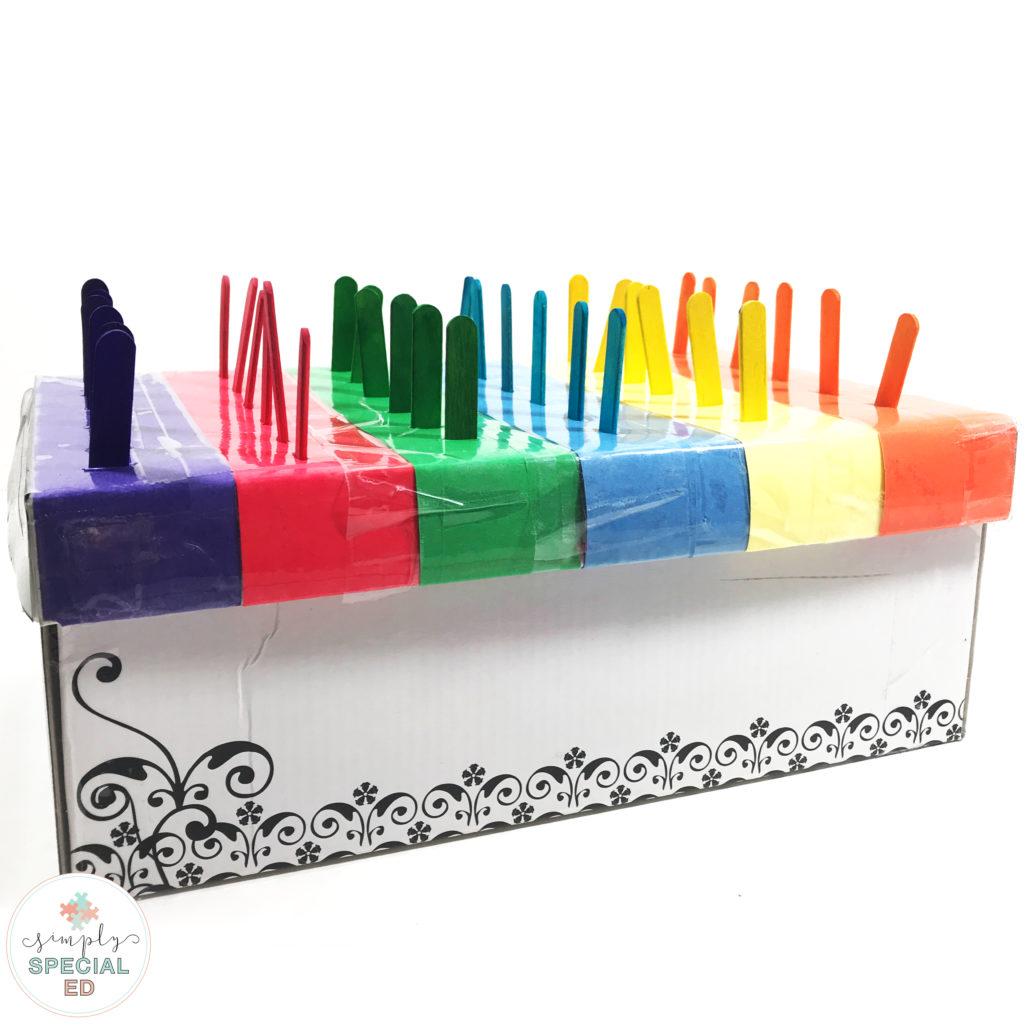
This last box is the most time consuming one to put together for sure! It works on fine motor, matching, and color sorting all in one. The best part about this one? It’s not quick to complete. Some students are early finishers! They are FAST! This one requires them to slow down, think, and complete.
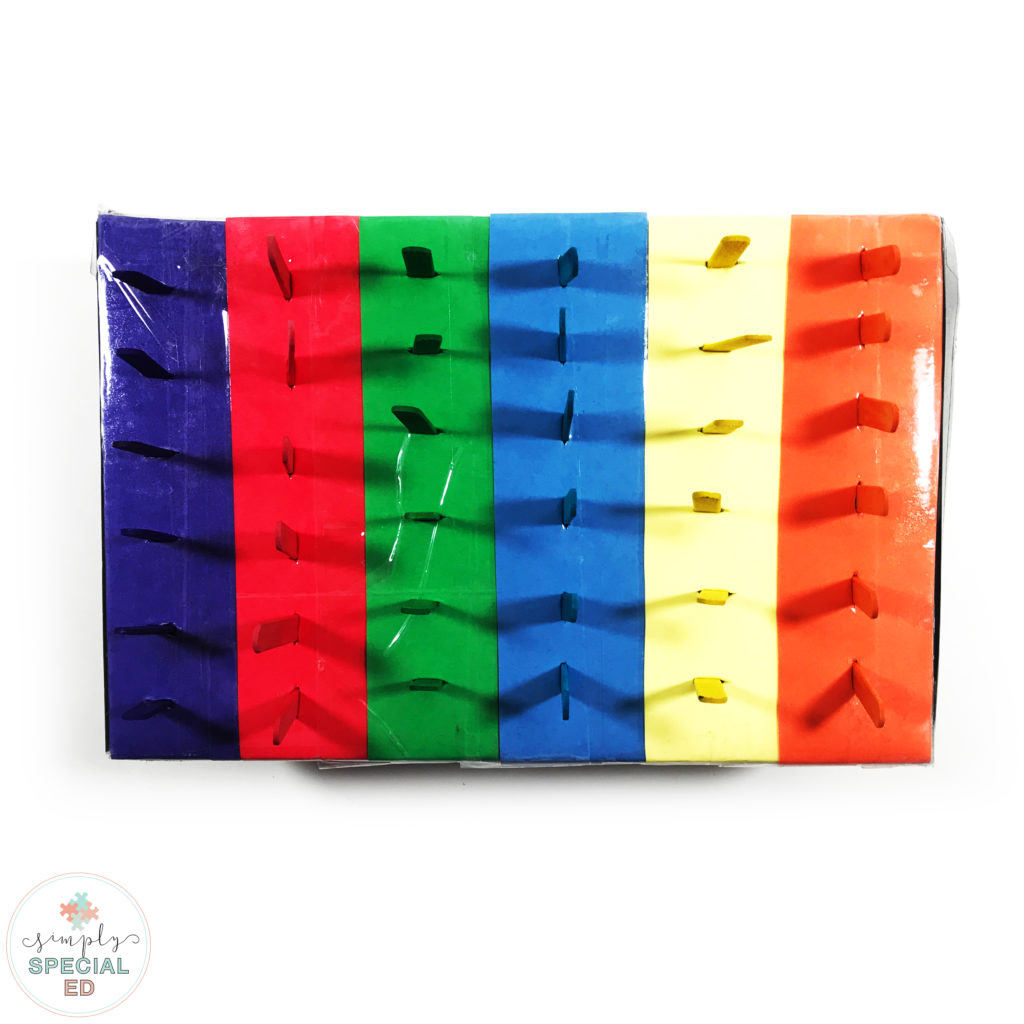
To start this one you will need a shoe box. I covered the sides in butcher paper. The top I matched colored construction paper to 6 different colors of popsicles ( you can do more or less depending on your students, you could even do it with 2 colors!) Cut the contruction paper in strips and tape it on the top of the box using packing tape (affiliate link). Next use your xacto knife set (affiliate link, I use this in a ton of my boxes!) to cut lines just a BIT bigger than the sticks. The bigger the hole the easier to push through and you’ll want it to be more difficult.
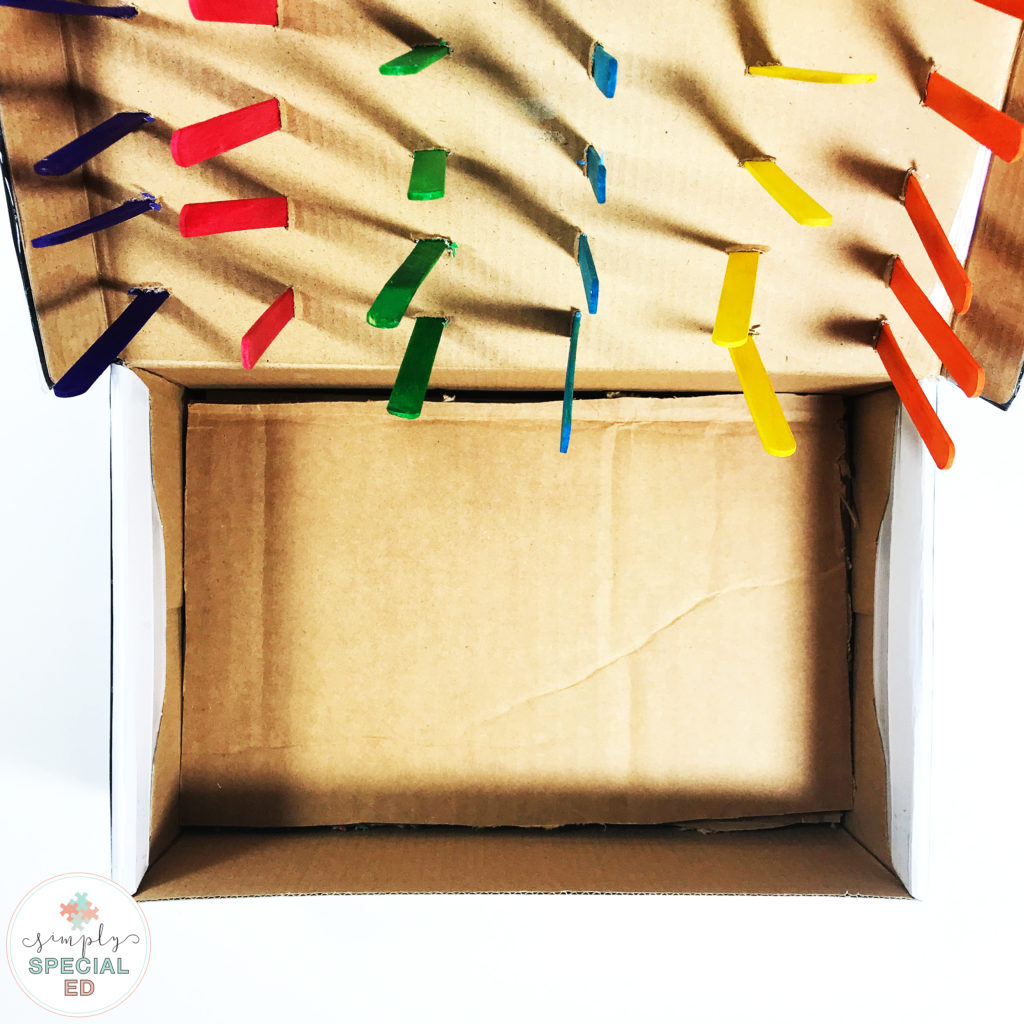
Depending on how deep your box is, you might have to build up the bottom so the sticks (affiliate link) don’t fall completely through. I just stuffed some tissue paper in the bottom and cut a piece of cardboard to build up the base and tape it in. Now when the sticks push through they stand up and still stick out. I can store the sticks inside in a small basket so the student can take the basket out and start working.
This is another view of how the colors are tapes down and the sticks are standing up. Also if the side of the box is plain without writing and pretty, I keep it!
This one took about 25 minutes to put together because of the cutting 🙂
Shop the affiliate links to the materials used in this post at the links below, thanks for using my links!
If you enjoyed these 4 simple task boxes, make sure to check out the first set!
You DO NOT have to buy fancy bins and materials for independent work! You can make them with things you have! Puzzle without all the pieces? Use them for a put in task! Old beads?- use them!As you can see, the inside isn’t always pretty, but the whole point of these is that they are functional and use materials that we ALREADY HAVE. This saves money and time overall!
What other types of task boxes would you like to see? leave me a comment and I’ll be back soon with more boxes!