Simple Task boxes for your Autism Classroom independent work station are tough to find- but you can make them DIY! here’s how!
I get asked a lot about independent work for students who are NOT independent during work time yet! The answer? PUT IN TASKS! These are fun and easy to make and you can easily differentiate them!
(( This post WILL contain affiliate links. You don’t pay any more, but if you purchase from my link I get a small commission. This allows me to try everything out that I recommend to you and keep my blog running smoothly! Thank you!))
TOOLS: (affiliate links below)
+ Canisters (one shown is a swiss miss container)
+ Shoe Boxes
+ Amazon boxes (yes you can use one without a removable lid)
+ Mini bins (ones shown are from dollar tree but similar linked here)
+ Mini items to sort (ones shown are from target dollar spot but similar linked)
+ Duct Tape
+ Cardboard
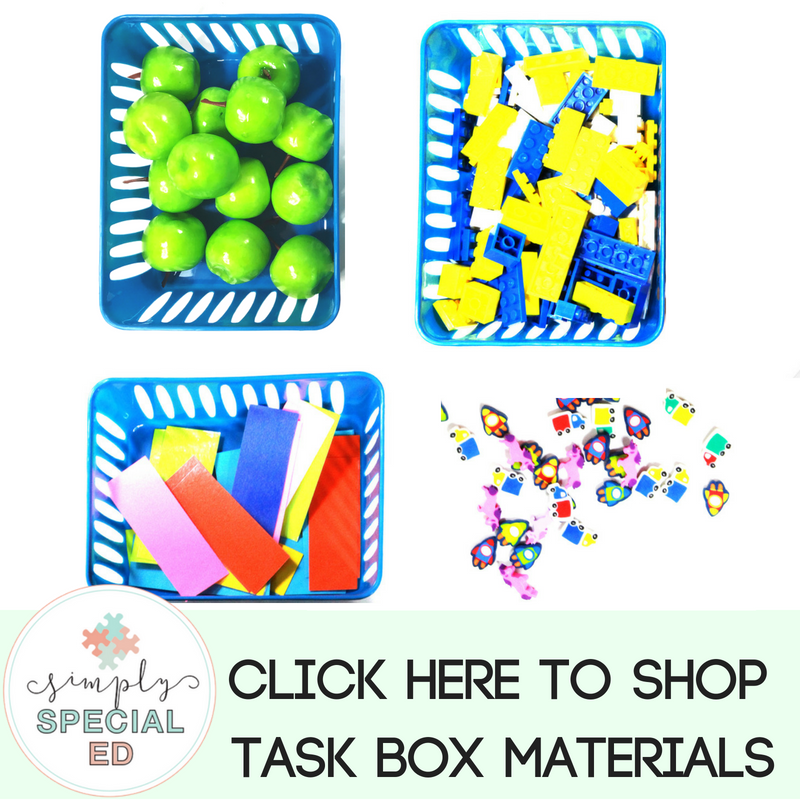
You can find all my favorite task box materials here. (affiliate link)
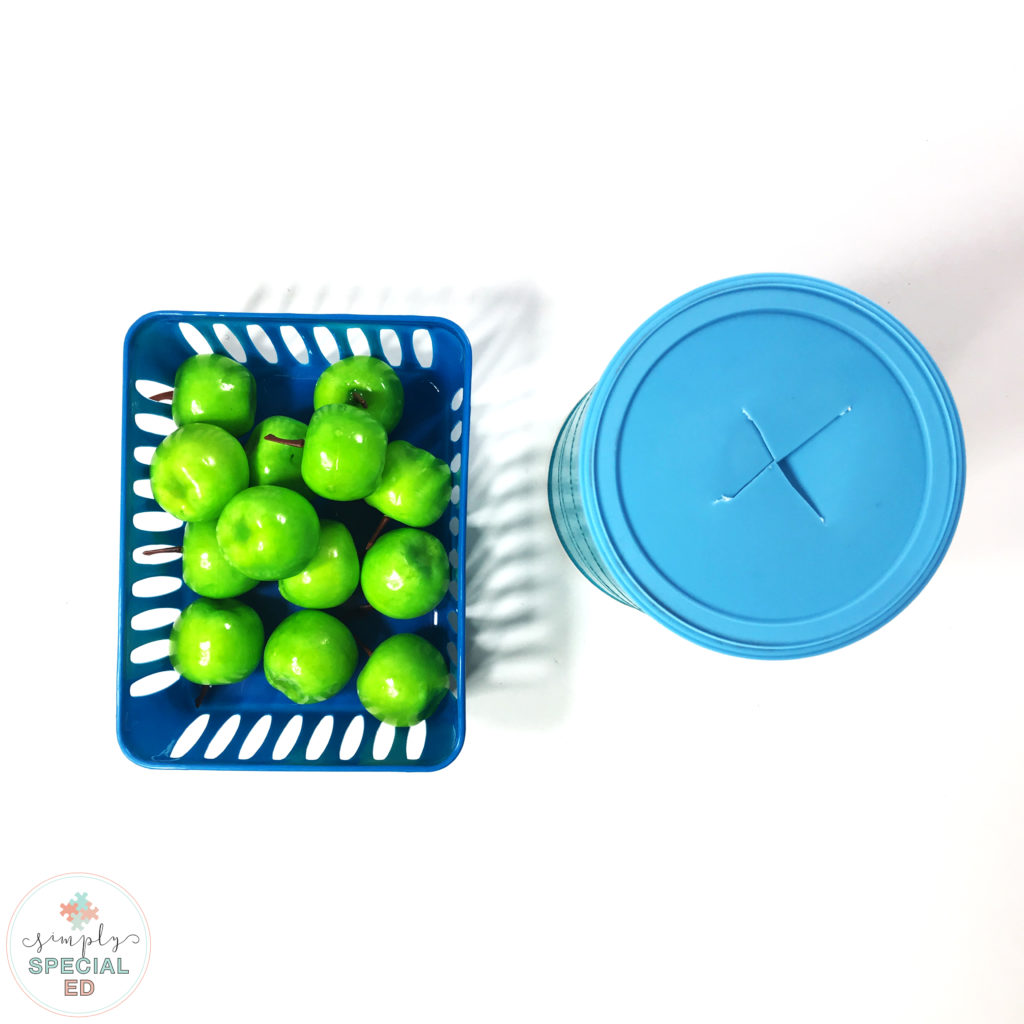
The first is the most simple of the four tasks. This is a basic put in task.

I took a Swiss Miss Hot Chocolate canister… emptied and rinsed it out. I covered the canister with duct tape. Then i used my xacto knife set (affiliate link) to cut the x through the top of the cover. You can make this x wider or smaller increasing or decreasing the difficulty of pushing the apple through.

I used these apples I found on amazon, but you could use ping pong balls (affiliate link) too! The student transfers the apple from the bin into the canister by pushing it through.
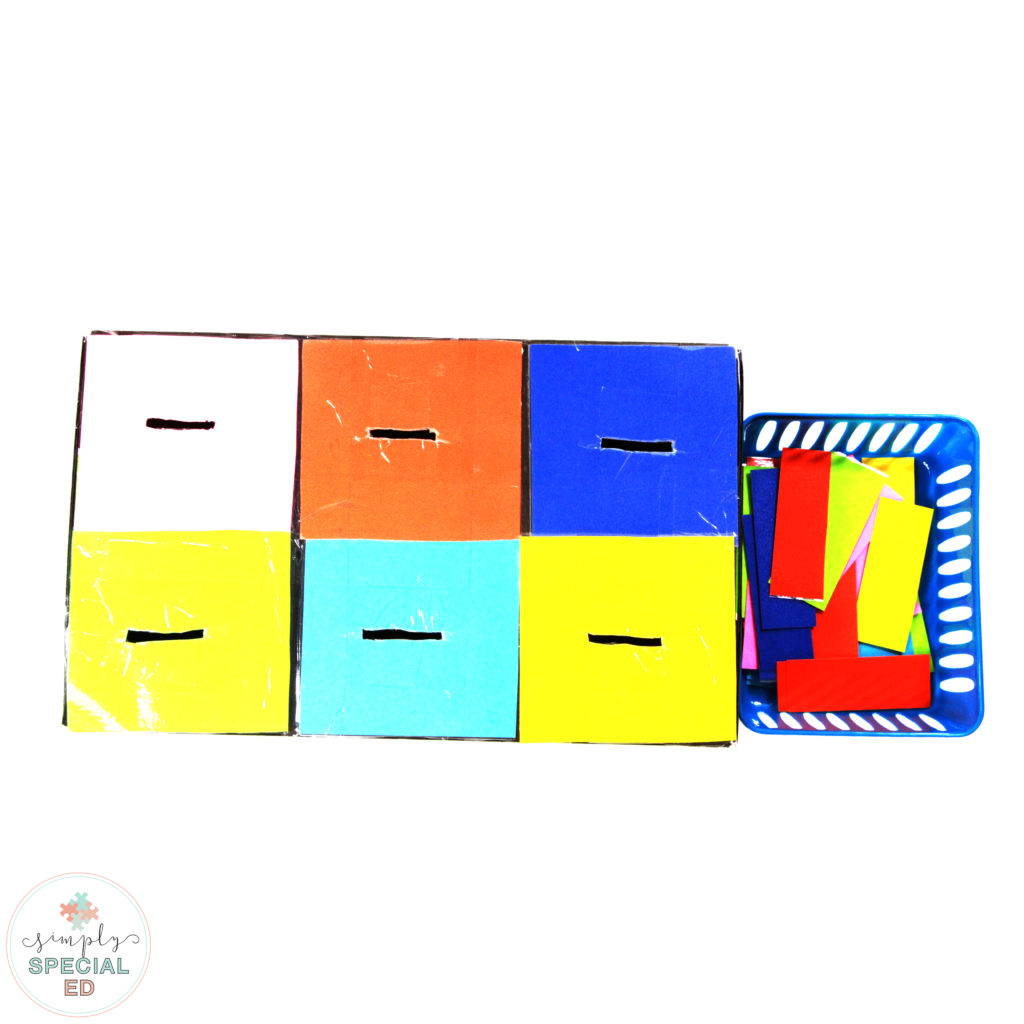
The next task is a sorting and fine motor put in task. This task is a show box covered with duct tape or bright paper and covered with packing tape. I used one sheet of each color of astrobrights. I laminated the sheet and cut one square for the top of the box of each color. I then cut the rest of the sheet into strips using a paper cutter.

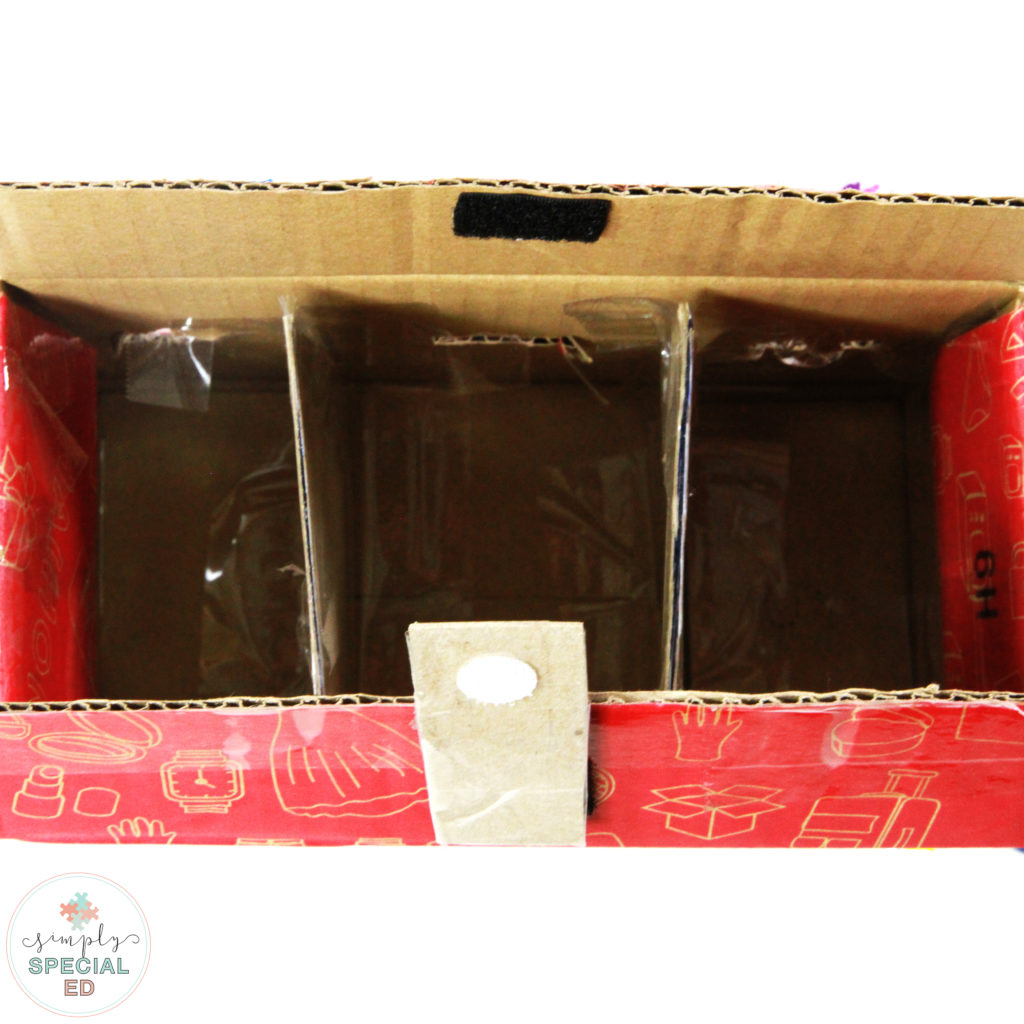
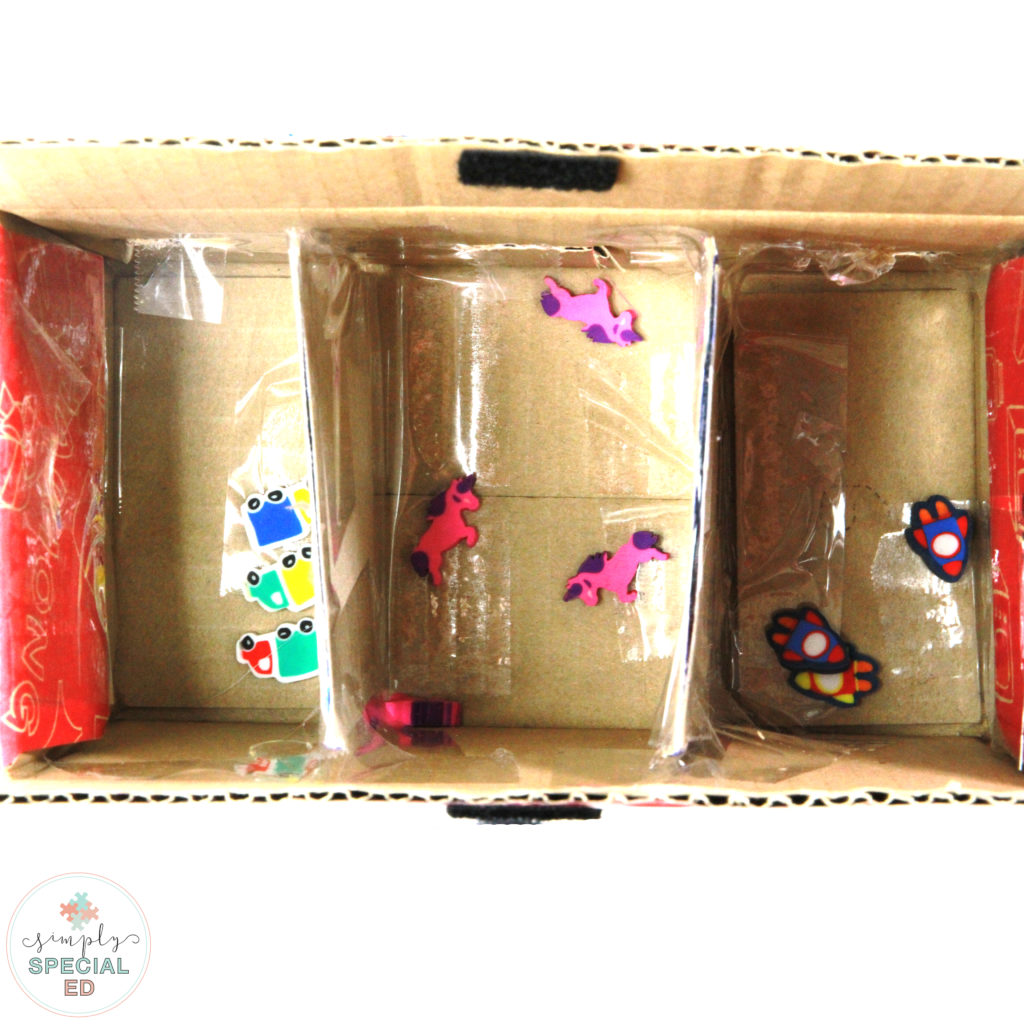
I places the squares ontop of the box and covered with packing tape to hold in place. Then I used my xacto knife kit to cut the holes. You can make the holes bigger or smaller to increase difficulty. Inside the box use pieces of cardboard to separate each section. This allows you to check student work.
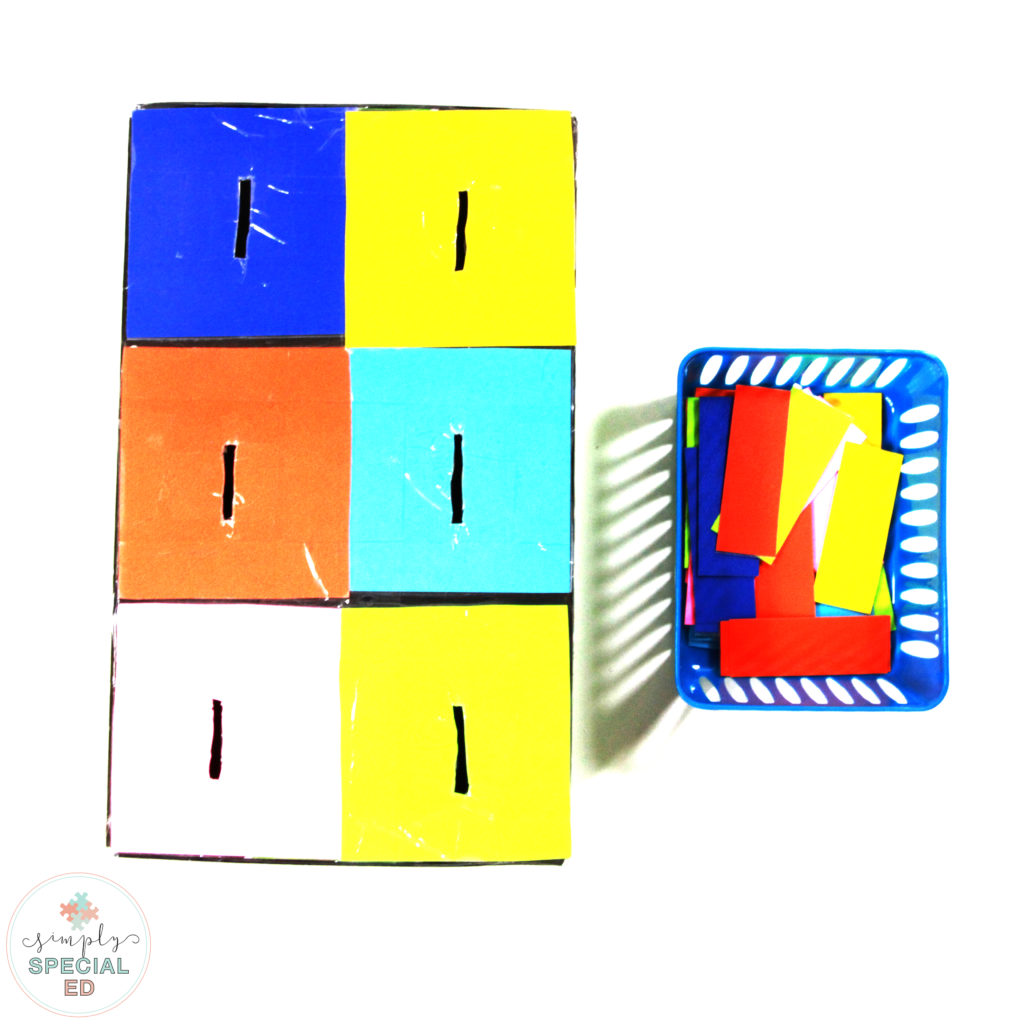
If you have a student that is not able to sort 6 colors at once, you can make the box with less colors OR you can velcro a laminated piece of white paper to cover all but two sections and only give the student 2 colors to sort.
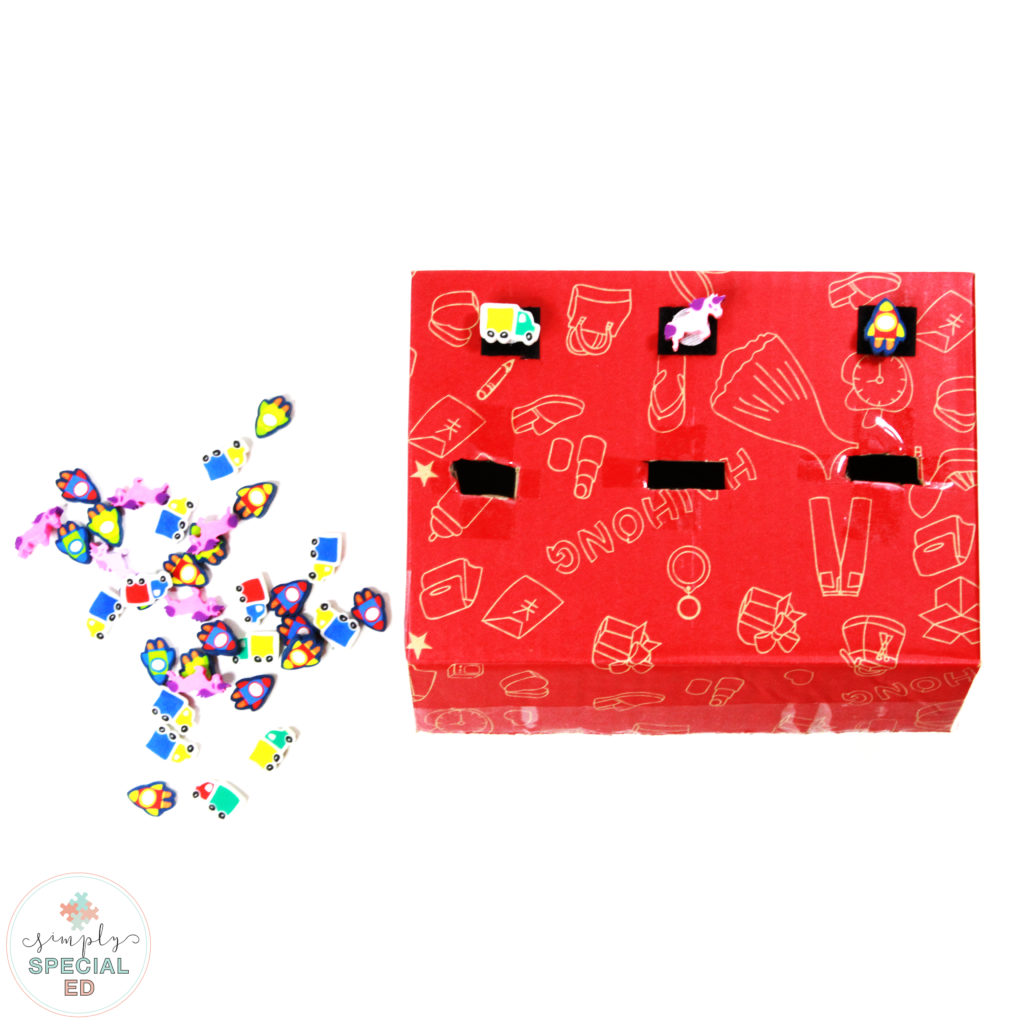
The next box has 3 sections and is using mini erasers. This is a step above sorting colors because they must really focus on the eraser and compare like images and colors. You can often find these in the Target dollar spot for different seasons or you can also get them on amazon in student favorites. I velcroed each eraser onto the box so I could switch them around so students weren’t able to memorize the order. I cut the holes using the xacto knife kit.
This was a small box an amazon purchase came in. Since the box wasn’t too busy I saved time by not covering it all. But I did have to do something tricky to be able to check and remove the pieces. The top of the box was open so I turned the box on the side. I used cardboard to separate the sections to check student work. Then I used a small strip of cardboard to make a closure using velcro as shown.
The next box uses a student favorite- legos! I got the mini legos in a party kit at the dollar tree. But I have seen similar ones on amazon.
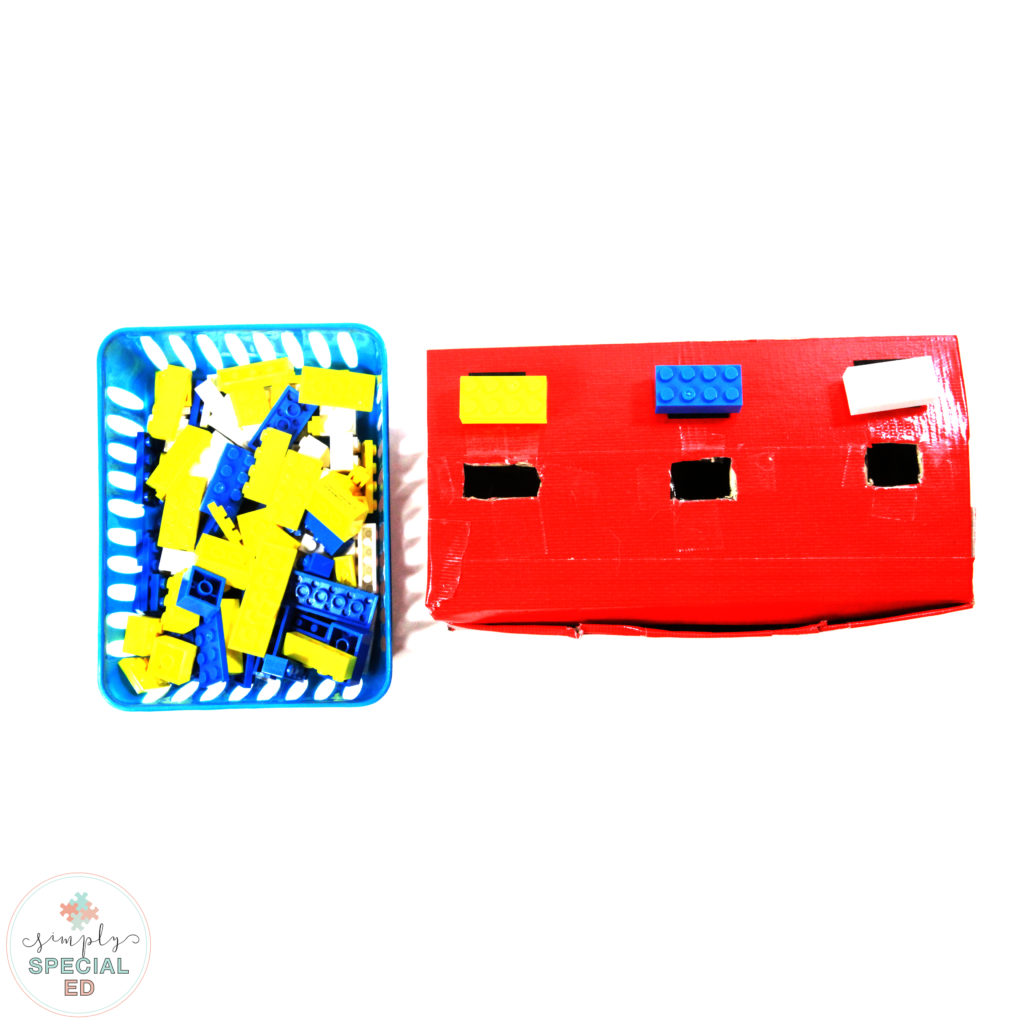
This box had a tuck in section that I was able to continue to utilize with ease even after covering the entire box with duct tape. (The duct tape keeps the box long lasting, without covering in tape the life of your box will be shortened for sure!)

Just like the mini eraser box, I velcroed the pieces so you can switch the colors around. This one is also nonidentical matching, because even if the same color the shapes and sizes of the legos were all different. This box was made for students with fine motor difficulty so I made the holes a bit bigger to accomodate.
You DO NOT have to buy fancy bins and materials for independent work! You can make them with things you have! Puzzle without all the pieces? Use them for a put in task! Old beads?- use them!As you can see, the inside isn’t always pretty, but the whole point of these is that they are functional and use materials that we ALREADY HAVE. This saves money and time overall!
Want to shop for the materials you see in this post? I’ve linked similar (affiliate) links on my Amazon page!
(( This post DID contain affiliate links. You don’t pay any more, but if you purchase from my link I get a small commission. This allows me to try everything out that I recommend to you and keep my blog running smoothly! Thank you!))

I am just beginning to teach this group of exceptional students and love these helpful examples!