You may have seen some pictures of my velcro boards over the years, and each and every time the HOW DO I MAKE THAT comments flood in! I have literally been meaning to write this blog post for a YEAR, and am just now getting around to it!
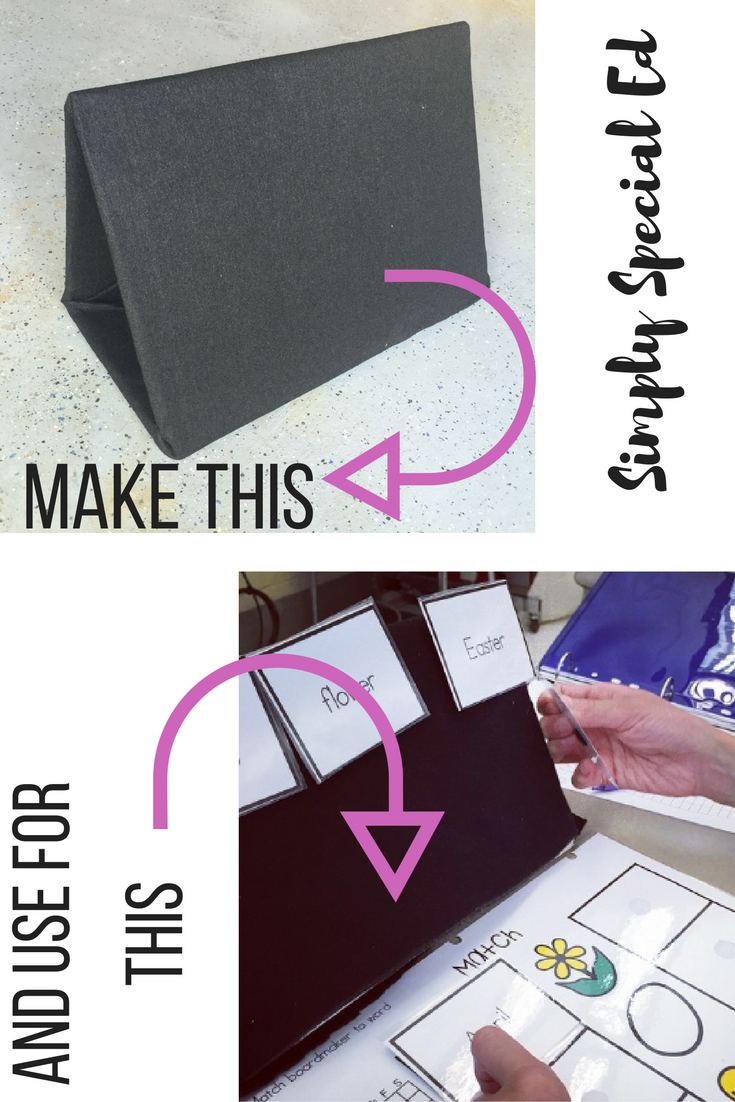
This board can be used for a variety of reasons, but it started out as something I made for my students with visual impairments & fine motor impairments. It keeps in mind the mentality of a slant board, has a black background making it easy to track, and velcro can attach, allowing students to pull from the board for task boxes or binder tasks.
Did I mention, this keeps all the pieces from going FLYING all over the table and floor (can you say less missing pieces?)
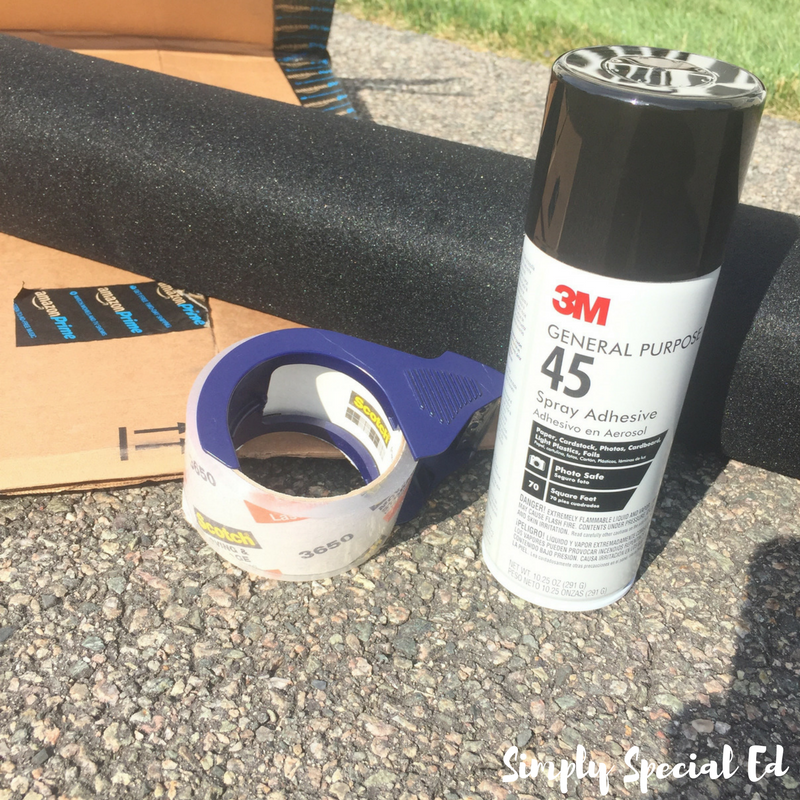
Here is what you need!
Cardboard box– I like them to be pretty BIG but you can make small ones too, I like to be sure the whole alphabet could fit on my board so it will fit all task boxes, some kids might need a smaller field but I like to have the space available to challenge them.
Packing Tape– Scotch is my favorite, there just isn’t a generic that is comparable.
Adhesive Spray– Any kind works, don’t go crazy on the price.
Veltex fabric– It is prety much the “hook” part of velcro, but softer. I have found it at Michael’s, but it is hard to come by. I recently found a much thicker version on amazon, and I am ALL about it. It came in a big roll, and I really have my mind spinning with plans for it!
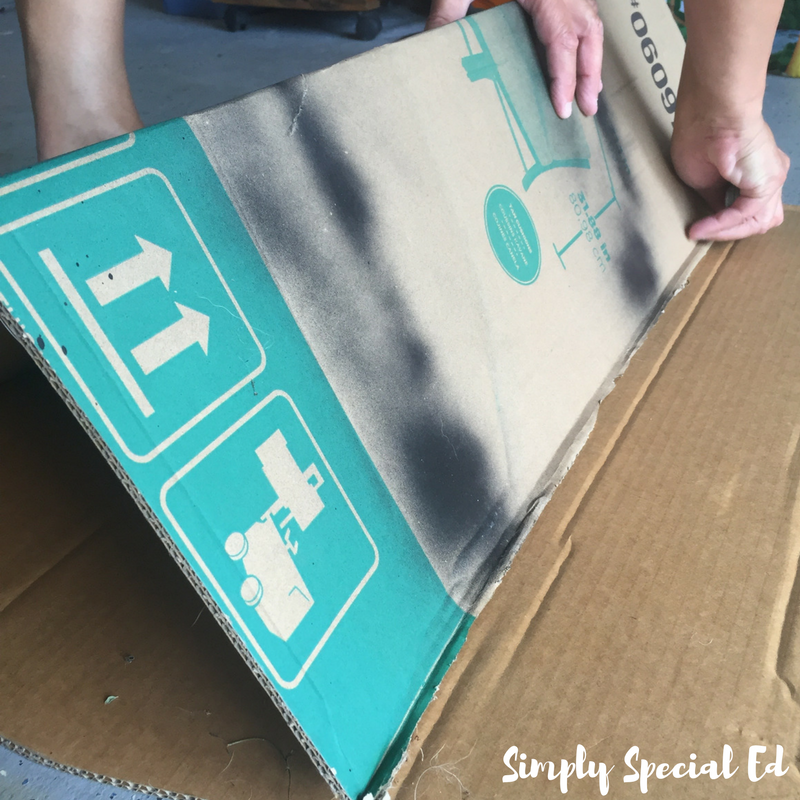
1.
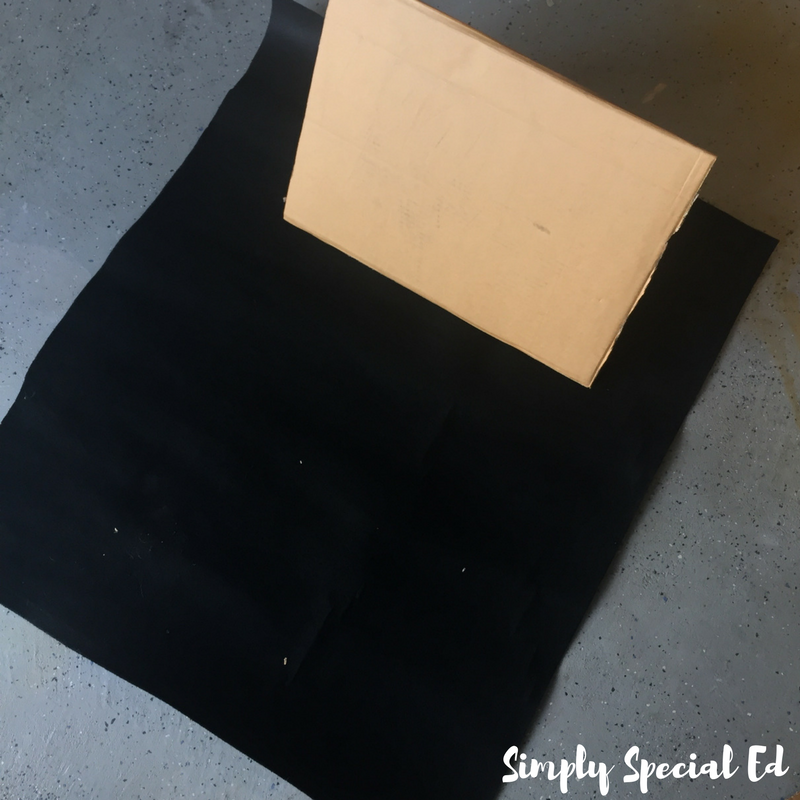
Cut the cardboard so it lays flat. 
2.
Slice any edges off with a razor. I like mine to not be so big that it doesn’t fit on a student desk. 
3.
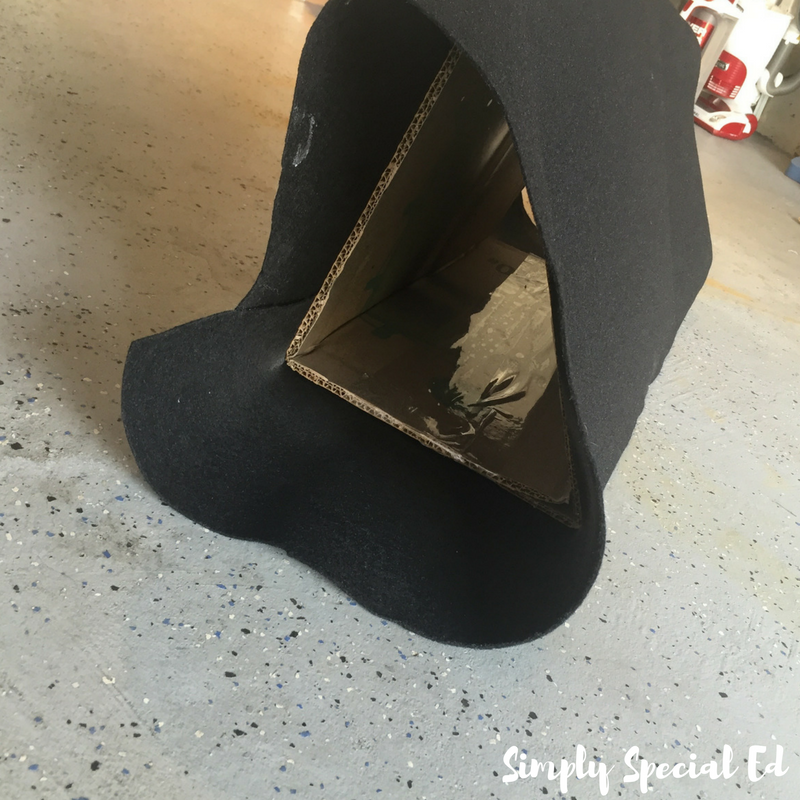
Fold into a triangle, and cut excess, you don’t want any extra.
4.
Tape the bottom with the packaging tape. It doesn’t need to be pretty, you are covering it! I wrap it around a bunch of times to keep it sturdy!
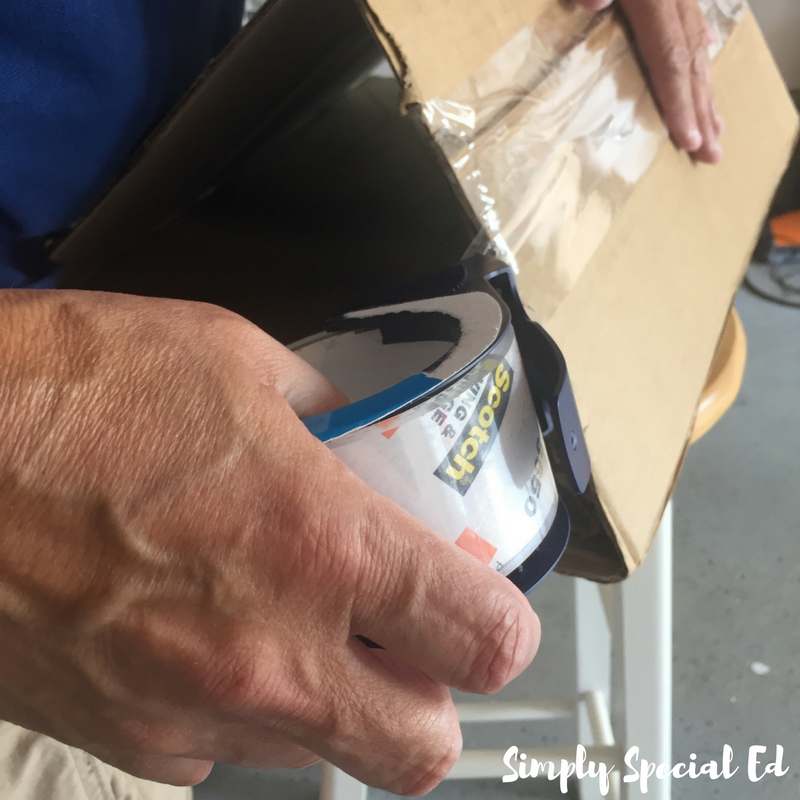
5.
Wrap fabric around to measure that you have enough. Cut any excess, you only want a little bit of overlap so it is nice and smooth.
6.
Then cut and lay a piece of veltex flat. I make it just a little bit wider on the edges, so it tucks inside and you can’t see the cardboard, looks pretty that way!
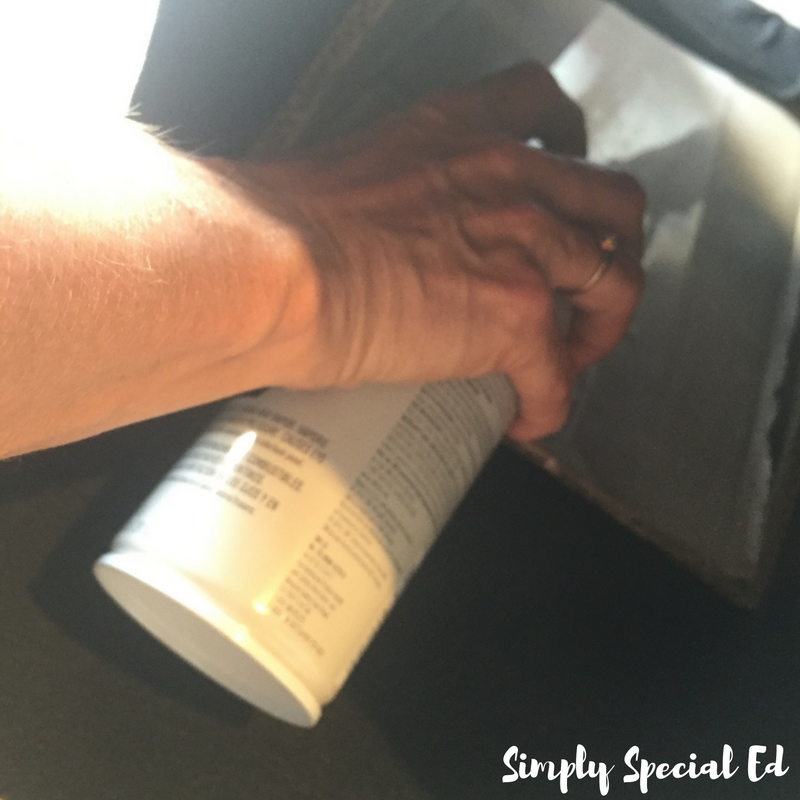
7. Spray the bottom first (spray on cardboard, NOT fabric) then press the cardboard on top to seal. Then spray the two big sides! Be quick, and smooth over as you go.
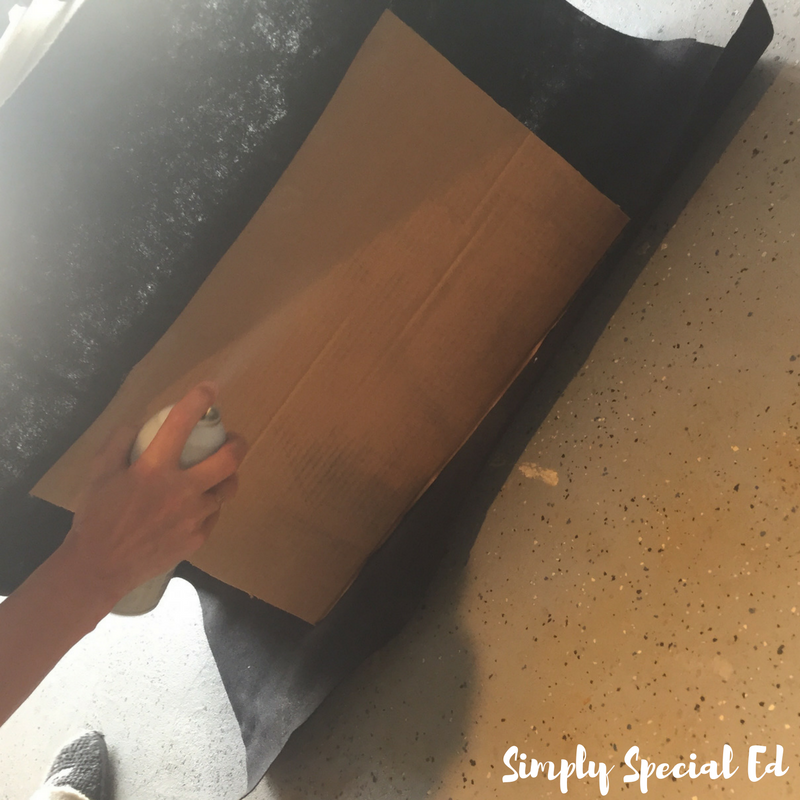
Press all the edges so you know it is smooth. 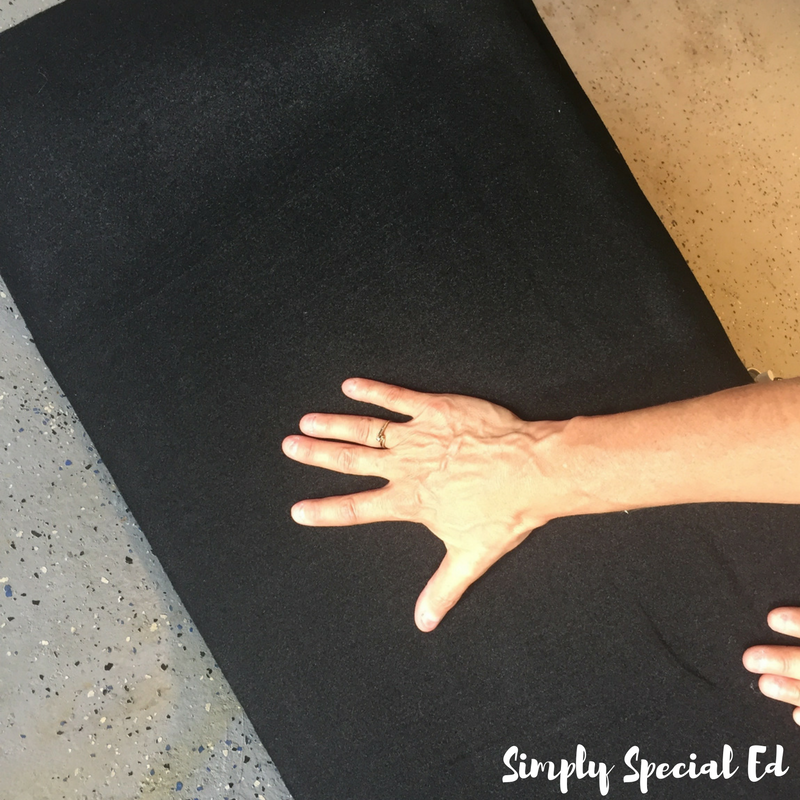
8.
Next part is a little tricky, you have to be quick! Spray the inside corners on each side and fold the extra fabric in. This way you don’t see any ugly card board!
9. & You are done!
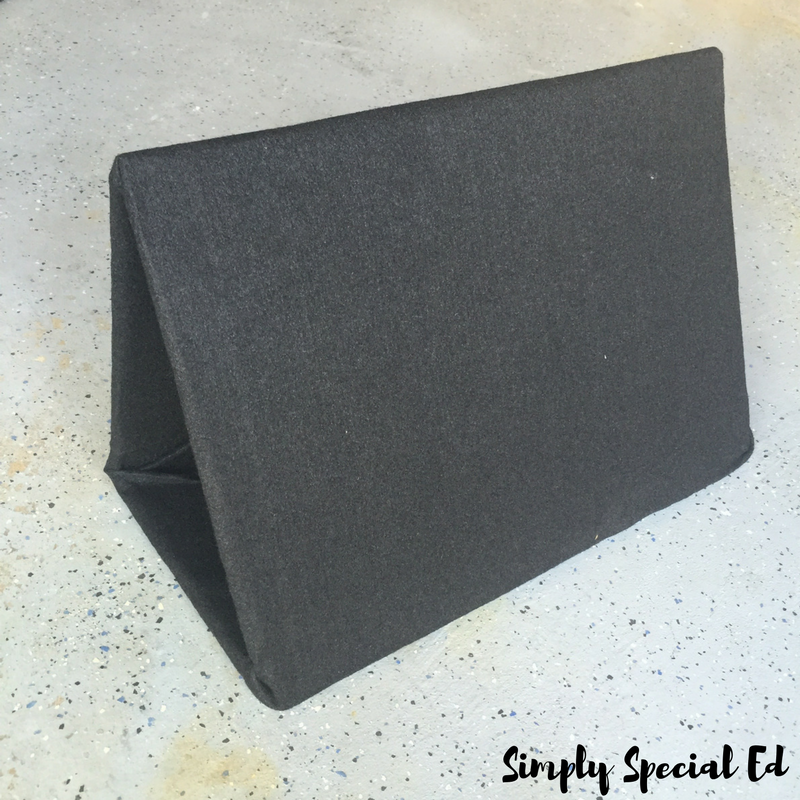
I use these boards EVERY DAY. They are sturdy, can be tossed around, and are easily stored on shelves or under desks. I LOVE having them for my task box system.
TIP: set up TWO tasks to start increasing independence. Student finishes one side, flips to the other!
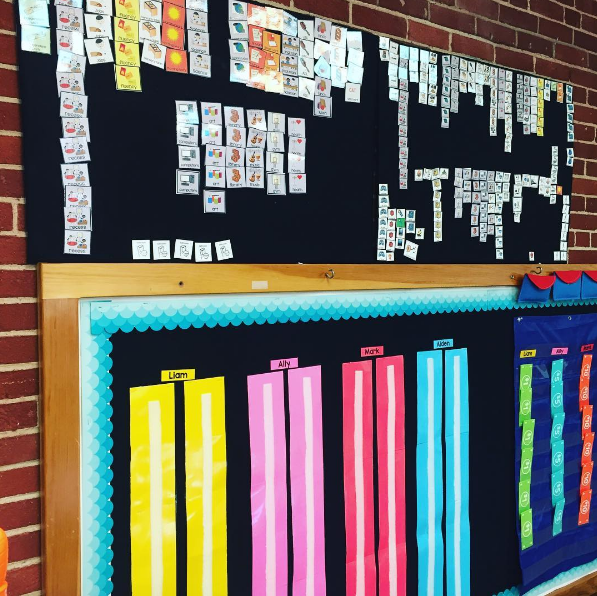
Another great way to use the veltex fabric, is to make a flat velcro board to store visuals! I’m getting my money’s worth for this big fabric roll!

*This post contains some affiliate links! You don’t pay any more, but I get a little bit of commission, this helps me host more giveaways for you!
Can you link the veltex fabric? I’ve been to my local fabric stores and Michaels, neither have it.
I *need* this veltex fabric that you speak of, and I’m a big fan of Amazon, but I cannot find it. Could you provide a link?
Just click the link in the post!
Hey, Alyssa- I read thru post for veltex board. I am almost positive fabric is like the LOOP not the hook. The hook is rough.
Hi there. Loved your tutorial. Found it while looking for Veltex fabric online that I don’t have to buy in 3 yard increments. That’s too much. Need it for a museum project (for exhibit). Just to do a small prototype and see how it works. Where did you find it? Also, what is the one you found on Amazon.com